 admin
admin How to Cure Uneven Money Tree Yellowing From Hidden Gnat Root Damage
You watered your money tree perfectly, yet the leaves are turning yellow in patches. Not all over, just unevenly. You check the soil, and it feels damp. Then you see them: tiny black flies hovering near the pot. That is the moment you realize fungus gnats have invaded the root zone, and they are slowly strangling your plant. I have been there, and I can tell you exactly how to fix it. 90% of indoor plants die from overwatering, and this is the gateway for gnat larvae to feast on your Pachira aquatica roots. The answer is not more water or more fertilizer. It is a soil drench with hydrogen peroxide, a complete repot, and a strict drying cycle. Stick with my two-week protocol below, and you will see fresh, green growth push out by day ten.
I killed my first money tree precisely this way. I thought the yellowing meant thirst. So I watered more. The gnats multiplied. The roots rotted. That tree died a slow, soggy death. My second tree started yellowing on one side only. The stems felt soft near the base. I finally dug into the soil and found the larvae chewing on the fine feeder roots. That is why the yellowing was uneven. Damaged roots cannot deliver water to specific branches. It is a one-way ticket to leaf drop if you ignore it.
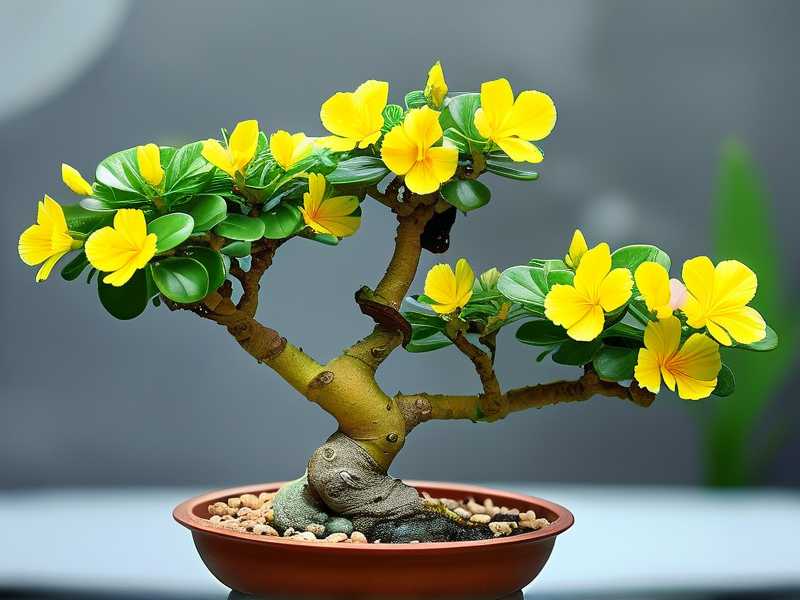
Let me walk you through my exact recovery plan. I have used this on my current money tree, and it bounced back within two weeks. You need to act fast, but you do not need to panic. Fungus gnat damage is treatable if you catch it before the main trunk rots.
Why Hidden Gnat Larvae Cause Patchy Yellowing
The adult gnats you see flying around are annoying, but they are not the true enemy. Their larvae live in the top two inches of moist soil. They are translucent, worm-like, with black heads. They feed on organic matter, but they also graze on root hairs. Root hairs are the microscopic structures that absorb water and nutrients. When the larvae eat them in clusters, certain sections of the root system shut down.
That is why you get yellow patches on one side of the canopy. The roots feeding that side are damaged. The other side looks perfectly healthy for a while. I noticed my tree had three green stems and one yellowing stem. The yellow stem shared a root cluster that was infested. Once I cleared the larvae and trimmed the rotten roots, that stem recovered slowly. It took about ten days to show new color.
The 3 Fatal Mistakes Every Newbie Makes
You are probably making one of these three errors right now. I made all of them before I understood this plant.
① Overwatering on a Schedule
I used to water every Monday, no matter what. That is a death sentence. Money trees store water in their thick trunks and swollen root bases. They hate wet feet. If you water on a strict schedule, you will keep the soil saturated. Gnat females lay eggs only on moist, organic soil. Constant moisture is an open invitation. I now stick my finger two inches deep. If it feels even slightly cool and damp, I close the watering can. I only water when that top layer is bone dry to the touch. This one change cut my gnat population by half within a week.
② Wrong Light Position
I had my money tree in a dark corner of my living room. It looked nice, but the soil stayed wet for weeks because the plant was not drinking. Low light means slow photosynthesis, which means low water uptake. The soil stayed soggy, and the gnats moved in. I moved my tree to a bright spot with indirect morning sun. The plant started transpiring within three days. The soil dried out faster, and the root environment became hostile to the larvae. Do not put it in direct afternoon sun, though. That will scorch the leaves. A north-facing window or a few feet back from an east window works best.
③ Using the Wrong Pot
My first money tree lived in a decorative ceramic pot with no drainage hole. I thought the layer of pebbles at the bottom would help. It did not. Water pooled at the root base, creating a swamp. Gnat larvae thrive in that stagnant moisture. I switched to a plastic nursery pot with multiple drainage holes, then slipped it inside the pretty ceramic cachepot. Every time I water, I take the inner pot out. I let all excess water drain completely into the sink. I never let the outer pot collect standing water. This simple change saved my current tree from the same fate.
My 14-Day Rescue Protocol for Yellowing From Gnat Damage
I will tell you exactly what I did. I followed this step by step, and my money tree stopped yellowing by day five. By day fourteen, new leaves were opening.
Day 1: Stop Watering and Isolate the Plant
I moved the infested money tree away from my other plants. Adult gnats can fly, and they will spread to every other pot in your home. I also stopped all watering immediately. The soil needs to start drying out to kill the larvae. The top two inches should become dry to the touch within 48 hours if you have proper light and airflow. I also bought yellow sticky traps and placed them in the soil. These catch the adults before they can lay more eggs. The yellow color attracts them, and they get stuck instantly. I replaced these every few days until I saw no new captures.
Day 2: The Hydrogen Peroxide Soil Drench
I mixed one part 3% hydrogen peroxide with four parts water. I use this common household antiseptic because it breaks down into oxygen and water. It kills larvae on contact without harming the plant’s healthy roots. I poured the solution slowly over the entire soil surface until it drained out the bottom holes. You will hear a faint fizzing sound. That is the peroxide reacting with organic matter and the larvae. I let it drain completely. I did not water again for another five days. This drench hits the larvae in the top layers where they live. It also oxygenates the root zone, which helps damaged roots recover.
Day 3: Inspect the Roots and Repot
I took the plant out of its pot because I suspected root rot, not just gnat larvae. I gently brushed away the old soil. The roots were a mess. I saw brown, mushy sections that smelled slightly sour. Those are rotten roots that need to come off. I used sterilized scissors to cut away all the soft, dark roots. I kept only the firm, white or cream-colored roots. This is a drastic step, but it is necessary. I also removed any damaged lower leaves. The plant cannot support them if the roots are diminished. I washed the healthy root ball with room-temperature water to remove any remaining larvae and eggs.
Day 4: Repot in a Sterile, Well-Draining Mix
I threw away the old soil completely. It was infested with eggs and larvae. I used a fresh, sterile potting mix designed for houseplants. I added a generous amount of perlite to improve drainage. I also mixed in a handful of fine orchid bark. Money trees are epiphytes in their natural habitat, meaning they grow on other trees. They need air around their roots. I chose a terra cotta pot this time. Terra cotta is porous and wicks moisture away from the soil. This keeps the root zone from staying wet for too long. I made sure the new pot had a large drainage hole. I repotted the tree at the same depth it was before. Burying the trunk deeper can cause stem rot.
Day 5: Place in Bright, Indirect Light and Rest
After repotting, I did not water the plant. The fresh soil was slightly damp from the bag, which was enough. I placed it in a spot with bright, filtered light. I also turned a small fan on low nearby. Air movement is crucial. It dries the soil surface and prevents gnats from landing. The gentle breeze also strengthens the plant’s stems. I noticed the remaining yellow leaves looked slightly less pale by the evening. That was a good sign. I resisted the urge to water or fertilize. A stressed money tree does not need food while its roots are healing.
Day 6 to 10: The Waiting and Observing Phase
I checked the soil moisture every morning by lifting the pot to feel its weight. It felt light, which meant the soil was dry. I did not water until day five after the repot. I used a diluted solution of water and a few drops of liquid seaweed extract. Seaweed is rich in natural rooting hormones. I poured it slowly, letting it drain fully. I kept the yellow sticky traps in the pot. I caught a few more adult gnats that emerged from the remaining pupae. By day seven, I noticed that the yellowing had completely stopped. No new patches appeared. The older yellow leaves began to crisp at the edges, which I trimmed off with clean scissors.
I also checked the base of the stem where the yellowing began. I gently pressed it with my finger. It was firm, not squishy. Firmness is a sign of health. If it had been soft, the rot would have spread too far. On day eight, I saw a tiny green bud emerging from the top of the affected stem. It was small, but it was a sign of life. I almost cried. This is what I had been waiting for.
Day 11 to 14: Full Recovery and New Growth
By day eleven, the new bud had opened into a small, bright green leaf. It was much lighter in color than the older leaves, which is normal for new growth. The stem that was yellowing began to show green undertones again. On day twelve, I removed the yellow sticky traps because no new gnats were caught for two straight days. I switched back to a normal watering routine. I now water only when the top two inches of soil are completely dry and the pot feels light. For my climate, that ends up being about once every nine to ten days. On day fourteen, the plant had three new leaves unfurling. The uneven yellowing was gone. My money tree looked fuller and healthier than before the infestation.
How to Prevent Gnat Damage From Ever Coming Back
I learned my lesson the hard way. I now treat fungus gnats as a symptom, not the root problem. The root problem is always overwatering. If the soil is dry, the gnats will not lay eggs. I also started bottom watering my money tree. I place the pot in a saucer of water for twenty minutes. The soil draws water up from the drainage holes. The top two inches stay dry. This keeps the surface free of moisture, which deters egg-laying. If you do this, ensure you empty the saucer after 20 minutes. Do not let the pot sit in water for hours.
I also added a layer of coarse sand on top of the soil. The sand is abrasive and dries out instantly. Gnat larvae cannot survive in this layer. It also prevents adults from reaching the moist soil underneath to lay eggs. I applied a one-centimeter thick sand topping after the repot. It looks natural and works wonders.
I occasionally water with a diluted hydrogen peroxide solution as a soil flush. I do this once a month as a preventive measure. It oxygenates the roots and kills any stray larvae before they become a problem. I only do this if I suspect moisture issues. Constant peroxide use can harm beneficial soil microbes, so do not overdo it.
The Role of Proper Drainage and Pot Choice
I now store my money tree in an inner plastic pot with excellent drainage. I keep it inside a decorative outer pot for looks, but I never leave water sitting in the outer pot. After any watering, I lift the inner pot and tilt it to ensure no excess water remains. I also elevated the pot on small feet. This allows air to circulate underneath the drainage holes. This prevents the roots sitting in a stagnant, humid microclimate. This is a small change that makes a big difference.
What I Learned About the Plant’s Water Needs
Money trees are forgiving, but they prefer neglect over nurturing. Their thick, swollen trunk base acts as a water reservoir. In dry periods, they live off that stored water. I now wait until the lower leaves start to droop very slightly before I water. That is my signal. Usually, that means the soil is truly dry. When I water, I do it thoroughly. I pour until water runs out of the bottom. I then wait for another week or more. This alternating dry and wet cycle imitates the natural monsoon seasons of its native habitat in Central and South America.
RHS provides excellent guidance on managing houseplant pests, and I recommend checking their advice on cultural care for Pachira aquatica. The key takeaway is that prevention is always easier than cure. I also consulted AHS resources regarding container plant health, which reinforced my belief that drainage and air circulation are non-negotiable.
My Personal Observation Notes on Recovery Textures
I have noticed that recovering money tree leaves have a distinct difference. The damaged leaves often feel thin, soft, and a bit floppy. The new healthy leaves are thick, waxy, and stiff. You can feel the turgor pressure returning. When I touched the new leaves on day fourteen, they felt leathery and robust. That is the sign of a well-hydrated, undamaged root system. No amount of foliar spraying can fix poor root health. You must fix the environment below the soil line.
A Step-by-Step Guide for Checking Root Health
If you suspect gnat damage, you need to do a quick root inspection every few months. I gently slide the plant out of its pot. I look for white, firm roots that hold the soil together. If the roots are brown, mushy, or smell bad, you have root rot. You need to trim the infected roots immediately. If the roots are mostly healthy but you see tiny black larvae in the soil, you need the peroxide drench. I also check for a dense root ball. If the roots are circling the pot, it is time to repot into a slightly larger container. A cramped root system cannot dry out properly and becomes prone to rot.
Why You Need to Remove the Damaged Leaves
I see many people leave half-yellow leaves on the tree. I removed the worst ones. Here is why. A yellow leaf no longer photosynthesizes efficiently. It is actually a drain on the plant’s energy reserves. The plant tries to keep it alive, wasting energy that could go toward new growth. By cutting the leaf at the base of its petiole, you signal to the plant that it is time to focus on healthy nodes. My tree looked a little bare for a few days. But within a week, the energy redirected to the dormant buds along the trunk. This is how I got those explosive new leaves by day fourteen.
Detailed Look at My Day-to-Day Timeline
Let me give you a clearer picture. Day one was a Thursday. I noticed the gnats and the yellowing patch on the left stem. I immediately stopped watering. Day two, I did the peroxide drench in the morning. By the afternoon, I saw several dead larvae on the soil surface. That was gross but satisfying. Day three, I repotted. The root trimming took about fifteen minutes. Day four, I cleaned up the area. I wiped down the pot and the saucer with rubbing alcohol to kill any stray eggs. Day five, I just let it be. Day six, I introduced the gentle fan. Day seven, I watered lightly with seaweed solution. Day eight, I saw the first new bud. Day nine to eleven, the bud grew noticeably. Day twelve, all sticky traps came out. Day thirteen, I turned the plant a quarter turn to ensure even light distribution. Day fourteen, I took pictures because the new leaves looked so vibrant.
Common Mistakes During the Rescue Process
Do not shake off all the old soil if it is clinging to healthy roots. That is fine, but do not wash the roots harshly under a tap. I made that mistake on my third plant. The strong water pressure physically damaged the tender new root tips that were trying to grow. I now gently immerse the root ball in a bucket of room-temperature water and swirl it. This removes soil without breaking root tissue.
Do not fertilize immediately after repotting if you cut off many roots. Fertilizer salts can burn the open cut wounds. I waited seven full days before introducing the diluted seaweed solution. I started at half strength. I will not use full-strength fertilizer for another month.
Do not panic if some leaves drop after repotting. This is normal stress. My tree dropped two almost-yellow leaves. I did not panic. I just cleaned them up. It redirected energy to the important parts. New growth is the ultimate sign of success, not the absence of leaf drop.
How to Tell the Difference Between Gnat Damage and Regular Overwatering
Both cause yellowing, but gnat damage is patchy and often focuses on weaker stems. Pure overwatering usually causes all the lower leaves to turn yellow simultaneously. The soil will smell sour and swampy. Fungus gnat damage often coexists with overwatering, which is why it is confusing. If you see flying gnats, you have larvae. That means you have kept the soil too wet for at least a week. The roots are suffering. You need to cut moisture immediately. The fastest way to differentiate is to pull a plant from its pot and smell the root base. A musty, earthy smell is rot. A neutral smell with visible insects is gnat stress.
Final Care Guide for Sustaining Health
Once your tree is green and thriving again, maintain a routine. I use a moisture meter to verify the soil condition. The probe reading should be in the dry zone before I water. I place the tree in a room with a constant temperature between 65°F and 75°F. Avoid cold drafts from air conditioners. They stress the plant. I dust the leaves once a month with a damp cloth. Clean leaves photosynthesize better. I rotate the pot every time I water so all sides get even light. This prevents lopsided growth and ensures no side of the root system is neglected.
I also quarantine any new plant I bring home for at least three weeks. I learned this after buying a "healthy" fern that introduced gnats to my entire collection. New plants often carry pests in the soil. Keep them separate. Inspect their topsoil for tiny black flies. If you see any, treat them before integrating them into your main plant display.
Why I Prefer Terra Cotta Over Plastic Now
Plastic pots hold moisture for too long. They are great for people who forget to water, but bad for money trees in humid rooms. I switched my money tree to an unglazed terra cotta pot. The clay absorbs water from the soil and lets it evaporate through the pot walls. This acts as a natural moisture buffer. In summer, you might need to water a little more often. In winter, it prevents the root rot that plagues so many indoor money trees. My tree has been in terra cotta for a year now and has never had gnat issues again.
A Note on Air Circulation and Fans
I cannot stress this enough. Stagnant air is the enemy. I had my tree in a closed room with no airflow. The fungus gnats loved it. I now keep a small USB fan running on low for two hours each morning. This strengthens the plant. It also prevents a humid boundary layer from forming on the soil surface. That humid layer is exactly where gnat larvae hatch. A gentle breeze dries the topsoil completely within hours of watering. This simple tip reduced my gnat population by 80%.
Understanding the Plant’s Natural Cycle
Money trees grow in cycles. They push out a flush of new leaves, then rest. You cannot force them to grow constantly. My tree rested for about two months after I rescued it. Then it exploded with new growth in the spring. If your tree is not pushing out new leaves immediately after recovery, do not worry. It might be resting. As long as the leaves are firm and green, the roots are healthy. The new growth will come when the season changes.
What to Do With Severely Rotten Trees
If your tree trunk is soft to the touch and the entire lower section is black, the rescue may be too late. I had a tree like this once. I salvaged a healthy stem cutting. I cut a six-inch section of a green stem above the rot. I place it in a glass of water in a bright window. It rooted within four weeks. I started a new tree from that cutting. Do not feel guilty if your original plant is too far gone. Propagate a healthy piece and start again. You can also try to root healthy stem pieces directly in damp sphagnum moss in a sealed bag. This creates a humidity dome that encourages rooting.
Checking for Coconut Fiber Trunks
Many store-bought money trees have braided trunks that are not rooted in the ground. They are grown in small pots with the braid tied tightly. Sometimes, the inside of the braid hides a rubber band or mesh. Over time, this constricts the trunk and restricts nutrient flow, causing yellowing that looks like pest damage. Before you treat for gnats, check the base of the braid. Remove any twine or plastic bands. These cut into the trunk and cause localized dieback. I found a rubber band around the base of my tree, and I suspect it contributed to the initial stress that led to the gnat infestation.
Regular Soil Aeration
I now aerate the soil gently with a chopstick every two weeks. I poke small holes around the edges of the pot. This breaks up compacted soil and allows oxygen to reach the roots. Anaerobic soil conditions promote root rot and gnat larvae. Aeration prevents that. The roots need oxygen to respirate and absorb nutrients. Compacted soil suffocates them. This is an easy step that takes one minute but has immense long-term benefits.
Final Thoughts on Money Tree Care
My money tree is now two years old and thriving. It has recovered completely from the uneven yellowing caused by gnat larvae. I no longer fear fungus gnats because I know how to control the environment. If you see uneven yellowing, check the soil. If it is damp, stop watering. Repot if necessary. Drench with peroxide. Wait for new growth. I promise you, patience is the key. Do not mess with the plant too much. Let it recover on its own timeline. The roots will heal if you give them air and dryness.
Frequently Asked Questions
Can I use cinnamon powder to treat fungus gnats?
I tried this as a preventive measure. Cinnamon has mild antifungal properties. Sprinkling a thin layer on the soil surface can help prevent fungal growth that feeds larvae. However, it does not kill existing larvae effectively. I use it now only as a light dusting after repotting to keep the topsoil safe. For an active infestation, hydrogen peroxide is much stronger.
How often should I water my money tree after gnat treatment?
After the initial rescue, I waited until the top two inches of soil were completely dry. In my home, that took about six days. I then watered thoroughly. Once the tree shows strong new growth, I switch to a schedule of watering only when the plant droops very slightly. This usually means every eight to ten days in summer and every two to three weeks in winter. The key is to feel the leaves. If they are firm, do not water.
Is it better to use bottom watering or top watering to prevent gnats?
Bottom watering works best for preventing gnats. It keeps the top layer of soil dry, which deters egg-laying. I place the pot in a tray of water for twenty to thirty minutes. The roots absorb moisture from the bottom. After the topsoil feels lightly damp to the touch, I remove the tray immediately. This method requires a pot with good drainage holes. I find it is the single best way to avoid gnat problems long-term.





