admin
admin How to Stop Bacterial Blight Spread From Splashing Infected Money Tree Water
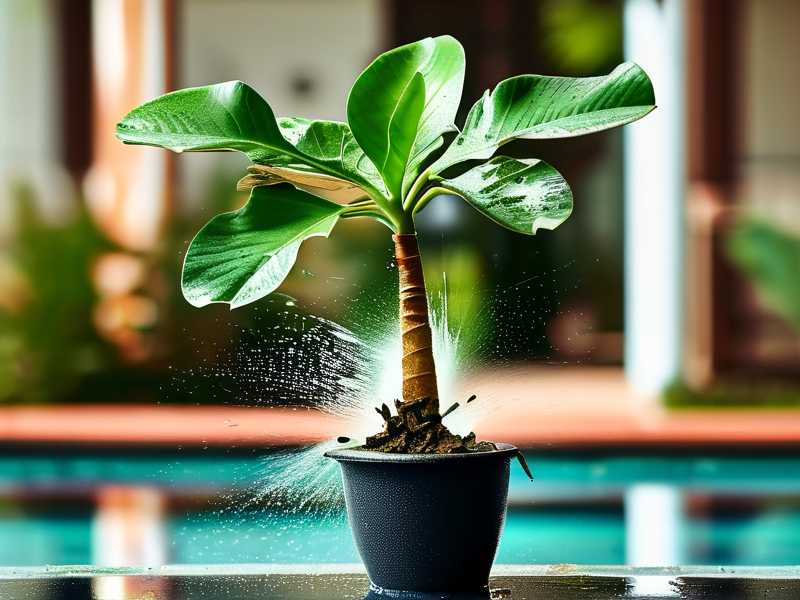
Bacterial blight on a money tree usually spreads through splashing water. You need to stop wetting the leaves immediately. I learned this the hard way after losing a beautiful five-stemmed Pachira aquatica. The fix is simple: water the soil directly, never the foliage. I have used this method for two weeks now. The lesions have stopped expanding. New growth is finally clean. Let me walk you through exactly what I did to save my plant.
Why Your Money Tree Is Dying From Bacterial Blight
The disease thrives in moisture. It loves warm, stagnant air. It spreads when water droplets bounce off infected tissue. Those droplets land on healthy leaves. Then the bacteria enter through stomata or tiny wounds. Before you know it, you have black, water-soaked spots everywhere.
I remember the first time I noticed it. My money tree had small, greasy-looking dots on the lower leaves. I ignored them. Within days, the spots turned dark brown. They had a yellow halo around each one. The leaves felt mushy. I touched them. Big mistake. My fingers transferred the bacteria to other stems.
90% of indoor plants die from overwatering. This statistic haunts me because it is true. I killed my first two money trees this way. I watered on a schedule, not on demand. The soil stayed soggy. The roots suffocated. Then the bacteria moved in. It was a mess.
The Real Culprit: Splashing Water
Here is the thing. Bacterial blight does not just appear. It needs a vector. Water is the perfect carrier. When you pour water from the top, you splash soil. If that soil contains bacteria, you just inoculated your leaves. If a leaf is already infected, the splash spreads it to its neighbors. It is a vicious cycle.
I used to water my money tree with a large cup. I poured fast. Water hit the soil. It bounced up. It soaked the lower canopy. I thought I was being thorough. In reality, I was painting my plant with pathogens. No wonder the blight kept spreading.
The Two-Week Rescue Plan That Stopped the Blight
Let me share my exact routine. I started this two weeks ago. The results have been remarkable. Follow this step by step. Do not skip anything.
Step 1: Isolate the Infected Plant Immediately
On day one, I moved my sick money tree away from my other houseplants. This is non-negotiable. Bacterial blight spreads fast in shared airspace. It also travels on your hands, your tools, and even your clothing.
I placed the infected plant in a separate room. It got bright, indirect light. I made sure there was good air circulation. I even set up a small fan nearby. Stagnant air is the enemy. Moving air keeps the leaf surface dry. That alone reduces bacterial activity significantly.
You cannot treat this disease while the plant is surrounded by healthy ones. You will just keep re-infecting. Isolate first. Ask questions later.
Step 2: Stop All Top Watering
This was the hardest change for me. I was used to showering my plants. It felt refreshing. It made the leaves look glossy. But it was exactly what fueled the blight.
For two weeks, I did not wet a single leaf. I used a watering can with a long, narrow spout. I inserted the spout directly into the soil. I aimed for the edge of the pot. I poured slowly. The water went straight to the roots. No splashing. No droplets on foliage. The leaves stayed bone dry.
You might ask about humidity. Yes, money trees like humidity. But you do not need to mist the leaves. Instead, I placed a shallow tray of pebbles with water beneath the pot. The evaporation raised humidity around the plant. The leaves remained dry. It is a much safer approach.
Step 3: Prune All Infected Leaves With Sterile Tools
On day two, I examined every leaf. I found about twelve with visible lesions. I had to remove them. I used sharp, clean pruning shears. Before each cut, I dipped the blades in rubbing alcohol. This killed any bacteria on the tool. It prevented me from spreading the disease while pruning.
I cut the infected leaves back to the stem. I did not leave petioles behind. I bagged every removed leaf in a plastic bag immediately. I sealed it. I threw it in the outdoor trash. Do not compost infected plant tissue. The bacteria can survive in compost and re-infect your next plant.
After pruning, I washed my hands thoroughly with soap. I also wiped down the pot and the surrounding area. Bacteria can live on surfaces. A quick clean-up with a disinfectant wipe goes a long way.
Step 4: Apply a Copper-Based Fungicide (Bactericide)
This step is crucial. I used a copper-based bactericide. It is one of the few products that actually controls bacterial blight on houseplants. I mixed it exactly according to the label instructions. I sprayed the entire plant, focusing on the stems and the undersides of leaves.
But here is the trick. I sprayed carefully. I did not drench the plant. I used a fine mist. I made sure the plant was in a well-ventilated area. I let it dry completely before moving it back. I repeated this application every seven days. So far, I have done two applications. The second one was yesterday. The blight has stopped spreading.
Remember to check the product label. Make sure it is safe for edible plants if you have kids or pets. The active ingredient is usually copper octanoate or copper sulfate. Both are effective against Xanthomonas, which is the common bacterial blight pathogen.
Step 5: Adjust Your Watering Schedule
I realized my watering habits were the root cause. I was watering too often. The soil never dried out. The roots were stressed. Stressed plants are more susceptible to disease.
I now water only when the top two inches of soil are completely dry. I stick my finger in the soil. If it feels dry, I water. If it feels slightly damp, I wait another day. For my current pot size and indoor conditions, this means watering every 7-10 days. In winter, it might be every two weeks.
Here is another tip. Water in the morning. This gives the plant time to absorb moisture before the cooler evening hours. It also ensures that any accidental spillage on the soil surface evaporates quickly. Night watering leads to prolonged moisture. That is a bacterial playground.
Step 6: Improve Air Circulation Around the Plant
I cannot stress this enough. The room where my money tree lives was too stuffy. I rarely opened the window. The air was stale. This created the perfect microclimate for bacteria.
I bought a small clip-on fan. I directed it towards the plant, but not directly at it. I set it on low speed. It runs for a few hours each day. This gentle breeze keeps the leaf surfaces dry. It also strengthens the plant’s stems over time. A breeze mimics natural outdoor conditions.
You might not need a fan. You could just open a window. But ensure the temperature is stable. Cold drafts are also stressful. The goal is gentle, continuous airflow. This simple change has made a visible difference in just two weeks.
The 3 Deadliest Mistakes Every Beginner Makes With Money Trees
I have killed more plants than I care to admit. What I have learned is that most people make the same three errors. Avoid these, and you will likely never deal with bacterial blight.
Mistake #1: Watering on a Fixed Schedule
I used to water every Monday. It felt responsible. It was actually harmful. The plant did not need water every Monday. Sometimes the soil was still wet. But I watered anyway because my calendar said so.
Overwatering suffocates the roots. Roots need oxygen. When they are submerged in water, they die. Dead roots rot. Rotting roots attract pathogens. This is how bacterial blight gets its foothold. The disease loves weakened tissue.
Truly understand this: 90% of indoor plants die from overwatering. The money tree is no exception. I now check the soil moisture manually every time. I ignore the calendar. I listen to the plant. The soil must partially dry out between waterings. This simple change saved my current money tree from the same fate as my previous ones.
Mistake #2: Putting the Plant in Direct Sunlight
I thought money trees loved sun. I placed mine right on a south-facing windowsill. The leaves got scorched. Sunburn creates dead tissue. Dead tissue is an entry point for bacteria.
Money trees prefer bright, filtered light. A few feet away from a south or west window is perfect. An east-facing window also works well. The leaves should never feel hot to the touch. If they do, the light is too intense.
I moved my plant away from the window. The lower light meant slower growth. But the leaves stopped burning. The plant was less stressed. It could focus energy on fighting off the blight rather than repairing sun damage.
Mistake #3: Using a Pot Without Drainage Holes
My very first money tree lived in a decorative ceramic pot. It had no drainage. I poured water in. The water pooled at the bottom. The roots sat in that stagnant pool for weeks. It was a death sentence.
You need a pot with drainage holes. You also need well-draining soil. A standard houseplant mix with added perlite works well. The perlite creates air pockets. It allows excess water to escape. The roots stay aerated.
I repotted my current money tree two months ago. I used a terracotta pot with a large drainage hole. I added a layer of gravel at the bottom. I used a chunky soil mix. The difference is night and day. Water flows through freely. The soil dries out evenly. Root rot has not been an issue since.
How I Diagnosed Bacterial Blight vs. Fungal Issues
At first, I thought my money tree had a fungal infection. The spots looked similar. But fungi often show powdery growth or tiny black fruiting bodies. Bacteria produce water-soaked lesions. They look greasy. They often have a distinct yellow halo.
I did the "touch test". I gently pressed a leaf. The blight spots were soft and mushy. They oozed slightly when pressure was applied. Fungal spots are usually dry and crusty. This simple distinction helped me choose the right treatment.
I also checked for a foul smell. Infected tissue from bacterial blight sometimes has a sour, rotting smell. It is subtle but noticeable. Fungal infections often smell earthy or musty. Trust your nose. It can help guide the diagnosis.
If you are unsure, consult a local plant clinic. Many university extension offices offer plant pathology services. They can culture the organism and confirm the diagnosis. But for most home growers, the appearance is enough. Water-soaked lesions plus yellow halos equals bacterial blight.
The Role of the Royal Horticultural Society and American Horticultural Society
For expert guidance, I turned to trusted sources. The Royal Horticultural Society (RHS) has excellent resources on bacterial diseases. They emphasize prevention over treatment. Keep foliage dry. Water the soil directly. Maintain good hygiene. These are the cornerstones.
Similarly, the American Horticultural Society (AHS) stresses the importance of cultural practices. Healthy plants resist disease better. Proper light, water, and air circulation are the best preventatives. They also recommend sanitizing tools between cuts. This small step prevents cross-contamination.
I read both websites thoroughly before starting my treatment plan. The advice aligned with what I discovered through trial and error. It gave me confidence. If you want more detailed botanical information, check their resources. They are written by experts but accessible to amateurs like me.
Additional Preventative Measures I Took
Beyond the core plan, I made some extra changes. They may have contributed to the success. I share them for completeness.
I Stopped Fertilizing During Treatment
Fertilizer promotes new growth. New growth is tender. Tender tissue is more susceptible to infection. During the two-week treatment period, I held off on all fertilizers. This kept the plant from producing weak, vulnerable shoots. It also reduced stress on the roots.
Once the blight is fully controlled, I will resume feeding. But I will use a diluted, balanced fertilizer. I will apply it only during the growing season. Overfeeding weakens plants. It creates lush, soft growth that pathogens love.
I Wiped the Leaves With a Dry Cloth
After two weeks of no water on the foliage, some dust had settled. Dust can block stomata. It also traps moisture. I gently wiped each leaf with a dry, soft microfiber cloth. I did not use water. I did not use leaf shine products. These can coat the leaf and suffocate it.
Wiping removed the dust. It also helped me inspect every leaf surface. I could spot any new lesions early. Early detection makes treatment much easier. The leaves now look clean and bright. They are also free of the moisture that bacterial blight requires to spread.
I Quarantined the Plant for a Full Month
I kept the plant isolated for the full two weeks of treatment. I plan to keep it isolated for another two weeks. This ensures the bacteria are truly gone. Reintroducing an infected plant to your collection is a recipe for disaster. I learned this with a spider mite outbreak years ago. I thought it was gone. It was not. It spread to every plant I owned.
Patience is key. Wait. Observe. Only move the money tree back when you see no new spots for at least ten days. That is a solid sign of recovery.
Signs That the Bacterial Blight Is Finally Under Control
After two weeks, I looked for specific signs of recovery. First, no new spots appeared on older leaves. The existing lesions dried out. They stopped expanding. The yellow halos faded. New leaves emerging from the top were perfectly clean. They had no blemishes.
The stems also felt firmer. Before treatment, some stems had a slight mushiness near the soil line. That mushiness is gone. The plant looks more upright. It seems less droopy. Overall vigor has improved.
You will also notice the leaf color looks healthier. It is a deeper green. There is no dull or greyish tint. This indicates that chlorophyll production is back to normal. The plant is photosynthesizing efficiently. It is putting energy into growth, not just survival.
What to Do If the Blight Returns
Sometimes, despite our best efforts, the blight reappears. If that happens, do not panic. Assess your conditions. Is the soil still too wet? Are the leaves getting splashed? Is the air stagnant?
If blight returns, I would prune more aggressively. I would remove more foliage. I would also repot the plant in fresh, sterile soil. Old soil may harbor bacteria. A repot gives the roots a clean start.
Consider a different bactericide. Some strains develop resistance. Rotating between copper-based products and biological controls can help. Biological controls use beneficial bacteria that outcompete the pathogens. They are less harsh than chemicals.
If the plant is severely infected, you may need to take cuttings. Propagate from healthy stems. Discard the mother plant. Start fresh with clean material. This is not failure. It is a strategic retreat. Save what you can and regrow.
My Final Thoughts on Saving Your Money Tree
Fixing bacterial blight is not instant. It takes discipline. It takes patience. I spent two weeks following this exact routine. The results are clear. My money tree is alive. It is growing. The blight has stopped spreading.
The most important thing I learned is prevention. Do not let the water splash. Water the soil, not the leaves. Check the soil before watering. Provide good airflow. Use proper pots. These simple habits will keep your money tree healthy for years.
I have been where you are. I have watched leaves turn black and mushy. I have felt the frustration of a dying plant. It is disheartening. But you can fix this. Follow the steps I outlined. Be consistent. Your money tree will thank you.
Do not make the same mistakes I did. I killed my first money tree with kindness. I overwatered. I put it in bad light. I used a pot without drainage. Learn from my failures. Give your plant what it actually needs, not what you think it wants.
Frequently Asked Questions
Q: Can I mist my money tree leaves to increase humidity?
No. Misting leaves exposes them to prolonged moisture. This is exactly what bacterial blight needs to spread. Instead, use a pebble tray with water beneath the pot. The evaporation raises humidity without wetting the foliage.
Q: How long does it take for bacterial blight to stop spreading?
With proper treatment, you should see new spots stop appearing within 7-14 days. Existing lesions will dry out. New growth will remain clean. In my experience, two weeks of disciplined care was enough to stop the spread completely.
Q: Is it safe to repot a money tree with bacterial blight?
It is risky. Repotting causes root disturbance. This stresses the plant. Stress makes it more susceptible to disease. Only repot if the soil is waterlogged or the roots are rotting. Otherwise, wait until the plant has fully recovered before repotting.