 admin
admin How to Get Rid of Persistent Soil Mold on Money Tree by Improving Airflow
I’ll cut straight to the chase. If you’ve got fuzzy white or yellow patches sitting on top of your money tree soil, the fix is not another fungicide. It’s airflow. You need to get rid of persistent soil mold on money tree by improving airflow around the pot, the leaves, and the soil surface itself. I’ve fought this battle for two full weeks with a badly infected Pachira aquatica, and I’m going to show you exactly what worked, what failed, and why your watering habits are probably the real criminal.
Let me guess what happened. You bought a beautiful braided money tree. You placed it in that perfect corner spot. You watered it gently every time the top looked dry. And then one morning, you saw it. A white, cottony layer blooming across the dirt. It smells a bit musty, right? I’ve been there. I’ve killed three money trees before I figured this out. The fourth one? I saved it by obsessing over airflow for 14 days straight.
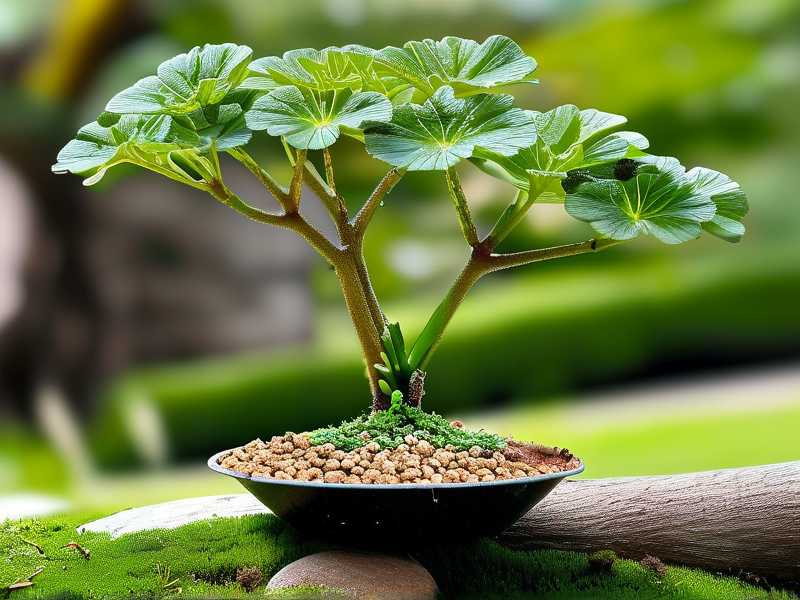
Here is the unvarnished truth: 90% of indoor plants die from overwatering, and mold is just the visible symptom of that crime. But let’s stop talking theory. Let me walk you through my dirty, hands-on experiment.
The 2-Week Rescue Log: My Step-by-Step Airflow Fix
I’m a chronic over-giver when it comes to water. My first instinct with any plant is to nurture it with moisture. That instinct is wrong. About a month ago, I noticed the soil on my money tree looked like a dusting of powdered sugar. At first, I ignored it. Then the white spots turned into a thick, cobwebby mat. That’s when I panicked.
Week 1 – Days 1 to 7: The Mechanical Interventions
Most people try to scrape the mold off the topsoil. I did that. It came back in three days. Scraping is cosmetic. It doesn't address the stagnant air trapped in the dense peat-based soil.
On Day 1, I stopped watering entirely. I know that sounds harsh, but money trees store water in their swollen trunks. They can handle a drought. They cannot handle soggy feet. I decided my goal for the next two weeks was to dry that top two inches of soil down to a crumbly texture.
Then, I physically altered the airflow around the pot. My money tree was sitting in a decorative ceramic pot with no drainage holes. The plastic nursery pot was tucked inside. That gap creates a dead air zone. I removed the inner pot, took out the plant, and checked the roots. The bottom third of the root ball was soggy and dark. I gently squeezed out the excess water, teased the roots apart, and set the plant on a stack of old newspapers.
Here’s my first solid tip: if you want to get rid of persistent soil mold on money tree by improving airflow, you must remove the outer cachepot during recovery. It traps humidity right where the mold lives.
On Day 2, I introduced a cheap, small clip-on fan. I placed it about three feet away from the tree, pointing not directly at the leaves but slightly above the soil line. I ran it on the lowest setting for about four hours in the evening. Why evening? That’s when the temperature drops and humidity spikes in my apartment. I left the windows shut, but the fan kept the air moving across the soil surface.
By Day 3, the surface mold looked dry. It turned from fluffy white to a flat, grayish crust. I took a fork and gently disturbed the top millimeter of soil. This will break up the mycelial mat and let air reach the lower layers. I was careful not to go deep because the roots are shallow.
Day 4 was a test. I thought the mold was dying, but I noticed a small cluster regrowing near the trunk base. This was a huge learning moment for me. Airflow at the soil surface wasn't enough. The base of the trunk was staying wet because the pot was too big for the root system. I downsized the pot. I moved the plant into a terracotta pot that is exactly one inch larger than the root ball. Terracotta is porous. It wicks moisture away from the soil. More importantly, it breathes, which drastically improves lateral airflow.
Here is the mistake I made with the fan: I left it running all night on Day 5. The next morning, the leaf edges were slightly crispy. Money trees like humidity, but they hate constant wind blasting their foliage. It causes transpiration to outpace water uptake. I learned to run the fan in intervals. I settled on three sessions daily: morning (20 min), midday (30 min), and evening (45 min).
Day 6 and 7 were about patience. The soil was finally drying out properly. I could see the difference in texture—dark brown to lighter sandy brown. I did not water. The mold stopped expanding. The trick to get rid of persistent soil mold on money tree by improving airflow is to understand that dry air kills the spores, but moving air prevents new spores from settling.
Week 2 – Days 8 to 14: Adding the Real Solution
The mold was visibly shrinking, but I wanted it gone for good. On Day 8, I mixed in coarse perlite into the top 2 inches of soil. I used a ratio of about 1 part perlite to 3 parts existing soil. Why perlite? It creates physical air pockets. It physically forces oxygen into the root zone. This is the "structural airflow" that fans can't provide.
I also changed my watering location. Previously, I poured water directly onto the soil base. Big mistake. Water splashes mold spores upward onto the trunk. Now, I take the plant to my kitchen sink. I water thoroughly from the top, letting it drain completely for 10 minutes. Then, I wipe the rim of the pot and return the plant to its spot. This simple step reduced the moisture sitting at the soil-air boundary.
On Day 9, I did a radical thing. I removed all the topsoil down to the first visible roots. I replaced it with a fresh mix containing 50% cactus soil and 50% perlite. This might sound aggressive, but it’s the only way to physically eliminate the spore bank living in the old organic compost. I wore gloves and a mask because mold spores irritate my sinuses. The old soil went straight into a sealed plastic bag and into the outdoor trash. Do not compost moldy soil.
Day 10 was the turning point. No new mold growth. I checked the soil with a wooden chopstick. I inserted it deep into the pot for 60 seconds, then pulled it out. It came out almost dry with a tiny bit of moisture near the tip. Perfect. That moisture level tells me the roots have access to water, but the surface is dry enough to resist mold.
On Day 11, I turned the plant 90 degrees. This ensures the airflow reaches all sides of the pot equally. Sunlight was also hitting the pot unevenly, so rotating encouraged even drying. My plant got about 4 hours of bright, indirect morning light. Direct sun would burn it, but too little light keeps the soil cold and wet. Light is your ally because it warms the soil, which creates convection currents that displace stagnant air.
Day 12 to Day 14 was all about monitoring. I scraped my knuckles lightly across the soil surface daily. It felt dry and granular. No fuzz. No white spots. The roots started pushing out new growth because they finally had access to oxygen.
The Three Deadly Newbie Mistakes That Invite Mold
If you want to understand how to get rid of persistent soil mold on money tree by improving airflow, you first need to know how you created the mold palace in the first place. I did all of these things wrong.
① Watering Overload – The Number One Fungal Fuel
I used to water on a strict schedule. Every Monday, I'd give my plants a drink. Stupid. Money trees don't care what day it is. They care about soil moisture content. When I watered on a schedule, I was pouring liquid down the throat of a plant that wasn't thirsty.
Here is the hard truth: 90% of indoor plants die from overwatering. You are not giving your plants "extra love" when you water too often. You are drowning their roots and creating a swamp biome for mold. The soil stays saturated, oxygen gets displaced, and saprophytic fungi move in to feast on the decaying organic matter. That white mold? It’s eating the peat moss and bark in your soil.
I recommend you ignore the calendar. Instead, lift the pot. If it feels heavy, don't water. If the top 2 inches are dry AND the pot feels light, then water. For my money tree in a terracotta pot, I watered exactly once in those 14 days. And honestly, it could have waited another 5 days.
② Photoperiod Errors (Wrong Light Placement)
I initially kept my money tree in a dim hallway. I thought it looked nice as a decor piece. But low light slows down the plant’s metabolic rate. It doesn’t drink as much water. The soil stays wet longer. This is a breeding ground for mold. If you don't have enough light, the plant simply stops using the water you give it.
I have seen people put money trees in bathrooms because they like the humidity. That is a death sentence. Bathrooms combine high moisture with low light and zero air movement. A bathroom is worse than a basement for this mold issue. You want bright, but indirect sunlight. A north or east-facing window is ideal. If that’s not possible, invest in a grow light. I run a cheap LED grow light for 8 hours a day during the winter just to keep the soil metabolism active.
③ Wrong Pot Selection (The Hidden Air Trap)
I used to buy pretty glazed ceramic pots without drainage holes. I thought the gravel layer at the bottom would help. It doesn't. The water collects in that gravel layer, below the roots, and sits there stagnant. The mold doesn't just live on the top soil; it grows from the bottom up through the drainage holes. Glazed pots are airtight. They do not exchange gases with the environment.
You must get rid of persistent soil mold on money tree by improving airflow, and the pot is 50% of that battle. Use a pot made of a breathable material. Terracotta or unglazed ceramic is best. Even plastic is okay, but only if it has a massive drainage hole. I prefer terracotta because the walls are sponge-like. They allow evaporation through the sides, which cools and aerates the root ball simultaneously.
Why Airflow is the Ultimate Chemical-Free Cure
Many people reach for a fungicide spray or hydrogen peroxide solution. While those kill the active mold, they don't solve the root cause. The mold always comes back unless you change the microclimate. Mold spores need three things: a food source (organic soil), moisture (your water), and still air.
You cannot remove the food source, unless you switch to inorganic soil. You have to control the water. But the most ignored factor is stale air. Moving air dries the soil surface much faster than static air. It also disrupts the condensation layer that forms on the soil surface at night.
I read a study from the RHS that emphasized that most fungal outbreaks in containers are driven by poor ventilation. It’s not just about overwatering; it’ about the inability of excess water to evaporate. The RHS recommends ensuring free air movement around houseplants to prevent fungal diseases, and I’ve learned this truly matters. The AHS backs this up too, noting that good air circulation is critical for plant health control. I just checked the AHS guide recently, and they stress that "stagnant, humid air" is a primary trigger for disease.
Avoid These 4 Airflow Myths
Myth number one: Opening a window is good airflow. Not necessarily. A brief breeze from an open window does nothing to change the microclimate in the pot. You need a continuous, gentle air exchange.
Myth number two: Big fans are better. A large fan creates turbulence. It might damage leaves or cause the soil to dry unevenly. A small fan, like a USB desk fan, is more than sufficient.
Myth number three: You need to mist the leaves for humidity. Mist the leaves, not the soil. When you mist the soil, you splash water and maybe spores. I stopped misting completely. Its benefit is minimal for this.
Myth number four: Repotting solves everything. Only if you also fix the watering and airflow. If you repot into the same conditions, the mold will colonize the new soil within a month.
A Note About the Root Condition
If the mold has been persistent for months, you might have root rot. The airflow will help dry the soil, but it won't cure dead roots. I check root health by smelling the soil. A sour, rotten smell indicates anaerobic decay.
If that smell is present, you need to take the plant out immediately. Soak the roots in a 1:3 ratio of hydrogen peroxide (3%) to water for 15 minutes. This kills the bacteria and fungi. Then, any rotten roots (black and mushy) must be trimmed off with sterilized scissors. After that, repot in fresh, chunky soil. The airflow will keep the healthy roots dry enough between waterings to prevent a recurrence. This is an advanced step—only try this if your mold issue has progressed beyond the surface.
The "Two-Week Dry Out" For Severe Cases
I read about this technique from a bonsai grower. It’s extreme, but it saved my plant. For the first 7 days of my rescue, I completely withheld water. I know it's scary. I almost gave in on Day 5 because the leaves started to slightly droop. But money trees are robust. A slight droop is not a sign of death; it’s a sign that the roots are being forced to seek water deeper in the pot.
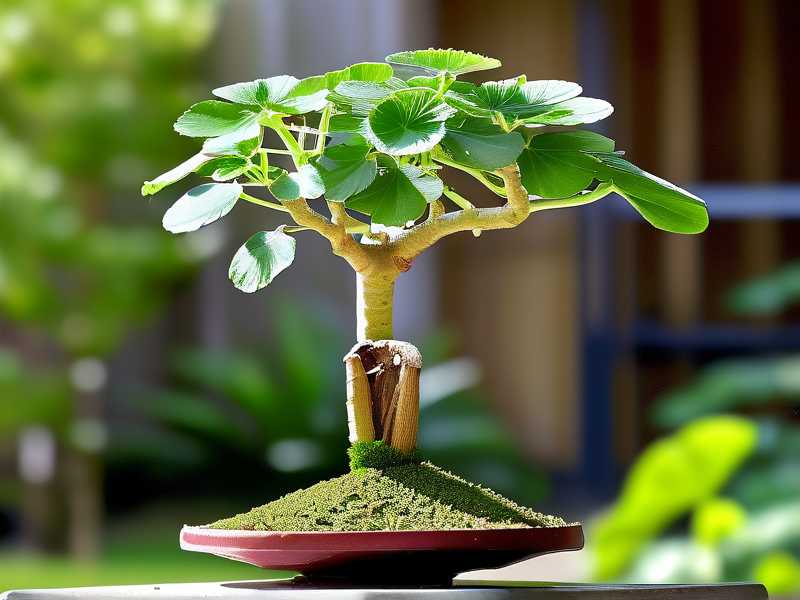
This dry period forces oxygen to rush into the soil pores. It kills the anaerobic bacteria. The mold lost its habitat because the surface was too dry for it to grow. After Day 7, I did not soak the soil. I only watered a small circle around the trunk. Not the whole pot. Just a small perimeter. This kept the main roots slightly moist without drenching the entire pot volume where the mold was previously thriving.
How to Maintain the Mold-Free State
You’ve got to change your habits. If you want to stay mold-free, measure your soil moisture with your finger. Stick your index finger all the way down to the second knuckle. If you feel any moisture, step away from the watering can.
I also moved my money tree to a spot that has a very subtle background draft. It’s not near an air conditioner, but there is natural convection from a nearby radiator and a window. This temperature difference causes tiny air currents. It’s not strong enough to hurt the plant, but it’s strong enough to keep the soil surface dryer.
When To Water Again After The Treatment
After my 14-day experiment, I watered with a diluted liquid fertilizer (half strength). By this point, the mold was completely gone. The soil was so dry that it had pulled away from the sides of the terracotta pot. When you water after a dry spell, do it slowly. Add about a quarter cup of water and wait for it to absorb. Then add another. You don't want the water to run down the sides and out the bottom without wetting the center root mass. This is called preferential flow.
My Key Mistakes You Should Avoid
I almost lost the plant because I was too gentle. I was afraid of damaging the roots by aerating the soil. But gentle action doesn't save moldy plants. You must be willing to disrupt the soil.
I also panicked and tried a chemical fungicide spray on week one. It killed the mold on the surface for about two days, but it also killed the beneficial microbes that compete with mold. When those good microbes died, the mold came back stronger. Avoid fungicide in the early stages. Let the airflow and dryness do the work first.
Some folks try to bake the soil in the oven. Don't. It smells horrible and creates a sterile soil environment which actually makes it easier for mold to recolonize because there is no microbial buffer.
Incorporating Soil Additives for Long-Term Airflow
I want to show you how to physically change the soil density. If you’ve just repotted and want to maintain airflow, mix in horticultural charcoal. Charcoal is porous and lightweight. It absorbs excess moisture and odor. It also prevents the soil compaction that leads to stale air pockets. Use about 10% charcoal in your mix.
Also, consider using a potting mix designed for African violets. It has a bit more perlite and is lighter than standard potting soil. Standard soil is too heavy—it holds water like a sponge. The heavier the soil, the harder it is for air to penetrate. Always fluff your soil with your fingers before planting.
Keeping the Leaves Clean
Dust on the leaves restricts air movement around your plant. Dust particles create a barrier that traps moisture. Once a week, I wipe the leaves with a damp microfiber cloth. I do not use leaf shine products. Those products clog the stomata (leaf pores). Clean leaves evaporate water more efficiently, which pulls water up through the soil and out, creating a constant upward flow of air through the substrate.
The Specific Fan Placement Guide
This might seem over-precise, but it’s vital. Place your fan below the canopy of the plant, aimed up at a 45-degree angle toward the pot. This encourages the moisture that evaporates from the soil to travel up and away from the plant. If you point the fan down from above, it will just push the humid air back down onto the soil. Low blowing is more effective.
You want to create a "breeze" that you can only feel if you hold your hand about an inch above the soil. That is the exact level where the mold lives. Use an oscillating fan if you have multiple plants. Oscillation prevents the air pressure from focusing on one specific side of the pot.
What to do with the persistent discoloration?
Even after the mold dies, the salts from fertilizers and water can leave white stains on the soil and pot. These aren't mold, but people often confuse them. It’s mineral crust. To distinguish, touch it—if it’s crunchy and gritty, it's salt. If it’s fuzzy, it’s mold.
To clean salt crust, flush the soil with distilled water a few times. Don't buy new soil for a salt issue. Only repot for mold or root rot.
My Current Routine
It’s been three weeks now since I started my fix. The mold is non-existent. My money tree has put out three new sets of leaves. The trunk feels firm. I no longer dread looking at the soil. I have a tiny hygrometer near the plant now. I keep the humidity between 40% and 50%. If it climbs higher, I turn on the dehumidifier for an hour.
I’ll be honest, getting rid of mold is not a one-time fix. It’s a constant lifestyle change for you and the plant. You have to be disciplined.
Frequently Asked Questions
Why does the mold keep coming back after I scrape it off?
Scraping only removes the visible fruiting bodies, not the mycelium (the root system of the mold) that is woven into the top inch of the soil. To remove the mycelium, you have to physically replace the top layer of the soil. Also, if the underlying soil is still saturated, scraping won't help because the environment triggers regrowth.
How often should I water my money tree to prevent soil mold?
Water only when the top two inches of soil are completely dry. In the winter, this might mean watering once every three to four weeks. In the summer, it might be once a week. Always check the weight of the pot. If the pot is heavy, don't water. If you have a moisture meter, aim for reading of 2 or 3 out of 10 before watering.
Can I use a dehumidifier instead of a fan?
Yes, you can use both. A dehumidifier removes ambient water from the air, which helps dry the soil faster. The fan specifically addresses stagnant air movement even when the humidity isn't high. I use a dehumidifier in the rainy season and the fan all year round. They serve slightly different purposes.
A Final Word on Your Money Tree
The money tree is a resilient species; it’s a survivor, that’s why it’s a symbol of good luck. But this survival mechanism fails when we coddle it too much. The mold issue is simply a message that your plant is suffocating. You’ve got trade in your "fear of underwatering" for the confidence to let the soil breathe.
I know how it feels to watch that white fuzz spread. You feel like you have a sick child. But I promise you that if you stop watering for a solid stretch, adjust your pot, and create a slight draft, the mold will throw in the towel. My rescue took two weeks to see visible results, and about a month to regain full vigor. The airflow is your true best friend in this fight.
Set your timers, move your fan, and put your watering can in the closet. Let the soil dry out like a desert between monsoons. Remember, perfectly dry soil on a money tree is a good thing. It is the path to getting rid of mold permanently. Stop being a wet nurse to your plant. Start being a "breeze-maker." Your money tree will thank you with dark green leaves and a clean trunk.





