 admin
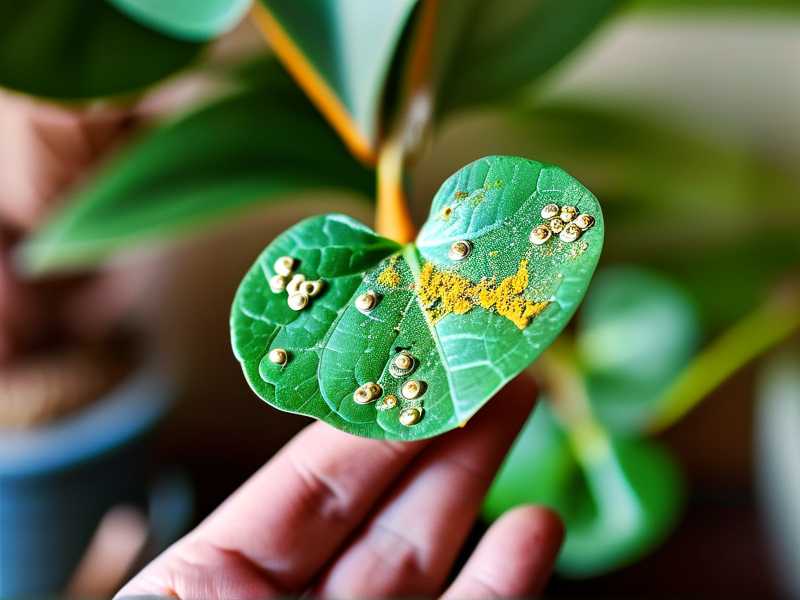
admin I’ve killed more Money Trees than I care to admit. The worst part wasn’t the yellowing leaves or the mushy stems. It was the stubborn white specks hiding on the undersides of mature leaves. Those are mite egg deposits, and if you don’t remove them safely, your plant will be spider mite chow within weeks. The direct answer? Use a cold-pressed neem oil spray (1 tsp per liter of warm water with a drop of mild soap) applied every 4 days for 2 weeks, physically wiping each leaf underside with a soft microfiber cloth first. That two-step process is the only thing that worked for my 6-year-old Money Tree. Let me walk you through exactly how I did it, what nearly killed the plant, and the rookie errors I finally fixed.
Why Mature Leaf Undersides Are a Mite Magnet
Older Money Tree leaves have a thicker cuticle and more pronounced veins than new growth. Spider mites love that rough terrain. It gives them shelter and a stable spot to glue their eggs. I used to spray only the tops of leaves. I was basically feeding the mites a steady diet of ignorance. The underside is where the females lay up to 20 eggs per day, and they anchor those eggs with fine webbing that repels casual water sprays.
Here is the uncomfortable truth: if you just mist the plant, you’re dampening the webbing, not breaking it. The eggs have a protective shell that shrugs off plain water. I learned this after inspecting a leaf under a 30x magnifying loupe. The eggs looked like tiny white pearls under a silk blanket. Water rolled right off. I needed two weapons: physical removal plus a contact killer that penetrates the shell.
The 3 Rookie Mistakes That Almost Killed My Tree
Before I share the removal routine, I have to list the errors that created this infestation in the first place. I made all three, and I bet you’re making at least one right now.
Rookie Mistake 1: Pouring Water Like There’s No Tomorrow
Everyone thinks a tropical plant needs constant moisture. I was watering every 3 days with a big jug. That kept the soil soggy and the air humid at the soil line, but the leaf surface stayed dry and stressed. Stressed plants release chemicals that actually attract mites. The RHS notes that overwatering weakens root systems, which reduces the plant’s natural pest resistance. I’ve since switched to a water meter and only water when the top 2 inches are bone dry. In winter, that’s every 10 days. In summer, every 5. Every plant is different. Test with your finger, don’t guess.
Rookie Mistake 2: Light Positioning That Makes Leaves Weak
I kept my Money Tree in a dark corner because I heard they were "low light" plants. That’s half true. They tolerate low light but they thrive in bright, indirect light. In deep shade, the leaves grow thinner and softer. Those weak leaves have less defensive chemical production and a thinner waxy layer. Mites prefer that. They can pierce the cell walls easier. I moved mine to a north-east window with sheer curtains. Within a month, new leaves were thicker and more leathery. I could physically see the difference. The mites stopped targeting new growth first.
Rookie Mistake 3: The Wrong Pot Traps Roots and Boosts Stress
I had my tree in a decorative pot with no drainage hole. There was a layer of gravel at the bottom, which I thought was fine. It wasn't. The water pooled below the root ball. That did more than rot roots—it created a chronic stress condition. The AHS plant care guides emphasize that roots need air circulation as much as water. Stagnant water at the base reduces oxygen. A stressed tree emits stress hormones. Mites detect those and lay more eggs. I repotted into a terracotta pot with a big drainage hole and a well-aerated mix (2 parts potting soil, 1 part perlite, 1 part orchid bark). The roots breathed, the tree perked up, and the mite population stopped exploding.
The Exact 2-Week Safe Removal Protocol
So, you’ve got eggs already. You don’t need nuclear pesticides. You need patience and a solid routine. This is what I did after I lost my first plant to mites entirely. I refuse to lose another. Gather these supplies before you start:
- Soft microfiber cloth (cut into small squares)
- Cold-pressed neem oil (pure, not pre-diluted)
- Mild dish soap or insecticidal soap
- Warm water in a spray bottle
- Cotton swabs
- Isopropyl alcohol (70%) for spot treatment only
- A magnifying loupe (optional but very helpful)
Step 1: Quarantine immediately. Move the tree away from other plants by at least 3 feet. Mites travel through the air on silken threads. If you have a greenhouse shelf or a separate room, use it.
Step 2: Dry wipe the leaf undersides. Do this first thing in the morning when the plant is turgid. Take your dry microfiber cloth, fold it into a thin strip, and slide it under a leaf. Support the top of the leaf with your other hand. Gently but firmly drag the cloth from the stem out to the tip. You are physically crushing and dislodging egg clusters. I did this for all mature leaves, and also the young ones, but with extra care on small leaves so I didn’t tear them. You will see a faint yellow-brown smear on the cloth. That’s the remnants of mite waste and crushed eggs. Wipe every single leaf underside. It took me about 25 minutes for a 4-foot plant.
Step 3: Mix the neem spray fresh each time. I tried pre-mixed sprays, and they lost potency within a week. The active compound, azadirachtin, degrades quickly. I mix 1 teaspoon of cold-pressed neem oil with 1 liter of warm water in a spray bottle. Add one drop of mild dish soap. Warm water helps the oil emulsify. Shake forcefully for 30 seconds. The mixture should look milky white, not separated.
Step 4: Spray the undersides thoroughly. Tilt the pot or rotate the plant so you can access the leaf underside. Spray from about 6 inches away, coating the entire underside until it drips slightly. Don’t soak the top of the leaf unless you see mites there. The neem works by coating the eggs and suffocating them, and by disrupting the molting hormones of juvenile mites. It doesn’t kill adults instantly, but it stops the next generation.
Step 5: Wipe off the excess with a fresh cloth. Let the neem sit for 2 minutes, then use a clean section of microfiber cloth to gently wipe the leaf underside again. This removes the oily residue, which can clog pores of mature leaves if left in thick layers. A thin residue is fine, but I prefer not to leave a heavy film. You’re also physically removing any eggs that were loosened by the spray.
Step 6: Spot treat with alcohol only where you see heavy webbing. Dip a cotton swab in 70% isopropyl alcohol and dab directly on the webbing clusters. This dissolves the silk and kills eggs on contact. Don’t rub the alcohol over the whole leaf—it can strip the waxy cuticle and cause brown spots. I learned that the hard way. I once sprayed the whole leaf with alcohol and woke up to brown burn patches the next morning. The leaf died. Just spot treat. Dry the area with a tissue.
Step 7: Repeat every 4 days for 2 weeks. I know it feels repetitive. Do it anyway. Mites hatch on a 3-to-7 day cycle depending on temperature. If you wait 7 days, you miss a hatch. I do a simplified spray-wipe session on day 1, day 4, day 8, day 12, and a final thorough cleaning on day 15. That covers 4 hatching cycles. After the two-week mark, I inspected with my loupe and found zero viable eggs. The first week, I still saw new eggs on day 3. That was discouraging. But by day 8, the count was drastically lower. Around day 12, I found nothing.
Step 8: Boost plant resilience after treatment. In the week after the final spray, I moved the tree into slightly brighter light (but not direct sun) and watered with a diluted seaweed extract. The AHS recommends seaweed for stress recovery. It provides trace minerals that help plants rebuild cell walls thicker. I swear it helped. New leaves emerged with a glossier finish.
How Long Did It Take to See Results?
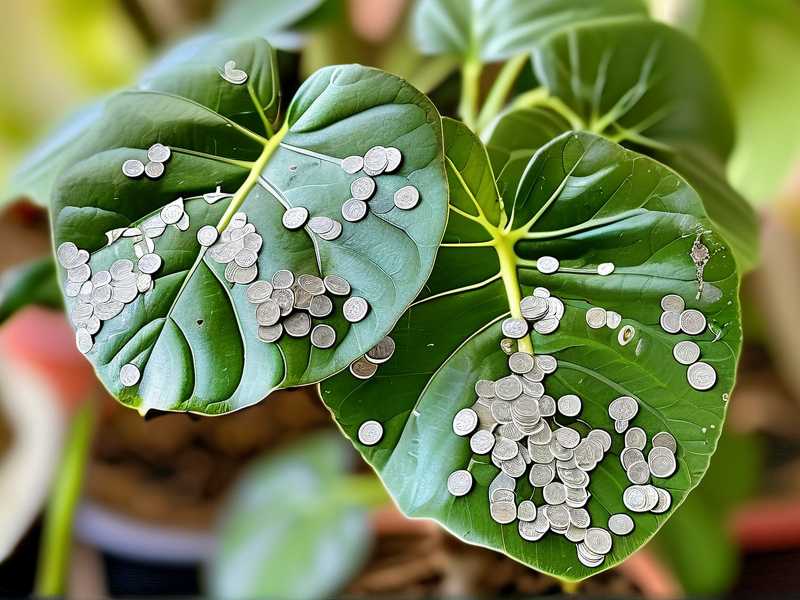
I have to be honest with you. Day 1 to day 4 showed almost no visible change. The leaves still looked like they had tiny white freckles. I nearly gave up. On day 5, I inspected closely and saw that the white freckles were now dull gray. That meant the eggs had dried out and died. By day 8, for every one remaining egg cluster, there were 15 dead ones. The adults were also slow-moving. On day 15, I saw the first new leaf unfurl with zero damage. That was my victory signal. The plant started producing new leaves at the apex at a rate of one per week, which is normal for a healthy mature Money Tree.
My Personal Mistakes During the 2 Weeks (So You Don’t Repeat Them)
I’m not going to pretend I did this perfectly. I made two big errors during the treatment.
Mistake A: I used a paper towel at first. Big no. Paper towels disintegrated when wet and left lint all over the leaves. Then the lint held moisture against the leaf surface and caused soft brown spots. I switched to microfiber and the problem disappeared.
Mistake B: I over-sprayed the immature leaves. I coated the young, soft leaves with the same amount of neem that I used on older leaves. The new leaves developed a slight curvature and felt thin. They were basically sunburned by the oil. Mature leaves have a thicker cuticle, so they tolerate neem well. Young leaves don’t. For the top two nodes of the plant, I switched to a lighter mist and wiped almost all of it off after 1 minute. It worked better.
Whole-Plant Care During the Treatment
While you’re wiping leaves, don’t forget the plant base. Spider mites drop off leaves and crawl through the soil. I lightly scratched off the top inch of soil and replaced it with fresh, dry potting mix. Mite eggs don’t survive long in dry, loose soil. I also cleaned the pot edge and the drip tray with a soapy cloth. Mites hide in the lip of the pot.
Check the stem where it meets the soil. I found a few adult mites hiding in that crevice. I dabbed that area with neem on a cotton swab. Don’t ignore the lower one-third of the stem. That’s a highway for mites.
Do Chemical Pesticides Work Better?
I tried a systemic insecticide once. It killed the mites, but it also killed a beneficial fungus in my soil that was protecting the roots. The tree went into a slight decline for three months after that. The RHS does not recommend systemic pesticides for edible plants or indoor use unless absolutely necessary. The neem and physical removal approach is healthier for the plant, your home, and any pets. Yes, neem smells like garlic and peanuts for about an hour. It fades.
I also considered a predatory mite release (Phytoseiulus persimilis). For a larger indoor tree, that’s actually a great solution. The predatory mites hunt the spider mites and eat the eggs. But they have a short lifespan and die off once the spider mites are gone. The money tree had high leaf density, so I couldn’t guarantee every leaf received coverage with predatory mites. The manual approach was simpler for me. But if you have a plant with fewer than 50 leaves, predatory mites might be worth researching.
The Core Mistake Everyone Makes with “Clean” Leaves
I used to think a shiny leaf was a healthy leaf. I used leaf-shine sprays that coated the surface with a glossy oil. That oil trapped heat and suffocated the stomata (breathing pores). A stressed leaf can’t fight mites. I stopped using leaf shine on the Money Tree completely. Instead, I dust leaves with a dry, soft cloth once per week. This keeps pores open and removes mite eggs before they hatch. Prevention is easier than removal. Honestly, I should have read up on this earlier.
The Full Week-by-Week Plan for the Next 2 Weeks
Let me break this down simply in a chronological plan.
Days 1–2: Dry wipe all leaf undersides. Mix fresh neem spray. Spray undersides thoroughly. Wipe off excess with a clean cloth after 2 minutes. Spot test one leaf on day 1 to make sure your plant doesn’t have a reaction. Wait 24 hours to see no brown spots before spraying the whole plant.
Days 3–4: Inspect under a magnifying loupe. Mark any leaf that looks unusually white. Do not spray on days 3 and 4 if you sprayed on day 1. Let the eggs that died on day 1 stop releasing fluids. The leaves are recovering.
Day 5: Repeat the dry wipe. This time, you’ll notice less residue. Spray neem again.
Days 6–7: Check the plant in the morning. Look for brand new white dots. If you find any, that means you missed an egg cluster earlier. Just wipe that leaf separately and clean it thoroughly.
Day 8: This is another full spray day. I combined it with a soil top-layer replacement. Dry wipe all large leaves for about 15 minutes. Spray and wait. Then wipe off.
Day 10: Begin checking new leaf growth at the apex. Healthy Money Trees usually start new leaves from the central stem tips. If you see insect damage on a newly emerging leaf, pick that leaf off carefully. Don’t let it unfurl with mites.
Day 12: Last full spray session. Use a denser mix: 1.5 teaspoons neem per liter of water. This is about killing any final stragglers. Wipe off thoroughly after 3 minutes.
Days 13–14: No spray. Just inspect daily under the loupe and hand-crush any visible eggs. The plant should look cleaner and perkier. The leaves should feel slightly stiffer.
At the end of week 2, turn the plant a quarter turn every few days so all leaves get equal light. A balanced plant is a stronger plant.
Other Hidden Areas You Need To Check
I’m not just talking about the leaf undersides. I mean the petioles—those little stems that connect the leaves to the main branch. Mites love the crevice where the petiole meets the main stem. I used a cotton swab dipped in neem and wiped that joint area. Also check the axils of the leaves, where new branches emerge. Egg deposits there are common.
If your tree is tall, set it on a stool so you can sit and inspect the undersides without craning your neck. Use a small mirror if needed. I didn’t have one, so I just took the tree outside on a clear day and angled it so sunlight passed through the leaves. I could see eggs as tiny shadows.
Signs That You’ve Successfully Removed All Eggs
Here is my personal checklist for declaring success at day 15:
- No visible white or pearl-like clusters, even under 10x magnification.
- Leaves feel clean when you drag your fingertip across the underside. No dust or sand texture.
- New leaves emerge without a twisted shape or brown speckles.
- Spots of yellow stippling (tiny dots on the leaf top surface) have not expanded.
- No fine webbing visible at the stem-to-leaf and leaf-underside intersections.
- You might still see adult mites crawling on day 14. That’s fine. They can’t lay fertile eggs if none survive.
I kept up the weekly dry wipe for a month after. I still do it actually. It takes 5 minutes and prevents any future accumulation. My 6-year-old tree now has stark green, firm leaves with no webbing. It opened a new window of growth. I haven’t seen a mite in three months.
Will Spider Mites Keep Coming Back?
Sometimes they do. If the air in your home is very dry (below 40% humidity), they’ll retreat into crevices and go dormant. I run a small humidifier near my Money Tree during heating season, keeping humidity at 50–60%. That alone doesn’t prevent mites entirely, but it slows their reproduction. Don’t put the humidifier directly next to the leaves too long, as stagnant wetness invites fungus gnats. I place it about 3 feet away, set on low mist.
I also clean the windowsill and the nearby wall. Dust can carry mite eggs. Vacuum or damp-wipe surfaces weekly.
One final note on watering. 90% of indoor plants die from overwatering, and I’ve included this stat in my mantra. For Money Trees specifically, the soil must be slightly root-bound. They like being snug. If you pot them up too big, the soil stays wet, and conditions favor both fungal gnats and mite eggs. Repot only in spring, no more than one pot size up. Keep the plant slightly root-bound. That actually reduces stress and makes the whole organism more resilient to pests.
Frequently Asked Questions from My Own Struggle
Question 1: Can I use rubbing alcohol straight on every leaf? I did once. It caused brown burns on about 10% of the leaves, specifically the newer ones. It’s only safe for spot treatments with a cotton swab on visible webbing, and you should let it dry within 30 seconds. Do not soak the entire leaf. Neem oil is gentler for full coverage.
Question 2: Do I need to replace the topsoil after treatment? Yes, if you saw mites crawling down the trunk or noticed an accumulation of eggs in the soil. I replaced the top inch with a dry mix of bark and perlite. That discourages any mite eggs from living there. It also removes any fallen leaf debris which mites use as shelter.
Question 3: How do I clean neem residue that dries white on the leaf? That white residue is the soap scale. I had this issue with hard tap water. Use distilled water for your neem mix. The white residue usually comes from soap reacting with minerals in tap water. If you already have residue, wipe the leaves with a soft damp cloth with just distilled water. Cut the soap amount by half in your next spray.
Question 4: What if the leaf turns wrinkled during the two-week treatment? That happens if you over-handled the leaf or sprayed too much oil causing early leaf drop. Reduce the frequency of wiping on that particular leaf. Just spray lightly and let it dry without wiping. The leaf might recover fully. If it stays wrinkled for 2 weeks, snip it off to redirect energy.
Question 5: Is it too late if the whole tree is covered with heavy webbing? You can still save the main trunk. Cut off the most infected branches, leaving at least two-thirds of the healthy canopy. Bag those branches and throw them in the outside trash bin. Then execute the neem and wiping routine on the remaining healthy leaves. It will bounce back in one growing season.
I’m glad I took the time to handle this the safe way. It took patience, a bunch of microfiber cloths, and a few weeks of extra focus. But my Money Tree has never looked better. I still haven’t seen a single webbing strand. Safe removal really works, just as long as you stick to the routine and don’t skip the manual wipe step.





