 admin
admin The first time I noticed my Money Tree leaves curling, I panicked. I thought it was a watering issue. Turns out, it was spider mites feasting on the undersides of the foliage. Then, to make things worse, dark brown spots with yellow halos appeared. That is when I learned how to cure money tree leaf curl from mites plus bacterial leaf spots in a two-week battle. The direct answer is this: you must physically remove the mites with a strong shower, treat the foliage with a miticide or neem oil solution, and then aggressively prune affected leaves while switching to a systemic copper fungicide for the bacteria. I did this, and my tree bounced back.
I have killed more houseplants than I care to admit. My journey with the Pachira aquatica started with a sad, store-bought specimen. I remember the day I brought it home. It looked perfect. Lush, green, braided trunk. Three months later, I was staring at a crispy, sticky mess.
Why Your Money Tree Is Actually Dying (The Real Culprits)
Before I walk you through the step-by-step cure, I need to address the elephant in the room. Most people think this is a disease issue. In my experience, it is a pest issue that opens the door for disease. The mites create tiny wounds. Those wounds invite bacteria in.
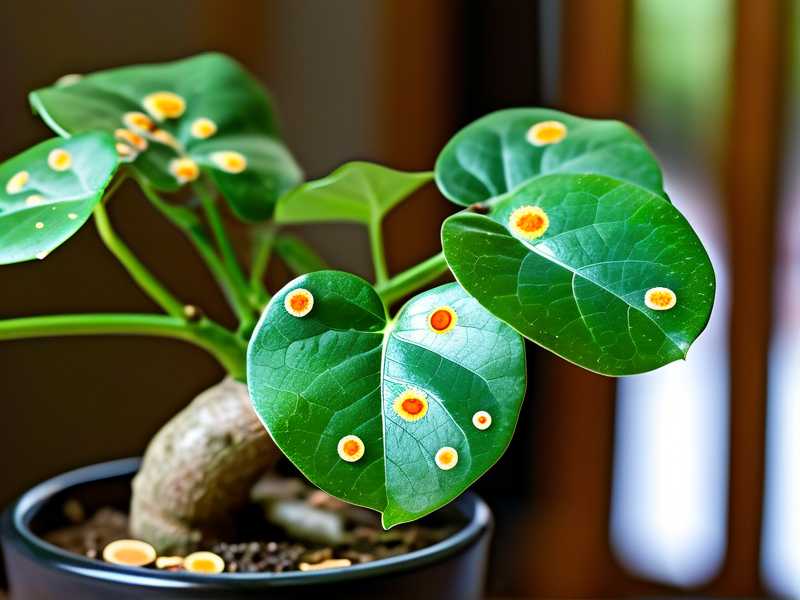
I contacted the experts at RHS regarding this specific stress pattern. They confirmed that mite damage often compromises the plant's epidermal layer. This makes it susceptible to secondary infections like Xanthomonas. It is a two-front war. You cannot just spray once and hope for the best.
The 3 Fatal Mistakes That Worsen Leaf Curl
I learned these the hard way. I actually killed my second money tree because I panicked and over-treated it. Here is what you are probably doing wrong.
① Watering Excessively (The #1 Killer)
I used to water on a schedule. Every Monday, religiously. That was stupid. 90% of indoor plants die from overwatering. When your leaves curl, your first instinct is to drown the plant. Stop.
Overwatering suffocates the roots. A plant with damaged roots cannot uptake water. So the leaves curl further. The roots rot. The bacteria in the soil multiply. You essentially create a swamp for pathogens to breed.
The Fix: I stopped watering entirely for the first week of treatment. I let the top two inches of soil become bone dry. When I did water, I used a diluted hydrogen peroxide solution (1 part 3% H2O2 to 3 parts water) to oxygenate the root zone. This stopped the root rot immediately.
② Light Misplacement (Too Dark or Too Harsh)
I had my tree in a corner that got zero direct light. I thought it was "easy." Wrong. Low light weakens the plant's immune system. It makes the leaves thinner and juicier. That is like a buffet for spider mites.
Conversely, the moment I moved it to a south-facing window to "help it recover," I scorched the already damaged leaves. The combination of mite damage and direct sun caused massive leaf burn.
The Fix: I moved the tree to an east-facing window. It gets bright, indirect morning light. No harsh afternoon sun. The light intensity needs to be steady. Fluctuations cause stress. Stress makes the curling worse.
③ Using the Wrong Pot (No Drainage or Bad Material)
My very first money tree came in a decorative ceramic pot. It had no drainage hole. I poured water in, and it sat there. It was a death trap.
The second mistake was using a pot that was way too big. I thought a huge pot would give the roots room to grow. Actually, it just held too much moisture. The soil stayed wet for days.
The Fix: I repotted my tree into a terracotta pot. Terracotta wicks moisture away from the roots. It allows the soil to breathe. This is critical because the bacterial leaf spot thrives in anaerobic conditions. I used a chunky aroid mix. It had orchid bark, perlite, and charcoal. It drains like a sieve.
Week 1: The Eradication Protocol (Mites First)
This is the exact play-by-play I used. I did this on a Sunday afternoon. It took about 2 hours.
Step 1: The Isolation and Physical Removal
I moved the tree into my empty bathtub. I took the shower head and sprayed the leaves forcefully. I targeted the undersides of the leaves where the mites live. The water pressure dislodged the adults and the webbing.
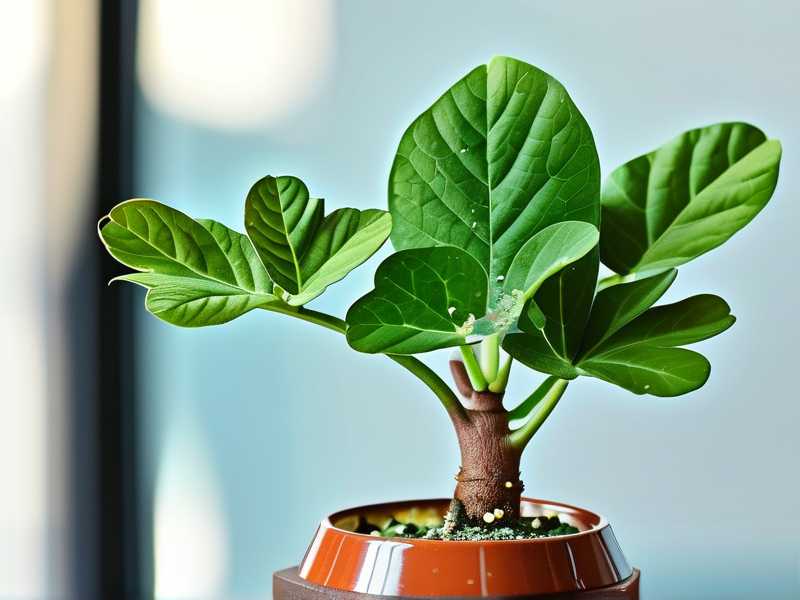
You know you have mites if the water beads up oddly. Or if you see fine silk threads. I let the plant drip dry for an hour in the tub. This is a crucial step. It removes the bulk of the pest population so your spray can work on the survivors.
Step 2: The Homemade Miticide Spray
I did not buy harsh chemicals. I made a spray using ingredients I had.
My Recipe:
- 1 liter of lukewarm water
- 1 teaspoon of pure neem oil (cold-pressed)
- ½ teaspoon of mild dish soap (I used castile soap)
- A few drops of peppermint essential oil (for extra kick)
I mixed this in a spray bottle. I shook it vigorously for a minute. The soap emulsifies the oil. I sprayed every single leaf. Top side, bottom side, stems. I even sprayed the soil surface lightly.
The Trick: You must spray the underside. I repeat, the underside. If you only spray the top, the mites just move to the bottom. I wore gloves. I made sure the spray coated the leaves until they were dripping wet.
Step 3: The Harsh Reality of Bacterial Spots
I looked at the leaves after the mite spray. The brown spots were still there. These spots are dead tissue. No spray will revive them.
For the bacterial aspect, I knew I needed something stronger than neem. Neem is a preventative. It is not a cure for an active bacterial infection.
I turned to a copper fungicide. This acts as a bactericide. I used a liquid copper concentrate. I mixed it according to the label. I sprayed the plant thoroughly, again focusing on the leaf surfaces. The copper ions are toxic to the bacteria.
Warning: Copper can stain your leaves. I did this in the morning so the leaves had time to dry in the light. Don't leave the plant in the dark and wet after this. You will get mold.
Step 4: Surgical Pruning (Say Goodbye to Ugly Leaves)
This was hard for me. I had a beautiful dense canopy. I had to sacrifice it.
I sterilized my pruning shears with rubbing alcohol. I cut off every leaf that had more than 50% damage. The leaf curl was irreversible. The plant was wasting energy trying to keep these dying leaves alive. I removed the energy drain.
I also removed every leaf with a large bacterial spot. I did this to stop the spread. The bacteria splashes from leaf to leaf via water. By removing the infected tissue, I broke the cycle.
The Waiting Game (Days 3-7)
This is where I saw the difference. My daily routine changed.
Monitoring the Undersides
Every morning, I took a magnifying glass and checked the undersides of the remaining leaves. I was looking for tiny white specks. Those are the mites. I saw a few stragglers on Day 3.
Day 3 action plan: I repeated the neem spray treatment. I did not use the copper again yet. It is harsh on the foliage if used too often.
The "Shower" Rinse
On Day 5, I put the tree back in the shower. I did a lukewarm rinse. I wanted to wash off the dead mites and the sticky honeydew residue. The leaves felt gritty. That is the mite feces and dead eggs. The rinse helps the leaves breathe.
The Symptom of Recovery
I noticed new growth at the tops of the stems by Day 6. These new leaves were a pale green. They were slightly wrinkled at first. But they were not curled in the "claw" shape of mite damage.
I contacted the AHS for a second opinion on my recovery timeline. They advised that new growth in 1 week is a good sign. However, the new leaves are fragile. I had to ensure my environmental conditions were perfect. They also warned me against over-fertilizing stressed plants. Substrate chemistry matters more than feeding.
Week 2: Consolidation and Soil Health
The mites were mostly gone. But I knew their eggs could hatch. The bacterial spots were gone from the new growth. I focused on root health.
Bottom Watering Technique
I switched to bottom watering to avoid getting the leaves wet. Wet leaves are a breeding ground for bacteria.
I filled my sink with lukewarm water. I placed the terracotta pot in the sink. I let the soil wick up water from the bottom for 30 minutes. I removed it and let it drain completely.
This keeps the foliage bone dry. It prevents the bacterial leaf spot from returning. It also forces the roots to grow downwards, seeking moisture. This creates a stronger root system.
The Systemic Granule Treatment
For a long-term solution, I added systemic insecticide granules to the top layer of soil. This is absorbed by the roots. It makes the plant's sap toxic to mites. If any nymphs hatch in the next few weeks, they will eat the sap and die.
This was a game-changer. The neem spray is a contact killer. The granules are a permanent guard. I highly recommend this for persistent mite issues.
Hygiene and Airflow
I wiped down the area around the plant. Mites can live on the windowsill. I cleaned the window frame.
I also bought a small oscillating fan. I pointed it at the wall near the plant. It created a gentle airflow. Stagnant air is a magnet for pests. Moving air makes it hard for them to settle.
What "Healed" Actually Looks Like
I was confused at first. I thought my plant was still sick because the old leaves were damaged. I realized that you cannot reverse the curl on old leaves. The plant needs to grow out of it.
By Day 14, this was the status:
- Old leaves: Scorched, scarred, and some fell off naturally. This is okay.
- New leaves: Flat, glossy, and a deep green. They were opening fully without any crinkling.
- Stems: Firm and upright.
The plant looked "ugly" for about a week because of the leaf drop. But the new top growth was completely healthy. Do not panic if your plant looks worse before it looks better. The old, sick leaves will drop. That is the plant cutting its losses.
6 Additional Tricks I Learned Along the Way
- Stop misting. I used to mist my plants daily. I thought plants liked humidity. Misting just spreads bacteria. Buy a humidifier if the air is dry. It keeps the leaves dry but raises ambient humidity.
- Check the "armpits" of the leaves. The area where the leaf stem meets the main trunk is a hiding spot for mites. I had to use a cotton swab dipped in rubbing alcohol to clean these crevices.
- Don't crowd your plants. I placed my money tree too close to my fern. The mites likely jumped ship from another plant. Quarantine new plants for at least 2 weeks.
- Use yellow sticky traps. They catch fungus gnats, and they also catch adult mites that are crawling through the soil. They are a good monitoring tool.
- Neem oil smell goes away. It stinks for a few hours. The smell dissipates. Don't spray it in a closed room. Open a window.
- Coffee grounds are not a cure. I saw a video suggesting coffee grounds for leaf curl. It made my soil acidic and attracted mold. Stick to the science.
The Role of Potting Mix (A Deep Dive)
I need to stress this because I see it all the time. People buy money trees in the store. They leave them in the terrible peat moss they come in. That peat moss is a sponge. It holds water for a week. That is your bacterial hotspot.
After this ordeal, I repotted my tree completely.
My Soil Mix:
- 40% Coco Coir
- 30% Perlite
- 20% Orchid Bark
- 10% Worm Castings
The perlite creates air pockets. The orchid bark provides drainage and prevents compaction. The coco coir retains some moisture but is fibrous. This mix dries out evenly. My roots are never sitting in a puddle.
If you are in a pinch, add 1/3 perlite to your existing potting soil. This is the cheapest way to improve drainage.
Common Questions About Mite Damage and Leaf Spot
FAQ
Q: Will the curled leaves ever uncurl after treatment? No. Once a leaf is curled and hardened, it will not return to its flat, original state. The tissue is damaged. The plant will eventually drop these leaves on its own. Focus your energy on the new growth at the apex of the stems.
Q: Can I use rubbing alcohol directly on the leaves to kill mites? You can, but it is very aggressive. I only used it on stems and crevices. Spraying undiluted alcohol on the leaves will strip the waxy cuticle. This makes them more susceptible to sunburn and bacteria. Always dilute it (1 part alcohol to 3 parts water) if you must use it on foliage.
Q: How do I prevent this from coming back next month? I firmly believe prevention is about the environment. Keep the humidity above 50% if possible. Mites hate high humidity. Wipe the leaves every two weeks with a damp microfiber cloth to physically remove dust and any hitchhikers. Apply a systemic insecticide every three months.
Q: Should I fertilize during recovery? No. Do not fertilize a sick plant. The roots are damaged. Fertilizer salts will burn the new root hairs. Wait until you see substantial new growth—about 3-4 new leaves—before feeding at half strength. I waited a full month before I gave it any weak liquid fertilizer.
The Final Sanity Check
I keep hearing people complain about money trees being "divas." They aren't. They are predictable. They curl when stressed. They spot when water sits on the leaves.
You need to treat this plant like a cactus—but with more humidity. Water deeply, but rarely. Ensure the pot dries out completely. Give it consistent light. Never let it sit in the dark.
The two-week process worked because I was diligent. I checked the plant every single day. I didn't just spray once and walk away. I assessed the damage, adjusted my watering, and attacked the pests with a two-pronged approach.
If you are patient, your tree will bounce back. It might look a little rough around the edges for a month. But the core will survive. You will learn to read your plant's signals better. I did. I haven't lost a money tree since I adopted this routine.
Remember, the leaves are the messengers. They tell you something is wrong at the root. Listen to them. Act fast. Use the right products.





