 admin
admin How to Treat Pest-Spray-Plus-Mold-Damaged Brown Money Tree Leaf Edges
If your money tree leaf edges are brown, crispy, and showing fuzzy mold after a pest spray treatment, stop everything. The fix is: gently rinse the leaves with lukewarm distilled water, prune the damaged edges with sterilized scissors, repot only if the soil smells sour, and move the plant to bright indirect light with 60% humidity for two weeks. I learned this the hard way after nearly killing my second Pachira aquatica.
Let me be real with you. I treated a spider mite outbreak with a commercial pyrethrin spray. Then the leaf edges turned brown and a grayish fuzz appeared. I panicked. I almost reached for more fungicide. That would have been a disaster. The spray had already burned the leaf tissue, and the mold was feeding on the dead cells.
So here is exactly what I did, day by day, for two weeks. Plus the mistakes that got me into this mess in the first place.
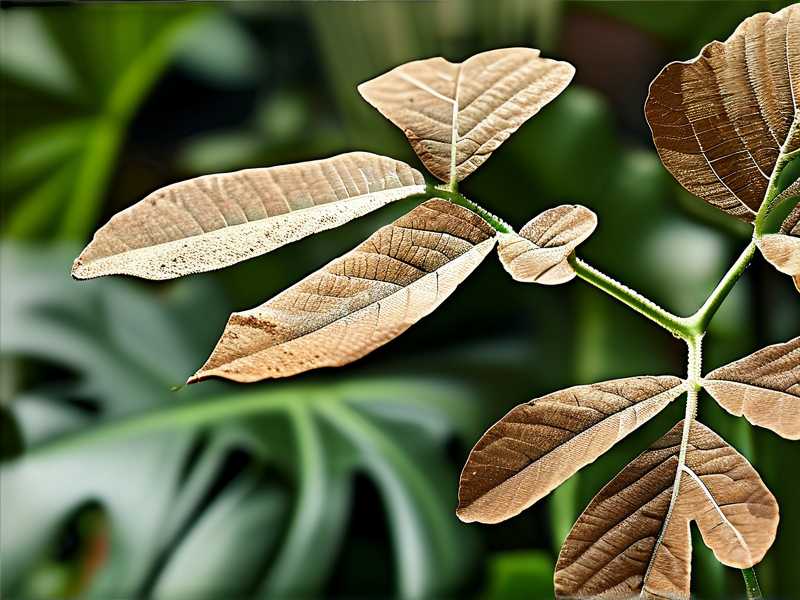
The Real Cause: Spray Burn + Saprophytic Mold
First things first. You need to understand what happened. The pest spray, especially oil-based or pyrethrin formulas, can burn leaf edges if the plant is in direct sun or if the spray is too concentrated. The damaged tissue then dies. That dead tissue, combined with high humidity and poor air circulation, invites saprophytic mold. That's the fuzzy gray or black stuff.
90% of indoor plants die from overwatering. But in this case, the mold is not necessarily from wet soil. It is from wet, damaged leaves. I had to stop treating the mold as a soil problem. It was a leaf surface problem.
I remember reading advice from the RHS about fungal issues on stressed foliage. They emphasize removing affected tissue and improving airflow. I also checked the AHS guidelines on chemical damage. They basically said what I suspected: spray damage predisposes leaves to secondary infections. That gave me a clear path forward.
My Two-Week Recovery Plan: Step by Step
Day 1: Stop Everything and Assess
I did not water. I did not spray. I did not fertilize. I just looked at the plant.
The brown edges were dry and crispy in some spots. Other spots felt mushy and had a white-gray fuzz. The soil surface looked fine, but I stuck my finger two inches deep. It was still damp from before the spray incident.
Here is my honest advice: before you touch anything, wait 24 hours after the last spray. Let the chemical residue settle. Then inspect with a magnifying glass. If you see tiny webs under the leaves, spider mites are still alive. If not, you only have chemical burn and mold.
I saw no webs. Good. So my mission was simple: remove the burn, stop the mold, and help the plant push new growth.
Day 2: The Gentle Rinse (My Biggest Lesson)
I tried wiping the leaves with a dry paper towel first. Terrible idea. The fuzz just smeared. I was rubbing mold into the healthy tissue.
Then I used lukewarm distilled water. I filled a spray bottle with plain water and misted the leaves heavily. Then I took a soft microfiber cloth and wiped each leaf individually, top and bottom. I had to be careful because the leaf edges were extremely fragile.
The secret was to dab, not wipe. Dabbing lifts the mold without breaking the fragile brown tissue. I repeated this process three times, using a fresh section of the cloth each time.
If you still have active pest issues, do not rinse with plain water only. Add one drop of mild dish soap per liter of water. But since my pests were gone, I skipped the soap. Just water.
After rinsing, I placed the plant in front of a small fan set on low for two hours. That dried the leaves completely. Wet leaves overnight would have invited more mold.
Day 3: Pruning the Dead Edges (Scissors Matter)
I know you want to leave the leaves alone. I did too. But brown, moldy edges are dead tissue. They will never turn green again. They only drain energy and spread spores.
I took sterilized pruning scissors. I dipped them in 70% isopropyl alcohol and let them air dry. Then I trimmed the brown edges, following the natural curve of the leaf. I left a tiny margin of brown tissue because cutting into green tissue can cause further dieback.
The hardest part was cutting away half of an otherwise healthy leaf. I kept one leaf with two-thirds brown removed because the base was still green and viable. It looked ugly, but the leaf still photosynthesized.
After each cut, I wiped the scissors with alcohol again. You absolutely cannot skip this if you have mold. Otherwise, you are spreading spores to every healthy leaf you touch.
Day 4: The Repotting Decision
Here is where most people screw up. They see mold on leaves and immediately repot. That is wrong.
I checked the roots first. I gently slid the plant out of its nursery pot. The roots were white and firm, not brown or mushy. The soil smelled earthy, not sour or rotten. So I did not repot. Repotting would have added stress to an already struggling plant.
But if your roots are dark and mushy, or if the soil smells like sewage, you need to repot urgently. Use a well-draining mix of coco coir, perlite, and orchid bark. Choose a pot with drainage holes. Do not use a decorative pot without holes.
I also lifted the pot to feel its weight. Heavy means waterlogged. Light means dry. My pot was moderately heavy, so I held off watering.
Newbie mistake number one: watering on a schedule. I used to water every Monday. Wrong. You must water based on soil moisture. Stick your finger in the soil. If it is dry up to your second knuckle, water. If not, wait. I now use a wooden chopstick stuck in the soil for ten minutes. If it comes out dark and wet, skip watering.
Day 5: Fixing the Humidity (But Not in the Way You Think)
Mold loves high humidity. But money trees also love humidity. Contradiction, right?
The trick is to raise humidity without leaving water on the leaves. I placed a small humidifier about three feet away from the plant. I set it to 60% and aimed the mist away from the foliage. That created ambient moisture without wetting the leaves.
I also filled a pebble tray with water and set the pot on top. The pot sits on the pebbles, not in the water. As the water evaporates, it creates a humid microclimate around the lower leaves.
Do not mist the leaves. I know many guides say to mist. But misting with damaged edges is like painting a target on your plant for mold spores. Skip the misting.
Day 6-7: The Waiting Game (and a Lighting Correction)
Nothing visible happened for two days. I wanted to see new growth immediately. Patience is not my strength.
I realized my plant was in a spot that got direct afternoon sun. That was part of the original problem. The oil-based spray combined with direct sun created a magnifying glass effect. That is what actually burned the leaf edges.
I moved the plant to an east-facing window with sheer curtains. It gets bright, filtered light from 8 AM to noon. Then indirect light for the rest of the day.
Newbie mistake number two: putting plants in direct sun without acclimation. Money trees can handle some morning sun, but they really prefer bright indirect light. Direct afternoon sun often leads to leaf scorch, especially on young leaves. If you only have a south window, pull the plant back three feet or use a thin curtain.
The mold spots started to dry out by Day 7. They turned from fuzzy to flat and crusty. That was a good sign. Dead mold is harmless once dried. I still could not remove them without damaging the leaf, so I left them.
Day 8: First Real Watering Since the Incident
The soil was finally dry down to about three inches. I used distilled water at room temperature. Tap water can contain chlorine and fluoride, which build up and stress already damaged roots.
I watered slowly, in circles around the pot rim, until water ran out of the drainage holes. Then I emptied the saucer. Never let the pot sit in standing water. That is how root rot starts.
Newbie mistake number three: using the wrong pot. I have killed plants in pots without drainage holes. I have also kept plants in oversized pots where the soil stayed wet for weeks. The money tree likes to be root-bound-ish. A pot only 1-2 inches larger than the root ball is ideal.
If your money tree is in a heavy ceramic pot with no drainage, repot it immediately. This is non-negotiable. A plastic nursery pot inside a decorative cachepot is fine, as long as you dump the excess water.
Day 9-10: Spot-Treatment with a Soft Brush
I found a few new fuzzy spots near the petioles. A tiny makeup brush with soft bristles worked wonders. I dipped it in a solution of 1 part 3% hydrogen peroxide to 3 parts water. Then I dabbed the fuzzy areas.
The hydrogen peroxide fizzes on contact with organic matter. That kills mold spores on the surface without harming the leaf tissue. But do not drench the leaves. Only dab the affected spots. This solution also helps dry out any remaining spores.
I left the plant alone for the rest of those two days. Acting too much is as bad as doing nothing. The leaves were stressed. They needed stable conditions, not more treatments.
Day 11: Assessing New Growth
I saw a tiny, pale green nub emerging from the top of the stem. That was a new leaf. This was the first sign of recovery. The plant redirected energy to new growth because the old damaged leaves were no longer productive.
I did not fertilize yet. The plant was still recovering. Fertilizing a stressed plant is a sure way to burn its roots. I waited until the new leaf fully expanded.
Day 12-13: Removing the Ugly Leaves (When Necessary)
I had two leaves that were more than 70% brown. I decided to remove them entirely at the petiole. Cutting them off at the stem joint with sterilized scissors.
Why? Because a leaf that is mostly dead costs more energy to maintain than it provides. The plant is better off shedding it. In nature, money trees drop damaged leaves. We just help the process along sometimes.
I left the leaves that were 30-50% damaged because they still have enough green area to feed the plant.
Day 14: The Verdict
After two weeks, the mold was completely gone. The brown edges were trimmed. No new browning appeared. Two new leaves had started to unfurl. The plant looked rough, sure, but it was healthy.
The moral of this story is simple. Most money tree problems after pest spray are caused by the spray itself, not the pests. You have to remove the chemical residue. You have to treat the mold as a secondary issue. And you have to give the plant stable conditions to recover.
My 3 Biggest Newbie Mistakes (So You Don't Make Them)
Mistake 1: I Watered on a Schedule
I used to water every Sunday. The topsoil looked dry, so I thought the plant needed water. In fact, the bottom half of the pot was still soaked. The roots were sitting in wet, compacted soil. That led to root rot and made the leaf edges brown before I even sprayed anything.
The fix: Stick your finger two inches deep. Only water if it feels dry. Use a moisture meter if you are unsure. And ensure the pot has drainage holes. Water thoroughly but rarely.
Mistake 2: I Put the Plant in Harsh Afternoon Sun
Money trees are understory plants. They grow under the canopy of larger trees in Central and South America. They get dappled light, not full sun. When I placed mine on a south-facing balcony, the leaves burned within a week. The edges turned brown and crispy. That made the subsequent pest spray damage even worse.
The fix: Bright, indirect light is the sweet spot. An east-facing window or a spot a few feet away from a south or west window works best. If you see pale, scorched patches, move the plant away from the window immediately.
Mistake 3: I Used a Pot That Was Way Too Big
My third money tree went into a 12-inch pot when the original nursery pot was only 6 inches. I thought it would give the roots room to grow. In reality, the excess soil held too much water. The roots stayed wet and rotted. The mold loved that environment.
The fix: Only step up 1-2 inches in pot diameter when repotting. A pot that is too large is worse than one that is slightly snug. Always ensure the pot has at least one drainage hole.
How to Prevent This From Happening Again
There are a few extra tips I picked up along the way. I want to share them because they have made a big difference in my plant care routine.
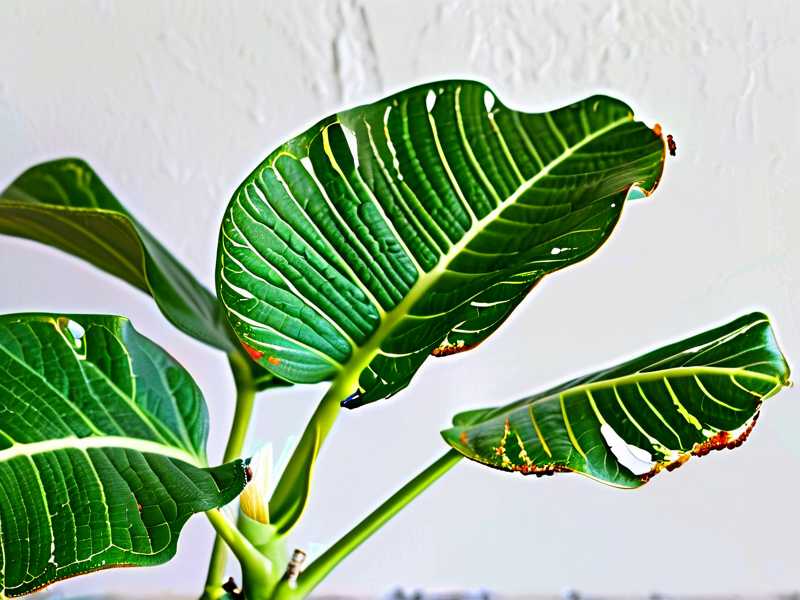
Read the Pesticide Label Carefully
This sounds obvious, but I learned it the hard way. Some sprays are strictly for outdoor plants. They are too strong for indoor use. Look for products labeled safe for indoor foliage plants. Check if the spray is oil-based. Oil-based sprays require the plant to stay out of direct sunlight for at least 48 hours. I missed that warning once.
Dilute More Than Recommended for Delicate Plants
Money tree leaves are actually quite thin. They are not like the thick, leathery leaves of a jade plant. A full-strength pyrethrin spray can burn them. I now dilute to half the recommended strength for new batches of chemicals. I test on one single leaf first, wait 48 hours, and if that leaf looks okay, I spray the rest.
Improve Air Circulation Around the Plant
Stagnant air is mold's best friend. I now keep a small oscillating fan in the corner of my plant room. It runs on low for a few hours each afternoon. The gentle breeze dries any moisture on the leaves and prevents spore germination. Just do not blow the fan directly on the plant for long periods, as that can dry out the soil too fast.
Quarantine New Plants and Infected Plants
I bring new plants into a separate room for at least two weeks. I do this to ensure they are pest-free before joining the rest of my collection. When I had the spider mite outbreak, I moved the affected plant to the bathroom while treating it. That prevented the mites from jumping to my other plants. It also meant the spray residue did not drift onto my healthy plants.
FAQs
Why did my money tree leaves turn brown after I sprayed for pests?
Spray burn is the most likely cause. Chemical pesticides, especially oil-based ones, damage leaf tissue when applied in direct sun or at too high a concentration. The leaf edges are the thinnest part, so they brown first. Additionally, some plants are more sensitive to certain active ingredients than others. I have had success with insecticidal soap at half strength, but pyrethrin always makes my money trees react.
Can my money tree recover from brown leaf edges?
Yes, but the brown parts will never turn green again. You have to prune off the brown edges with sterilized scissors. The key is to catch the problem early. If a leaf is more than 70% brown, remove it entirely. If it is less than that, trim the edges and give the leaf a chance to keep photosynthesizing. New growth will emerge from the stem tips once the plant regains its strength. I have seen this happen with multiple of my own plants.
Should I repot a money tree with mold on its leaves?
Only if the mold is on the soil. Mold on the leaves is usually saprophytic, meaning it feeds on dead tissue. Remove the dead leaf parts and dry the foliage, and the mold will go away. If the mold is on the soil surface, that is a sign of overwatering. In that case, stop watering until the top two inches of soil are bone dry. If the roots are mushy and the plant is wilting, then repot immediately into a fresh, well-draining mix.
Final Thoughts on Saving Your Money Tree
I have killed more plants than I want to admit. But every dead plant taught me something. The money tree taught me to be patient and to stop reaching for chemical solutions when a little water and light adjustment would do the trick.
After these two weeks, my money tree is not perfect. The leaves are a bit ragged from my pruning. But it has pushed out three new leaves, and there is no sign of mold or burn spreading. I have moved it back to its usual spot, and I am keeping a close eye on it.
The most important piece of advice I can give you is: when you see a problem, do not overreact. The plant does not need more chemicals. It needs stability. Give it proper light. Water only when the soil is dry. Remove the dead tissue. And let time do the rest.
You might also want to check your other indoor plants for pests. If one plant had spider mites, your others might have them too. Treating everything at the same time with a safe, diluted insecticidal soap, or just neem oil, is better than waiting for an outbreak. Prevention is always easier than treatment.
Money trees are truly resilient. They bounce back from ugly leaf damage if you give them the right conditions. I genuinely believe your plant will push out fresh, green growth soon. The brown edges do not mean your plant is dying. It simply means your plant went through a rough patch. We all do sometimes.





