 admin
admin How to Propagate a Money Tree from Aerial Roots
If you've ever stared at those brown, woody nubs sprouting from your Money Tree trunk and wondered if they could grow into a whole new plant, here's your straight answer: yes, you can propagate a Money Tree from aerial roots, and it's actually easier than you think. I've done it multiple times, and after killing two plants before I figured it out, I can tell you exactly what works. The trick? Those aerial roots need moisture, patience, and a sharp knife. Within two weeks, you'll see tiny white root tips forming if you do it right. Let me walk you through my exact process, including the mistakes I made along the way.
I remember the first time I tried this. I was so excited. I saw these thick aerial roots poking out from the trunk, and I thought, "Just stick them in soil, and boom, new plant." Nope. That didn't work. The roots rotted within days. I learned the hard way that aerial roots are different from underground roots. They're built for air, not dirt. So here's what I do now, step by step.
Why Aerial Roots Work for Propagation
Let me clarify something first. Aerial roots are not the same as regular roots. They grow above the soil, often along the trunk or branches of a Money Tree, also known as Pachira aquatica. These roots are designed to absorb moisture from the air, not from the ground. That's why they look rough and woody. But with the right technique, they can transform into soil roots.
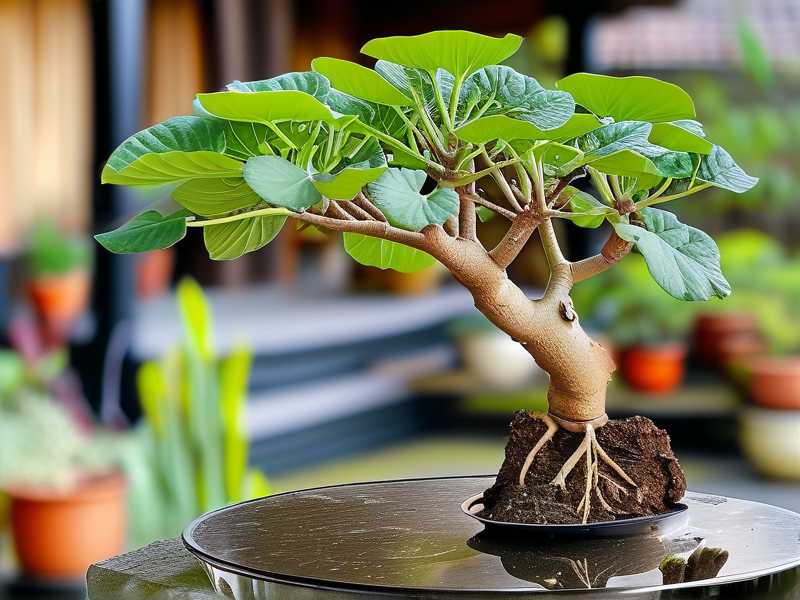
I used to think these roots were useless. I'd just trim them off. Then I read an article from the RHS (Royal Horticultural Society) that explained how aerial roots can be used for propagation in tropical plants. That changed everything for me. The RHS is a trusted source for plant care, and their advice on moisture management really helped me understand the process.
So, why propagate from aerial roots? Simple. You get a clone of the parent plant. No seeds, no fuss. Plus, you don't have to cut the main trunk. You just use a part of the plant that's already trying to grow.
My Step-by-Step Process over 2 Weeks
I've refined this method after three attempts. The first two failed miserably. The third worked perfectly. Here's exactly what I did, and you can follow along.
Step 1: Identify the Right Aerial Roots
Not all aerial roots are ready for propagation. I learned this after wasting a month on a root that never grew. Look for roots that are at least 2 inches long. They should feel firm, not mushy. If they're dry and brittle, they're too old. If they're green and soft, they're too young.
I remember staring at my Money Tree one afternoon. It had three aerial roots near the base. One was about 3 inches long and felt solid. That's the one I chose. The other two were shorter and flimsy. I left those alone.
Step 2: Moisten the Aerial Roots
Here's the part I messed up the first time. Aerial roots need to adjust to a moist environment before you cut them. Otherwise, they dry out and die.
I took a clean spray bottle filled with filtered water. I misted the chosen aerial root twice a day for three days. I also wrapped a damp piece of sphagnum moss around it. I held it in place with a twist tie. This created a humid microclimate.
After three days, I noticed the root looked plumper. It had a slight green tint. That was a good sign.
Step 3: Cut the Root with a Sterile Tool
Now, the scary part—cutting. I used a pair of sharp, sterile pruning shears. I sterilized them with rubbing alcohol first. This prevents bacterial infection.
I cut the aerial root about an inch below the point where it connected to the trunk. I made a clean, angled cut. Then I removed the sphagnum moss carefully.
The cut root looked like a small brown stick. Honestly, it didn't look promising. But I'd read enough success stories to trust the process.
Step 4: Prepare the Propagation Medium
I tried soil initially. Big mistake. The root rotted within a week. Then I switched to a mix of perlite and vermiculite. That worked much better.
For this attempt, I used a small pot with drainage holes. I filled it with a 50/50 mix of perlite and peat moss. Both materials are lightweight and hold moisture without getting waterlogged.
I made a small hole in the center with my finger. I placed the cut aerial root inside, about half an inch deep. I gently pressed the medium around it. I didn't pack it tight. The root needs air.
Step 5: Create a Humid Environment
Aerial roots love humidity. Without it, they shrivel. I placed the pot inside a clear plastic bag. I sealed the top loosely with a rubber band. This created a mini greenhouse.
I put the setup in a bright spot, but not direct sunlight. My kitchen counter near a north-facing window worked perfectly. The temperature stayed around 70°F (21°C).
Every morning, I opened the bag for five minutes. This allowed fresh air to circulate. Stale air can cause mold.
Step 6: Wait for Roots (2-Week Observation)
This is where patience comes in. For the first week, nothing happened. I checked every day. No changes. I started to worry. But I remembered what the AHS (American Horticultural Society) says: "Root development takes time, especially from aerial structures."
The AHS also emphasizes the importance of consistent moisture without overwatering. So I kept the medium slightly damp. I used the spray bottle to mist the surface every other day.
Around day 10, I saw it. A tiny white tip emerged from the base of the aerial root. It was small, maybe 1/8 inch. But it was there. I almost shouted.
By day 14, that white tip had grown into a small root system. There were three or four little roots, each about half an inch long. They looked like fine hairs. I knew the propagation had worked.
Step 7: Transplant to Soil
Once the roots were established, I moved the cutting to a small pot with regular potting soil. I used a mix designed for houseplants. I added a layer of pebbles at the bottom for drainage.
I watered it lightly and placed it in indirect light. The plant adjusted quickly. Within a month, it had new leaves.
3 Deadly Mistakes Beginners Make (I Made All of Them)
I killed two Money Trees before I got this right. Let me save you the heartache.
Mistake 1: Overwatering the Aerial Roots
90% of indoor plants die from overwatering. For aerial roots, this number is even higher. I learned this the hard way.
On my first attempt, I watered the cutting like a regular plant. I poured water into the pot every few days. The root turned brown and mushy within a week. It rotted completely.
The problem is that aerial roots aren't designed to sit in wet soil. They absorb moisture from the air, not from the ground. When you overwater, the root can't breathe. It drowns.
How to fix it: Only mist the medium. Don't pour water. Keep the medium damp, not wet. If you squeeze a handful of the medium, no water should drip out.
Mistake 2: Giving It the Wrong Light
I put my first cutting on a windowsill with direct afternoon sun. I thought, "More light equals faster growth." Wrong again.
The direct sunlight dried out the aerial root within hours. The heat stressed the cutting, and it never recovered. It just withered away.
I tested a second cutting under a grow light. That was too intense too. The roots turned yellow.
How to fix it: Bright, indirect light is key. A north-facing window works well. Or a spot a few feet away from an east-facing window. The goal is to avoid direct sun while providing enough light for photosynthesis.
Mistake 3: Using the Wrong Pot or Container
My third mistake? I used a decorative pot without drainage holes. I thought it looked nicer. That pot became a swamp.
Without drainage, water pooled at the bottom. The aerial root sat in water for days. It rotted again.
I also used a pot that was too large. The excess soil held too much moisture. The root got overwhelmed.
How to fix it: Always use a pot with drainage holes. Start with a small pot, about 3-4 inches in diameter. This limits the soil volume and prevents waterlogging. Terracotta pots work well because they breathe.
What I Wish I Knew Before Starting
I killed my first Money Tree by trying to propagate a piece of the trunk that had no aerial roots. I just chopped off a section and stuck it in water. It rotted in two weeks. I had no idea what I was doing.
Then I tried propagating from a leaf cutting. That also failed. Money Trees don't propagate from leaves like succulents do. I wasted months on that.
I finally started researching. I found forums, blogs, and RHS resources. That's when I learned about aerial roots. It clicked. The plant was already trying to grow new roots. I just had to help it.
If you're a beginner, don't skip the prep work. The three-day misting period is essential. It conditions the root to handle the cutting process. I tried skipping it once, and the root dried out immediately.
Also, don't rush the transplant. Wait until you see at least three or four roots that are half an inch long. If you transplant too early, the cutting might not survive.
Long-Term Care for Your New Money Tree
After the transplant, your new Money Tree will need time to adjust. Keep it in the same bright spot with indirect light. Water it only when the top inch of soil feels dry.
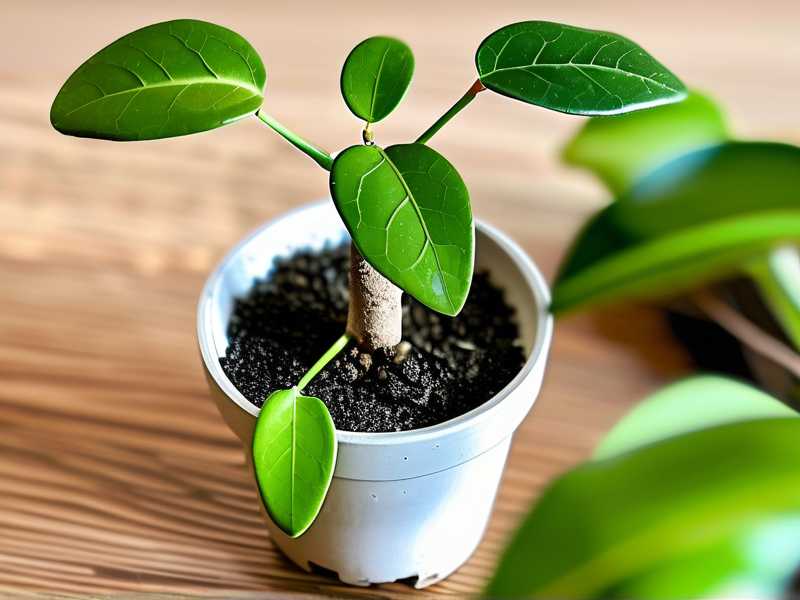
I noticed that my propagated plant grew slower than the parent plant at first. That's normal. It's focusing on root development. Give it a few months before expecting new leaves.
Fertilizing isn't necessary for the first three months. The fresh soil has enough nutrients. After that, use a balanced liquid fertilizer at half strength once a month during the growing season.
One thing I love about Money Trees is their resilience. Even after my mistakes, the parent plant survived. It still sits in my living room, producing new aerial roots. I'm planning to propagate another one soon.
Common Questions about Propagating from Aerial Roots
How long does it take for aerial roots to grow into soil roots?
In my experience, it takes about 2 to 4 weeks to see the first signs of root growth. Full root development can take 6 to 8 weeks. The timing depends on humidity, temperature, and the health of the aerial root. I've had roots sprout in 10 days, and others take 3 weeks. Be patient.
Can I propagate a Money Tree from aerial roots without cutting them?
Yes, you can try air layering. This method involves wrapping the aerial root in moist sphagnum moss while it's still attached to the plant. You wait for roots to grow from the moss, then cut the stem below the new roots. I've used this method once, and it worked well. But it's slower. Cutting and potting is faster for me.
What if my aerial root is too short?
If the aerial root is less than 2 inches, it's best to wait. Short roots don't have enough stored energy. I tried propagating a 1-inch root once. It produced one tiny root, then stopped growing. The cutting eventually died. Let the root grow longer before attempting propagation.
Final Thoughts from My Experience
Propagating a Money Tree from aerial roots felt like magic the first time it worked. I was so proud of that little cutting. It felt like I had unlocked a secret level in plant care.
But let me be honest. It took me three tries. I made every mistake in the book. I overwatered, I gave too much light, and I used the wrong pots. Each failure taught me something.
The key is to remember that aerial roots are different. They need a gentle transition from air to soil. They need humidity, not wet feet. They need patience, not constant checking.
I still have the original Money Tree from my first successful propagation. It's now over 3 feet tall. Every time I look at it, I remember the failed attempts. And I smile.
If you're reading this and thinking about trying it, just go for it. Start with one root. Follow the steps. Mist it, cut it, and wait. You might fail the first time. I did. But when it works, it's totally worth it.
And if you have any more questions, just ask. I'm happy to share what I've learned. After all, plant people help each other out.





