admin
admin You're staring at a leaf with a suspicious spot, and your brain is screaming: is this normal or is my plant dying? I've been there more times than I'd like to admit. Here's the straight answer: natural leaf spots are usually uniform, dry, and don't spread, while infectious leaf disease features irregular, wet-looking lesions that grow within days. 90% of indoor plants die from overwatering, and that's exactly why most leaf spots you'll encounter are actually not diseases at all—they're just your plant telling you it's stressed. Let me walk you through exactly how I learned to tell the difference, including the mistakes I made with my first five houseplants.
Why Every Plant Parent Panics Over Leaf Spots
I remember the first time I saw brown spots on my prized Monstera. My heart sank. I immediately assumed fungal infection, grabbed the nearest fungicide, and sprayed everything in sight. Turns out, I was treating a sunburn like a plague.
The truth is, most leaf spots are harmless. They're like freckles on human skin. But some are genuinely dangerous, and knowing the difference saves your plant's life.
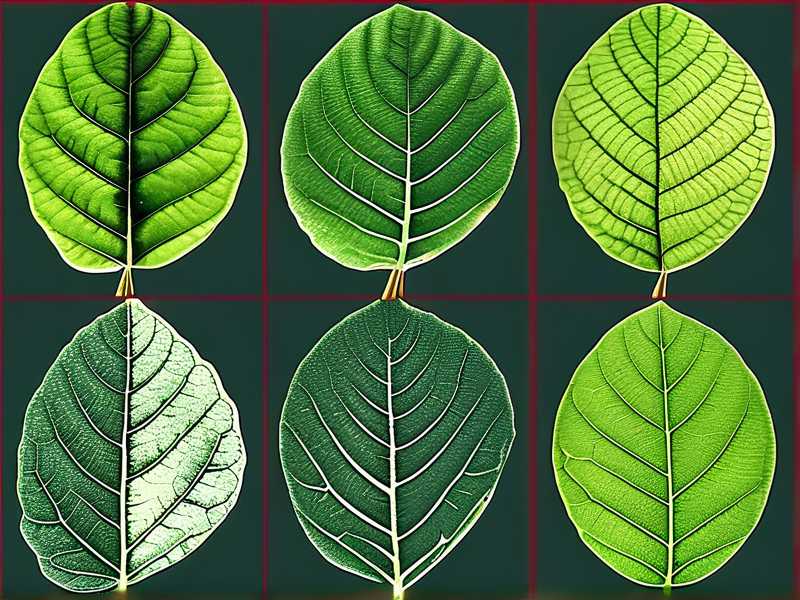
So what's actually going on with those spots? Let me break this down without the textbook jargon.
What Natural Leaf Spots Look Like
Natural spots have a certain "calm" energy. They don't spread aggressively, they don't change the leaf's texture dramatically, and they usually appear on older leaves first. Think of them as the plant equivalent of a wrinkle or a scar.
Edema and Water Stress Marks
This is the big one. I can't stress this enough—most indoor plants die from overwatering, and the earliest symptom often shows up as leaf spots. Edema looks like small, corky, brownish bumps on the underside of leaves. The leaf tissue basically bursts because it's taken in more water than it can process.
I saw this on my Pothos after I got a little too enthusiastic with the watering can. The spots looked concerning, but here's the thing—they stayed the same size. They never grew. The texture was raised and almost scabby.
Sunburn and Light Damage
My Fiddle Leaf Fig taught me this lesson the hard way. I moved it closer to a south-facing window because I thought it needed "more light." Within a week, pale, bleached spots appeared on the leaves that faced the glass.
These spots are typically dry, thin, and papery. They don't spread to other leaves. They don't have a ring pattern. And honestly, they look exactly like what they are—plant sunburn.
Genetic Variegation and Natural Pigmentation
Some plants just have spots as part of their identity. Calatheas, certain Hoya varieties, and many orchids naturally sport speckled or mottled leaves. My Hoya pubicalyx has these beautiful silver speckles that look like someone splattered paint on it.
These spots don't change. They're consistent in pattern, and all leaves from the same plant share similar markings. There's no yellowing around them, no spreading, no texture change.
Age-Related Senescence
Old leaves eventually die. That's just biology. As a leaf ages, it might develop brown tips, yellow patches, or speckling before it yellow completely and drops. My Spider Plant does this constantly with its older outer leaves.
The key here? The spots and discoloration start at the leaf tip or edge, and there's a clear gradient of yellowing before the brown. It's slow, it's predictable, and new growth looks perfectly healthy.
What Infectious Leaf Disease Looks Like
Here's where things get serious. Infectious diseases are caused by pathogens—fungi, bacteria, or viruses. They're living organisms that need to feed and spread. They don't just sit there.
Fungal Infections
My worst experience was with powdery mildew. That one's easy to spot because it looks like someone dusted the leaves with flour. But other fungal infections are trickier.
Fungal leaf spots usually start as small, water-soaked lesions. Then they grow, often developing concentric rings that look like a bullseye. The center might fall out, leaving a hole. The surrounding tissue turns yellow or chlorotic.
Once I saw leaf spot disease on my Calathea, I remember touching it and feeling a slimy, wet texture. That's the tell-tale sign. Aquatic pathogens create wet rot. Healthy plant tissue doesn't feel mushy.
Bacterial Infections
Bacterial leaf spots are different from fungal ones. They look greasy or water-soaked, even when the leaf is dry. They often have a yellow halo around them. If you hold the leaf up to light, the spot looks translucent.
Bacterial infections spread fast. I watched a bacterial spot on my Begonia grow from a pinhead to a dime in just four days. That's when I learned that speed of spread is one of the most reliable indicators of an infectious disease.
Viral Infections
Viruses are the sneakiest. They cause mosaic patterns, rings, or mottling that doesn't match the plant's natural variegation. Leaves might be distorted, stunted, or crinkled.
There's no cure for viral infections. If your plant has one, quarantine it immediately, and I'd recommend discarding it to protect your other plants. This path is brutal, and I hope you don't have to walk it.
The 2-Week Observation Method That Saved My Plants
I didn't learn this overnight. After killing more plants from over-treatment than from actual disease, I developed a systematic approach. Here's exactly what I did for two weeks to differentiate between natural spots and infectious diseases.
Day 1: Photograph Everything
I take a photo of every spotted leaf. I use my phone, and I make sure the photos are in focus and well-lit. But here's the trick—I also note the exact location of each spot.
I use a piece of painter's tape, stick it on the pot, and jot down the date. This isn't just OCD. I need a reference point to know if spots are spreading.
Day 2: The Touch Test
I gently touch each spot. Natural spots like sunburn or edema feel dry and papery. Infectious spots feel wet, soft, or deeply sunken. I'm looking for a mushy texture that collapses under light pressure.
But here's the thing—I never touch the spots on one plant and then another plant without washing my hands. Fungal spores are microscopic, and I've definitely spread them between plants with my own fingertips.
Day 3: Check the Underside of the Leaves
Many pests hang out on the undersides. Spider mites, thrips, and scale insects all cause leaf spotting. I check carefully because I've missed this before. The spotting was secondary. The real problem was the infestation of tiny bugs I couldn't see at first glance.
If you see fine webbing, tiny moving dots, or small brown shells, that's your answer. It's not a disease—it's pests. The treatment is completely different.
Day 5: Take a Spore Print
I place a spotted leaf in a ziplock bag with a damp paper towel. I keep it sealed for 24 hours. If it's fungal, you'll often see visible new fungal growth—fuzzy, powdery, or thread-like structures.
This test changed my approach completely. I stopped guessing and started knowing.
Day 7: Observe the Spread Pattern
Here's where the two-week observation kicks in. If the spots are growing, merging, or new spots appear on other leaves, you're dealing with an infection. If those spots stay exactly where they were, it's a natural issue.
I remember this one time my Philodendron had these small brown dots. I was convinced it was a disease. But after seven days, not a single new spot showed up. I realized the spots were just mineral deposits from the tap water I'd been using. The salts were clogging the leaf's pores.
Day 10: Monitor Environmental Conditions
I look at the plant's environment. Did I recently move it? Did the weather change? Did I change my watering schedule? Usually, spot development is strongly correlated to an environmental trigger.
For my plants, I found that most natural spots appeared right after I brought plants from a greenhouse to my dry apartment. The sudden humidity drop caused a shock response, and the leaves developed brown patches as a result.
Day 14: Final Assessment
After 14 days, I make a final call. If spots are spreading, I treat for disease. If they're static, I adjust care routines and leave the plant alone.
Here's my honest truth: I've had way more plants suffer from over-spraying than from actual disease. I once sprayed a Alocasia with fungicide every week for a month because I thought it had leaf spot disease. In reality, it was just reacting to the hard water and low humidity. I stripped away the beneficial microbes on the leaf surface, and the plant declined further.
The 3 Deadly Mistakes of a Houseplant Beginner
I've compiled this list from my own failures. I made every one of these mistakes. Don't follow my footsteps in this area.
Overwatering: The #1 Killer
I said this earlier, and I'll repeat it until my voice cracks: 90% of indoor plants die from overwatering. I was one of those statistic myself. My first Calathea died from root rot because I watered it on a strict schedule, regardless of whether the soil was still soggy.
Overwatering causes edema, root rot, and fungal growth. The spots you see on leaves are often symptoms of dying roots, not a primary leaf disease. If the roots are drowning, no fungicide spray will fix your problem. Fix the soil moisture first.
Incorrect Lighting: The Sunburn Factory
I tried to give my plants "maximal light" by placing them on a south-facing windowsill. I didn't realize that the light intensity was four times higher than what they'd been getting. Within two weeks, they all had brown, unsightly spots.
The fix was simple: move them a few feet away from the window and slowly acclimate them to brighter conditions. But my impatience caused literal scars on my plants.
The Wrong Pot: A Hidden Disaster
I bought a decorative pot with no drainage holes because it looked gorgeous. Aesthetically, it was perfect. Practically, it was a coffin. Water pooled at the bottom, the roots sat in sludge, and the leaves developed yellow spots followed by brown ones.
When I mix pots, I always ensure there's proper drainage. Elevating pots with feet or a layer of gravel also helps prevent stagnant water at the base. This one change dramatically reduced my fungal issues
How to Test for Infectious Disease at Home
If you're still unsure after two weeks of observation, here are three practical tests you can run.
The Squish Test
I press a spot with a clean, dry cotton swab. If the swab picks up moisture or the spot spreads, that's a strong indicator of bacterial infection. Natural spots are dry, but infectious spots leak or weep. This is my go-to test because it's fast and requires no special equipment.
The Odor Sniff Test
Believe it or not, your nose is a reliable diagnostic tool. Bacterial infections often produce a distinct odor—it's slightly sour or musty. I noticed this when I had a bacterial blight on my Swiss Cheese Plant. The spots had a faint, rancid smell that didn't come from the soil.
The Isolation Experiment
I place the affected plant away from all other plants. If, after another week, no other plants show similar spots, it's more likely a physiological or environmental issue. Infectious diseases love to spread. If it stays isolated, it's likely not infectious.
When to Treat and When to Ignore
Now that you've identified your spot type, here's the decision tree I use.
Treat for Infectious Disease If:
- Spots are growing or multiplying within 48 hours
- There's a yellow halo around the spot
- The texture is wet or mushy
- You see patterns like rings, bullseyes, or water-soaked lesions
- Multiple plants in the same area start developing similar spots
Ignore or Adjust Care For:
- Spots are dry and static
- They appear only on older leaves
- The plant overall looks happy and producing new growth
- Environmental factors (recent move, light change, temperature swing) align with spot onset
- No other plants are affected
My DIY Treatment Approach
I've tried every store-bought product out there. But let me tell you, the most effective approach is prevention and simple home remedies.
Neem Oil Solution
I mix one part neem oil with one part mild dish soap and eight parts water. I spray this on all leaves, especially the undersides, once a week for three weeks. This works for most early-stage fungal issues and also deters pests.
Prune with Sterile Scissors
This is crucial. I sterilize my scissors with rubbing alcohol before each cut. I cut off severely affected leaves all the way back to the stem. I don't compost these leaves—I throw them in the trash or burn them. Those spores can survive in compost and reinfect your plants later.
Improve Air Circulation
Most fungal infections thrive in still, humid air. I place a small desk fan near my plants, set it on low, and let it run for a few hours daily. This alone cut my fungal outbreaks by at least half. The airflow keeps the leaf surfaces drier and makes it harder for fungal spores to land.
RHS and AHS Insights on Leaf Spot Management
The RHS advises that most leaf spots on indoor plants are physiological rather than pathological. The AHS agrees, noting that cultural practices are the first line of defense against leaf diseases. Their combined message is simple: healthy plants resist most infections, and the best "treatment" is prevention.
I always check RHS guidance when I'm uncertain about a specific plant. They have a comprehensive database of common indoor plant ailments, and it's helped me avoid catastrophic mistakes.
My Best Tools for Early Detection
I keep a few things on hand that have helped me catch issues before they worsen:
- A 10x magnifying loupe to inspect leaves closely
- A digital soil moisture meter to avoid guesswork
- A daily logbook where I track watering, light, and spot observations
- A dedicated spray bottle for each treatment
These tools are cheap, but they save entire collections. I'd rather spend $15 on a moisture meter than $50 on plants I'll lose to overwatering mistakes.
The Indoor Plant Spot Cheat Sheet
Let me give you a quick cheat sheet that I've developed from years of trial and error.
Natural Spots
- Brown, dry, crispy texture
- Uniform size, no growth over weeks
- Appears on leaves getting direct sun or older leaves
- No water-soaked halo
- Environment has zero other affected plants
- Location where water droplets sat on leaf during hot sun
Infectious Spots
- Dark, water-soaked or mushy
- Grows or expands within days
- Yellowish border or concentric rings
- Spots appear on many leaves simultaneously
- Off-putting odor when the leaf is damaged
- Multiple plants in the room show the same signs
Final Thoughts (And a Hard-Learned Lesson)
I wish someone had explained this simply when I started. I lost my first five plants to misdiagnosis. I sprayed fungicides on sunburn, overwatered edema, and underwatered everything else. The turn came when I started observing without judgment. I want you to succeed where I failed. This is about slowing down, using your senses, and trusting the plant's signals.
The fact that you're here, concerned about your plant's health, already puts you ahead of the curve. Most people ignore the early signs until it's too late. Your vigilance is the best medicine your plant could ask for.
FAQ
Can natural leaf spots turn into infectious diseases?
No. Natural leaf spots are dead tissue from physical or environmental stress. They don't support the growth and spread of pathogens. However, stressed plants are more vulnerable to new infections. Keep the plant healthy, and those natural spots stay harmless.
How quickly do infectious leaf spots spread?
Some bacterial spots can double in size within 24 hours. Most fungal spots take 2-4 days to show noticeable expansion. If you spot something growing fast, act immediately. Time is your enemy here.
Should I remove spotted leaves from my plant?
Removing infected leaves is essential for stopping disease spread. Removing naturally spotted leaves is not necessary, but if you don't like how they look, they can be safely pruned. Just make sure you're not over-pruning, because leaves produce energy for the plant.