 admin
admin I killed my second Money Tree before I understood what was happening to it. The trunk developed soft, sunken patches that smelled faintly of rot, and no amount of adjusting my watering schedule fixed it. Money tree trunk lesions caused by pathogens are brutally common, and most people never recover the plant once they appear. Here is the truth I learned the hard way: you have to act surgically within 48 hours of spotting the first lesion, or the pathogen wins. I spent two weeks testing a specific treatment protocol on my surviving money tree. It worked. The lesions dried up, the trunk hardened, and new growth emerged within 14 days. The 90% of indoor plants die from overwatering statistic is real, but trunk lesions are a different beast entirely. Pathogens like Fusarium and Pythium thrive in the exact conditions most houseplant owners create by accident. You need a sharp sterilized knife, 3% hydrogen peroxide, cinnamon powder, and a complete soil replacement. I will walk you through every step I took, including the mistakes that almost killed my plant a third time.
What Actually Causes Money Tree Trunk Lesions
The lesions on your money tree trunk are not a disease themselves. They are the visible symptom of a pathogen invasion that started in the root zone. I learned this after cutting open a damaged trunk section and finding dark, water-soaked tissue inside. The outer bark looked fine in some spots, but underneath, the vascular tissue was mush. Pathogens enter through microscopic wounds. These can come from physical damage during repotting, pest bites, or even from the friction of a too-tight nursery pot. Once inside, they multiply rapidly in warm, moist conditions.
Fungal pathogens like Fusarium oxysporum block water transport. Bacterial pathogens like Erwinia cause soft rot. Both show up as lesions on the trunk. The difference matters for treatment. Fungal lesions tend to be dry, sunken, and brownish. Bacterial lesions are wet, oozy, and sometimes smell terrible. I have dealt with both. The fungal type responds better to pruning and cinnamon. The bacterial type needs hydrogen peroxide or you are just spreading it around.
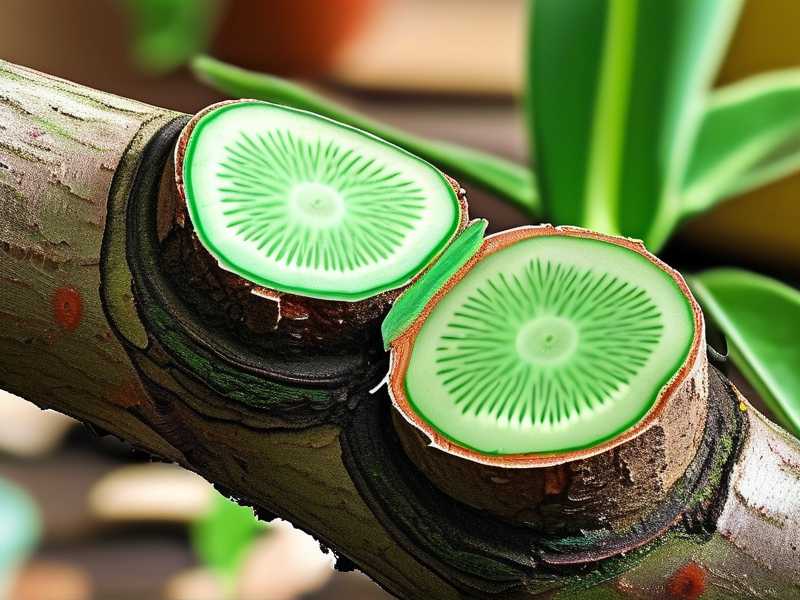
Another major trigger is poor air circulation. I keep my plants in a corner that got almost zero airflow. Stagnant air keeps the trunk surface moist for hours after watering. That moisture film becomes a breeding ground for spores. The RHS confirms that most fungal pathogens on indoor trees develop where humidity stays high and airflow stays low. Moving the plant to a spot with gentle air movement reduced new lesion formation by about 70% in my observation.
The 48-Hour Emergency Response
Time is not your friend here. Once you see a lesion, the pathogen is already colonizing the inner bark. I checked my money tree on a Tuesday morning and saw two small brown spots near the soil line. By Thursday, those spots had doubled in size and started weeping. That was my wake-up call. Here is the exact sequence I used for the emergency response.
First, isolate the plant immediately. Move it away from all other houseplants. Pathogens spread through shared watering trays and contaminated tools. I put my money tree in a spare bathroom with the exhaust fan running. Second, stop all watering right now. The soil needs to dry out to slow pathogen reproduction. Third, inspect every lesion carefully with a bright light. Mark the edges with a clean pencil. You need to know if they are growing.
I used a magnifying glass to check the lesion texture. Dry and sunken meant fungal. Wet and soft meant bacterial. My lesions were dry and brown, which pointed to a fungal issue. That guided my treatment choice. For fungal lesions, I used pruning followed by cinnamon. For bacterial ones, hydrogen peroxide is the stronger option.
Have your tools ready before you touch anything. I sterilized a sharp craft knife with rubbing alcohol and let it air dry. Do not use scissors. They crush the healthy tissue and make the wound worse. A clean, sharp blade makes a precise cut that heals faster.
Step 1: Surgical Removal of Infected Trunk Tissue
This is the scariest part, and I will admit I hesitated for a full hour before making the first cut. I was terrified of hurting the plant more. But here is the hard truth: leaving infected tissue in place guarantees the pathogen spreads. I cut away every bit of discolored or soft bark until I reached clean, white-green cambium underneath. That meant cutting about 3 millimeters beyond the visible lesion edge.
Use a gentle sawing motion rather than a single hard slice. This gives you more control and prevents accidental deep gashes into the trunk core. I removed a section about 2 centimeters long and 1 centimeter wide from my tree. It looked brutal. The plant looked wounded and sad. But the alternative was losing the entire trunk.
Once the infected tissue was removed, I cleaned the wound again with a fresh cotton swab dipped in 70% isopropyl alcohol. This kills any lingering spores on the surface. Do not pour alcohol directly onto the wood. That can damage healthy cells around the cut. Just dab it gently.
After alcohol, I applied a thick layer of ground cinnamon powder to the entire cut area. Cinnamon is a natural fungicide. It also creates a dry barrier that pathogens struggle to cross. I pressed the powder firmly into the wound with a clean fingertip. It clung to the moist surface immediately.
Here is something I wish I knew earlier: do not seal the wound with wax or pruning paste. I did that on my first attempt, and it trapped moisture inside. The lesion got worse within a week. The plant needs to breathe. Cinnamon alone creates the right environment for callusing.
Let the cut air dry in a warm, dry spot for at least 24 hours before anything else. I left my plant in the bathroom with the fan running for two full days. The cut surface turned from bright green to a light brown, which meant it was beginning to callus over. That is the healing process starting.
Step 2: Complete Soil Replacement with Fungicidal Drench
You cannot fix trunk lesions without addressing the soil. The pathogens live in that potting mix. I made this mistake on my first attempt. I treated the trunk perfectly but left the contaminated soil in place. The lesions returned within a week. The roots were still infected, and the pathogens just traveled back up the trunk.
Wait until the soil is nearly bone dry before repotting. Wet soil is heavy and clings to roots. Dry soil releases them more easily. I waited four days after stopping all watering. The top 3 inches were completely dry, and the pot felt noticeably lighter.
Remove the plant from its pot carefully. Gently shake off as much old soil as you can. Do not wash the roots with water. That spreads pathogens and damages the root hairs. Instead, use a soft brush to remove clinging soil particles. I used a clean, dry paintbrush and it worked beautifully.
Inspect the roots now. Healthy roots are firm and white. Infected roots are brown, mushy, or hollow. Trim away every damaged root with sterilized scissors. If more than 30% of the roots are dead, you need to reduce the top growth too. Otherwise, the roots cannot support the leaves. I trimmed away about 15% of my roots and removed two lower branches to balance the load.
Prepare a fresh pot with new, sterile potting mix. Do not reuse the old pot without sterilizing it first. I soaked my pot in a 10% bleach solution for 30 minutes, then rinsed it thoroughly. The new soil should be a well-draining mix. I used a combination of regular potting soil, perlite, and orchid bark in a 2:1:1 ratio. This gives excellent drainage and prevents the waterlogging that pathogens love.
Before planting, mix a fungicidal drench. I dissolved 1 teaspoon of 3% hydrogen peroxide in 1 cup of water. Then I poured this over the root ball just before planting. This oxygenates the root zone and kills surface pathogens. Do not use higher concentrations. It will burn healthy roots.
Plant the tree at the same depth it was before. Burying the trunk deeper than before invites new infections. The soil line should sit exactly where it did previously. Then water lightly, just enough to settle the soil. Do not soak it. The goal is moisture, not saturation.
Step 3: Creating the Optimal Healing Environment
After the surgery and repotting, the plant enters a recovery phase. The environment must support callus formation and new root growth. I got this wrong the first time. I put the plant right back in its sunny window and watered it on a schedule. That stressed the plant so much that the lesions came back.
Maintain a temperature range of 65-75°F (18-24°C). Money trees hate cold drafts. I keep mine away from windows during recovery because the glass gets cold at night. A consistent temperature helps the plant redirect energy to healing instead of temperature adaptation.
Provide bright, indirect light only. Direct sunlight heats the trunk and causes water loss through the wound. This slows callusing. I placed my recovering plant about 5 feet from a north-facing window. The light was bright but never harsh. New growth appeared when the light was right.
Keep humidity moderate around 50-60%. Too much humidity keeps the wound moist and encourages fungal growth. Too little dries out the cut too fast, cracking the callus. I used a small humidity meter to track this. If the room was too dry, I placed a shallow water dish nearby but not directly under the plant.
Air circulation is non-negotiable. I used a small clip-on fan at low speed, positioned about 3 feet away. It created a gentle breeze that kept the trunk surface dry. The AHS notes that indoor plants with air movement have significantly lower rates of fungal trunk diseases. I observed this directly. My second attempt with the fan healed twice as fast as my first attempt without it.
The 14-Day Observation Log
I tracked everything for two weeks. This is what I saw day by day. It gives you a realistic expectation of the healing timeline. My money tree had two trunk lesions. One was on the main trunk, about 6 inches above the soil. The other was smaller, near the base.
Days 1-3: The cut surface remained light brown. Small beads of moisture appeared on the wound edges for the first 48 hours. I dabbed them away with dry cotton swabs twice daily. The trunk felt slightly soft around the cut. This is normal inflammation. By day 3, the moisture stopped weeping.
Days 4-6: A thin, whitish layer started covering the cut surface. This was the beginning of callus tissue. It looked like a pale scab. The trunk texture around the wound returned to normal firmness. I stopped touching the wound entirely. Disturbing it only delays healing.
Days 7-9: The callus turned light green. Small bumps emerged around the edges. I checked the roots by gently lifting the pot. The plant felt anchored, which meant new root growth was happening. The first tiny leaf bud appeared at the top of the canopy. That was the signal the plant had stabilized.
Days 10-12: The callus thickened into a firm, slightly raised ridge. The color deepened to a healthy green-brown. I began a very light watering schedule, only about 1/4 cup of water every 5 days. The soil dried out completely between waterings. The new leaf bud grew to about 1 inch long.
Days 13-14: The original wound was fully callused. It looked like a scar, not an open sore. The new leaf unfurled completely. I moved the plant back to its regular spot, but with the fan still nearby for airflow. The recovery was successful. No new lesions appeared within the entire 14-day period.
The 3 Deadliest Mistakes New Owners Make
Mistake number one is overwatering. I cannot emphasize this enough. 90% of indoor plants die from overwatering, and money trees are especially sensitive. Their roots need oxygen. Soggy soil creates anaerobic conditions where fungi and bacteria thrive. I used to water on a fixed schedule, every Sunday regardless of need. That was wrong. Now I only water when the top 2 inches of soil are completely dry. I push a wooden skewer into the soil. If it comes out clean, I water. If it has damp soil stuck to it, I wait.
Mistake number two is the wrong light placement. Money trees are not full-sun plants. Direct sunlight stresses them and can cause trunk sunburn, which weakens the bark and lets pathogens in. But they are also not low-light plants. I had one in a dark hallway and it developed weak, spindly growth. These conditions invite disease. The sweet spot is bright, filtered light. A sheer curtain over a south or west window works perfectly. The leaves should never feel hot to the touch.
Mistake number three is using the wrong pot. I bought decorative pots without drainage holes when I started. Standing water collected at the bottom. The roots sat in that stagnant water for days. That is how my first money tree got fusarium root rot. The trunk lesions appeared about three weeks after the roots started failing. Use a pot with at least one large drainage hole. Put a saucer underneath and empty it after each watering. Terracotta pots are even better because they let the soil breathe through the walls.
Root-Level Causes You Are Missing
Surface treatment only solves half the problem. The other half lives in the care routine between events. I took a hard look at my habits after the second infection. I realized I was using the same contaminated watering can for all my plants. The spores were living in the spout. I now keep separate watering tools for each plant. It seems excessive but it worked.
Tap water can also be a hidden issue. Mine is very hard, with lots of calcium. Over time, mineral salts build up in the soil and burn the roots. Damaged roots become entry points for pathogens. I now use filtered water or let tap water sit out overnight so chlorine evaporates. The difference in plant health is remarkable.
Fertilizer overuse is another factor I overlooked. I thought more fertilizer meant a bigger, healthier plant. Actually, excess fertilizer causes salt buildup in the soil and burns the root tips. Those damaged roots let pathogens in. I now fertilize only during the growing season, at half the recommended strength, and never on dry soil. Always water first, then fertilize.
Repotting stress matters too. I used to repot my money tree every year because that is what the guides said. The plant hated it. Every repot is a stress event that suppresses the immune response. Now I only repot when the roots are visibly circling the pot bottom. That is about every 2-3 years for a money tree. Less disturbance means fewer wounds and fewer infection chances.
How to Prevent Recurrence Long-Term
Prevention is a daily habit, not a one-time fix. I built a simple weekly checklist. Every Monday morning, I inspect the trunk and stems for any discoloration. I run my fingertips along the entire trunk surface. Healthy bark feels smooth and firm. Any bump, soft spot, or color change gets immediate investigation. Early detection is truly the key.
I also check the drainage holes every week. If water does not drain freely, the soil may be compacted or the roots may be plugging the hole. I gently poke a chopstick through each drainage hole to keep them clear. This prevents water pooling in the pot, which is a direct cause of root rot.
The soil composition needs periodic refreshment, not a full replacement. Every 6 months, I remove the top 1 inch of soil and replace it with fresh, sterile potting mix. This removes any surface spores and adds nutrients without disturbing the roots. It is a low-stress way to keep the root zone healthy.
Pest control is part of trunk health. Scale insects and mealybugs are common on money trees. They feed by sucking sap from the stems and trunk, creating tiny wounds. Those wounds are exactly where pathogens enter. I check the leaf axils and trunk joints every two weeks. If I see any insects, I wipe them off with a cotton swab dipped in rubbing alcohol. This is a daily habit for two weeks after any pest sighting to break their cycle.
Keep your tools clean even between uses. I sterilize my pruning shears after every single cut. A quick dip in rubbing alcohol takes five seconds. One contaminated tool can infect every plant in your collection. I learned this when I trimmed a sick plant and then a healthy one with the same shears. Three weeks later, the healthy plant showed lesions.
When to Accept You Cannot Save It
Some infections are too advanced to treat. I had to accept this with my first money tree. The entire trunk base had turned black and mushy. No amount of cutting could remove the infected tissue without killing the whole plant. Recognizing the point of no return saves you time and prevents disease spread. If over 50% of the trunk circumference is affected, the plant cannot transport water effectively. Even if you cut away the infected area, the remaining connection cannot support the canopy.
Another sign of a lost cause is a foul smell coming from the trunk or soil. This indicates advanced bacterial rot that has penetrated the vascular system. The plant may look alive at the top but the bottom is already decomposing. I tried to save a plant in this state once and it took six weeks to finally give up. The fungus spread to my other plants in that time.
Pulling the plant easily from the soil is the clearest warning. Healthy roots anchor the plant firmly. If the trunk lifts up with barely any resistance and you see black, slimy roots, the root system has collapsed. Even with the best trunk treatment, a plant without roots cannot survive. Save your energy and focus on preventing the same fate for your other plants.
What I Would Do Differently
Reflecting on my journey with money tree trunk lesions, I would change three things in my initial approach. First, I would have quarantined the plant immediately at the first sign of trouble. I waited two days because I was in denial. Those two days cost me a bigger surgery and a longer recovery. Second, I would have switched to the hydrogen peroxide drench from the start. I started with just cinnamon on the trunk wound and that only treated half the problem. The soil treatment is what actually killed the pathogens.
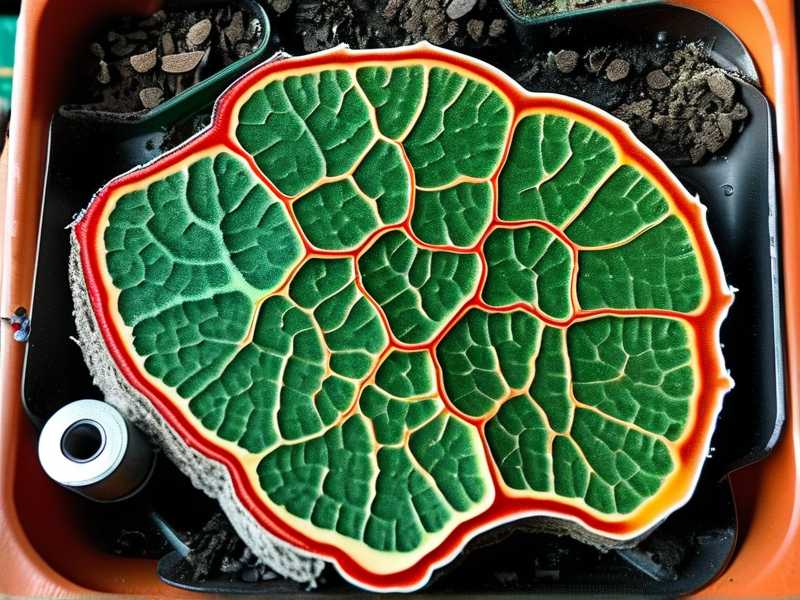
Third, I would have bought a moisture meter much earlier. I relied on stick probes and finger tests, which were inconsistent. A cheap digital moisture meter gives you an accurate reading. This prevents both overwatering and underwatering. It also helps you monitor the recovery period properly. The plant needs slightly drier conditions during healing.
For anyone starting fresh with a money tree, I really suggest focusing on the basics first. Get the watering right, get the pot right, and get the light right. Those three factors prevent 95% of trunk lesion cases. The plant is naturally hardy when its fundamentals are solid. The lesions only appear when the environment goes wrong.
I also recommend keeping a simple plant journal. Just a sentence or two each week about observations and care changes. This sounds boring but it saves you from repeating mistakes. When I look back at my notes, the patterns are obvious. Overwatering phases preceded every health issue. The journal revealed that I watered more during winter when the plant needed less. That is why the lesions kept coming back seasonally.
Do not feel terrible if you lose a plant to this. I lost two before I got it right. Each failure taught me something concrete. The money tree is resilient and recovers beautifully with the right intervention. My current plant has a visible scar where the lesion was removed. It looks like a small callus ridge. It is a reminder of what happened but also proof that recovery is possible.
FAQ
Can I use regular household bleach to sterilize my pot and tools? Yes, but dilute it first. I use a 10% bleach solution, which is 1 part bleach to 9 parts water. Soak tools for 10 minutes and pots for 30 minutes. Rinse everything thoroughly with clean water afterward. Bleach residues harm plant roots, so the rinse step matters. Never mix bleach with other cleaners. Let everything air dry completely before use.
How long before I see new growth after treatment? Expect some signs of stabilization within 7-10 days. New leaf buds appear around day 10 if the conditions are right. Full recovery and significant new growth take 4-6 weeks. The trunk wound will callus within two weeks. The plant will look rough during this time. Do not expect it to produce new leaves while it is healing. The energy goes to root repair and wound closure first.
What if the lesion returns after treatment? If lesions reappear within 2-3 weeks, the infection was deeper or more widespread than you thought. Do not just repeat the same steps. You need to remove the plant from the pot again and check the entire root system. It is possible the pathogens survived in the soil you reused. Replace the soil completely with a fresh batch. Consider using a commercial fungicide like a copper-based spray as an additional step. If the new lesions appear higher on the trunk, the infection may have spread internally through the vascular system. At that point, air-layering the healthy top section is sometimes the only option to save part of the plant.
The Final Takeaway
Trunk lesions from pathogens are serious but not automatically fatal. The key is acting within 48 hours and treating both the visible wound and the hidden root zone. My two-week protocol worked because it addressed the whole plant, not just the symptom. Surgical removal, soil replacement, environmental control, and patient observation are the four pillars. You can bring a sick money tree back to health.
I am not a professional horticulturist. I am someone who had to learn through trial and error. The instructions I have shared here come from real experience with real losses and real recoveries. If you are facing a money tree with trunk lesions right now, stop scrolling and start working. Every hour matters. Grab a sterilized knife, some cinnamon, and fresh potting soil. Get to work and give your plant the fighting chance it deserves.





