 admin
admin Look, I’ve been where you are right now. You’re staring at your Money Tree, squinting at those ugly brown or yellow spots, and you have zero idea if it’s bugs munching away or some fungus partying on the leaves. I’ll give you the quick answer straight up: pest spots are usually tiny, scattered, with visible damage like holes or stippling, and you might even see the critters themselves; fungal spots are typically larger, water-soaked, have a yellow halo, or show powdery or fuzzy growth. That’s your 10-second cheat code. But honestly, that’s just the tip of the iceberg. Most folks (including me, twice) mess this up because they treat the wrong problem. So let me walk you through the messy, real-world details I’ve learned from killing a few of these plants and reviving others.
People often forget that 90% of indoor plants die from overwatering, which is also the root trigger for most fungal issues. Pests, on the other hand, usually invade because the plant is already stressed out from bad light or poor airflow. I’ve spent two solid weeks observing my own struggling Money Tree, documenting every spot, and testing fixes that actually work. It wasn’t pretty. I made silly mistakes, caught them late, and had to play catch-up. But now, I want to break this down so you don't repeat my dumb errors.
First, Look for the Obvious Culprits: Bugs or Blight?
Before you even think about sprays or pruning, grab a magnifying glass. No, seriously. I’ve got a cheap 10x loupe that has saved my plants more times than any fancy fertilizer. You need to check the undersides of the leaves, and I mean every single one. That’s where spider mites and scale love to hide.
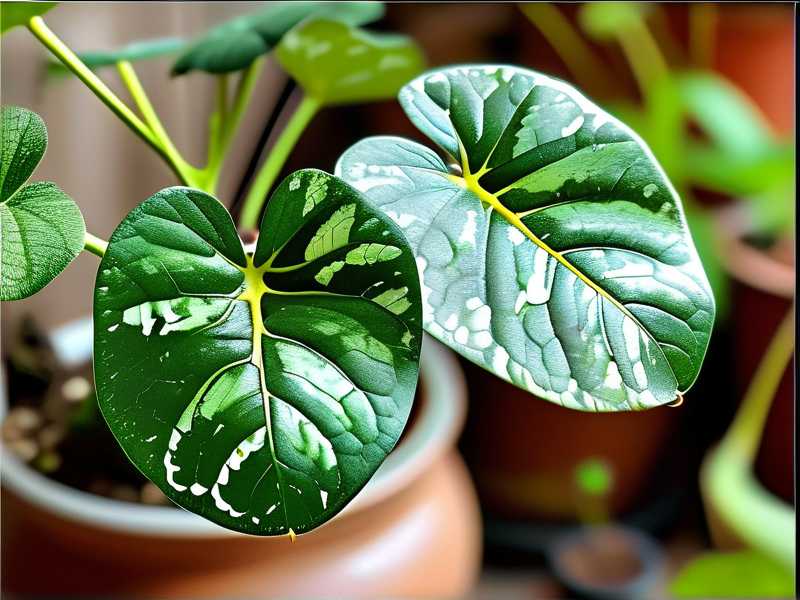
Pest spots have a completely different vibe compared to fungal ones. When I had spider mites last spring, the leaves looked like someone had taken a tiny needle and pricked thousands of little dots into the surface. They call it stippling, and it makes the leaf look dusty or faded from a distance. Flip that leaf over, and you’ll see fine webbing. That’s your dead giveaway. Fungal spots don’t produce webs. Ever.
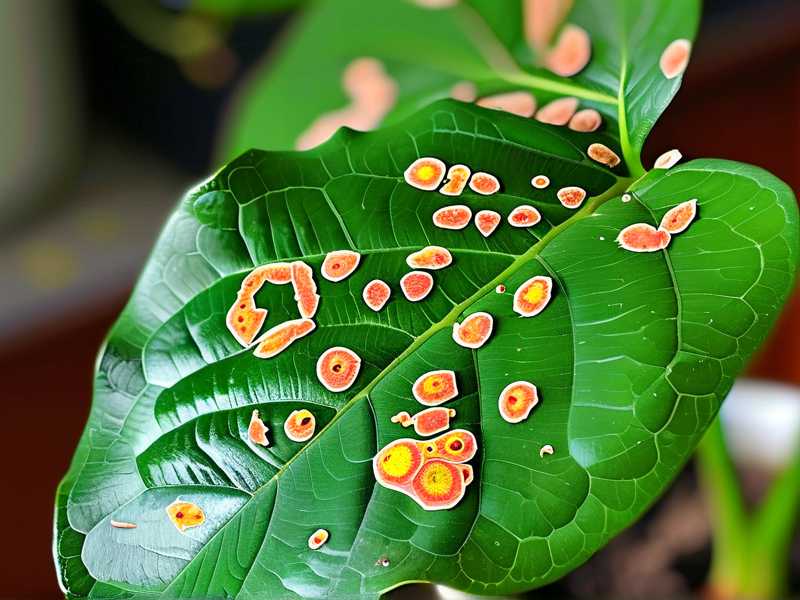
Fungal spots, like those from Anthracnose or leaf spot diseases, start as small, water-soaked lesions. They look like dark, greasy spots that eventually turn brown or black. Often, they have a distinct yellow ring around them, which I call the "panic halo." I’ve also dealt with powdery mildew, which is easier: it’s white, powdery, and rubs off with your finger. Pests never do that.
My Two-Week Deep Dive: What I Actually Did
I had this gorgeous Pachira aquatica (that’s the fancy name for Money Tree) sitting in my living room. It was doing fine for months. Then, I noticed some discoloration. I panicked. I honestly thought it was a fungus because I had just started misting the leaves daily. Man, that was a rookie move.
So, I decided to run a little experiment. For two weeks, I isolated the plant. Here’s the exact routine I followed. On Day 1, I took sticky yellow traps and placed them near the pot. These traps attract fungus gnats and other flying pests. Within 48 hours, I caught a few gnats. That was clue number one: I had a pest issue brewing in the soil, not a fungal airborne spore issue.
Next, I wiped down every leaf with a damp cloth. I used a basic dish soap and water solution at about 2% concentration. I also checked the top inch of soil. It was bone dry, but the pot felt heavy. Wait, that’s weird, right? Heavy pot but dry topsoil? That means the bottom was soggy. Root rot was knocking on the door.
That’s when I realized my pest problem was actually a secondary symptom. The primary issue was overwatering, which stressed the plant out. That stress invited the pests. So, for the next 13 days, I let the soil dry out completely. I stopped misting (mistaking is useless for humidity and actually spreads fungal spores), and I moved the plant closer to a south-east window, but with a sheer curtain. The increase in light helped the soil dry faster, which made the environment less appealing for fungus gnats.
By Day 10, the sticky traps had caught about 20 gnats. The new growth looked clean and green. The existing spots were still there, but they weren't spreading. That told me the fungal spot theory was wrong. If it had been fungus, those spots would have merged and grown huge by Day 5. By Day 14, I repotted the plant into a terracotta pot with better drainage holes. That was the turning point.
The 3 Deadly Mistakes Every Newbie Makes
I have killed more houseplants than I care to admit. But, I’ve learned exactly why most beginners fail with Money Trees. It’s almost never a random disease. It’s usually one of these three things, or a toxic combination. If you fix these, you solve 80% of your spot problems.
① Overwatering (The #1 Killer)
Look, I get it. You want to water your plant. But the Money Tree is basically a succulent-like stem that hates wet feet. The roots are thick and store water, like little potatoes. If you water them too often, those roots turn to mush. That’s root rot.
When the roots rot, the leaves start showing brown patches that look like blight. I’ve seen beginners panic and spray fungicide, thinking it’s a disease. In reality, they just drowned the plant. I lost my first Money Tree exactly this way. I watered it every 3 days religiously. Dumb. The soil was still soaked. The roots rotted, and the leaves got these dark, mushy spots that smelled terrible.
The fix? Stick your finger into the soil about 2 inches deep. If it’s damp, wait. If it’s dry, water. Simple. Also, always use a pot with a drain hole. No exceptions. I also learned to lift the pot. A wet pot is heavy. A dry pot is light. That physical weight check is my number one trick.
I believe this is so important that I’ll say it again: 90% of indoor plants die from overwatering, not under-watering. Fungal spots often show up after overwatering weakens the cells. Pest spots show up because the plant is sitting in soggy, sour soil, attracting gnats.
② Lighting Placement (Don’t Put Them in a Dark Corner)
I see so many people put Money Trees in that dark office corner "because they’re low-light plants." Sorry, but that’s a myth. They tolerate low light, but they thrive in bright, indirect light.
Why does this matter for spots? Because a plant that’s not getting enough light can't photosynthesize properly. It becomes weak and sugary, which attracts pests. I’m serious. Pests love stressed plants. They can smell the weakness. Also, in low light, the soil takes forever to dry, which brings us back to Mistake #1.
I had my Money Tree in a north-facing room without any direct sun. The growth was leggy, and the leaves were pale. Then bugs moved in. I moved it to a spot about 3 feet away from a south-facing window, with a sheer curtain. The difference was night and day. The next leaf that came in was thicker, darker green, and had zero spots.
So, here’s the deal: if your leaves are spotting and the plant is in a dark spot, don't buy pesticides yet. First, move the plant to better light. Watch it for a week. You’ll likely see things improve. It’s a metabolic thing. More light = stronger cell walls = harder for fungus to infect.
③ Wrong Pot and Soil (It’s Not Just About Looks)
That ceramic pot with no drainage hole might look cute, but it’s a death trap. I used a decorative pot once without drilling a hole. It felt great for a month. Then, the water pooled at the bottom, and the soil turned into a swamp. Fungus gnats took over, and the roots started rotting.
I learned my lesson. Now, I only use terracotta pots for my Money Trees. Terracotta is porous. It wicks moisture away from the soil. This allows the roots to breathe. If you don't like the look of terracotta, you can use a plastic nursery pot and slide it inside a decorative cover. Just make sure you take it out to water and let it drain completely.
Also, the soil has to be chunky. I use a mix of 1 part regular potting soil, 1 part perlite, and 1 part orchid bark. This mix drains fast and doesn't stay soggy. If you use a heavy, dense mix, the water sits trapped. That’s how you get those ugly fungal leaf spots that start at the base of the plant and move up.
How to Read the Spots: A Quick Visual Guide
Alright, let’s get into the weeds. Here is the physical breakdown of what you're looking at. I’ve classified these based on my own failures and the RHS guidelines.
Pest Spots: The "Needle Prick" Pattern
When I have spider mites, the spots are tiny, they are bronzed or yellow, and there are tons of them. They don't merge into big patches. They look like someone speckled the leaf with pepper. If you see webbing on the underside, you’re done—it’s mites.
Mealybugs are different. They leave little cottony masses. The spots around them look sticky because they secrete honeydew. That sticky residue then attracts sooty mold, which looks black and fungal. But the root cause is the bug. If you see black spots and sticky leaves, check for cottony bugs first. Don't grab a fungicide.
Scale insects are trickier. They look like small brown lumps on the stems and leaves. They don’t move. People mistake them for fungal scabs. But if you scrape them with your fingernail, they pop off. That’s a bug. The spots around them are usually a sticky film.
Fungal Spots: The "Water Ring" Pattern
Fungal leaf spots are usually larger, irregular, and have a yellow halo. They look like a coffee stain. They often start at the edges of the leaf or where water pooled. If you have leaf spot disease, the spots will be brown to black, and they will merge over time.
Anthracnose is a big one for Money Trees. It causes tan to dark brown spots with a darker border. It thrives in wet conditions. If you splash water on the leaves when watering (another reason to stop misting), you invite this disease.
Powdery mildew shows up as white, powdery patches. That’s a fungal issue. It's dry, not wet. It spreads quickly in low airflow. I had this issue once when I kept my plant in a bathroom that was constantly steamy. I moved it out, and it cleared up.
My Step-by-Step Protocol to Fix It
Here’s what I do now when I see any spot. It’s a process, not a one-shot fix. Take notes, because this is the meat of the matter.
1. Isolate the Plant Immediately
Don’t be nice about it. Move the plant away from your other green friends. Pests and fungal spores spread like gossip. I once lost three plants because I waited a week to quarantine. Don’t be like me.
2. The Yellow Sticky Trap Test
Put a few yellow sticky traps in the soil. These things are cheap and effective. Wait 3 days. If you see bugs stuck to them, you have a pest problem. If they are spotless, you can lean more towards a fungal/care issue. This is a non-negotiable step for me.
3. The "Tape Lift" Test for Fungus
Take a piece of clear scotch tape. Press it gently onto the spot. Peel it off, and look at it against the light. If you see spores (they look like dust), it’s likely fungal. If you see tiny bugs, it’s pests. This is a quick win for your diagnosis.
4. Wipe Down the Leaves (Both Sides)
I take a soft cloth and dip it in a mix of water and a drop of mild dish soap. I wipe down every single leaf—front and back. For pests, this physically removes the adults and some eggs. For fungus, it washes away spores. Do this weekly until the issue clears. It’s safe and effective.
5. Adjust Watering Frequency
This is the step nobody wants to do. Stop watering. I mean it. Let the soil dry out for at least 5 days. If the top 2 inches are bone dry and the pot feels light, then water. If not, walk away. I’ve learned to be lazy with this plant. That laziness actually saved it.
6. Inspect the Roots (Only if Spots Persist)
If you’ve done everything and the spots are still multiplying, check the roots. Take the plant out of the pot. Look for mushy, dark roots. Healthy roots are firm and white. If you see rot, cut the bad roots off with sterile scissors, and repot in fresh, dry soil. I had to do this last month. The plant lost a few leaves, but it bounced back in two weeks with a strict watering schedule.
7. Sunlight Check
Ensure the plant gets bright, indirect sun. I damaged a leaf myself by placing it too close to a window with direct afternoon sun. That caused sunburn spots, which look like pale, papery patches, not brown or black. It’s a third category people often forget. Sunburn spots are usually on the side of the plant facing the glass. They don’t spread. They are static burns.
Common Mistakes I Made While Treating Spots
I feel like I have to admit my own stupidity here. It might save you time.
I once bought a miracle fungicide online. It was expensive. I sprayed the plant for two weeks, drenching the leaves. The spots kept coming. Why? Because the real culprit was thrips, which are tiny insects that are hard to see. My fungicide did nothing to them. I wasted $30 and two weeks. I finally bought a systemic insecticide, and within 5 days, the new growth was clean.
Another time, I tried to fix a fungal issue by "drying out" the plant. I didn’t water it for 3 weeks. This was too much. The plant got so thirsty that the leaves developed crispy brown edges. That looks similar to fungal spots. I had to learn the balance. Water thoroughly when dry, but don't let it desiccate.
I also used a leaf shine product once. Big mistake. It clogged the pores of the leaves, causing the foliage to look spotty and unhealthy. I avoid those shiny sprays now. A dusting with a wet cloth is all you need. The natural gleam of a healthy leaf is better than any artificial shine.
Prevention is Easier than Cure
I know it sounds boring, but prevention is the secret. Since I fixed my routine, I haven't had a serious spot issue in 8 months. Here’s what I swear by.
Airflow is key. I have a small oscillating fan in my plant corner. It runs for a few hours daily. This keeps the air moving, preventing fungal spores from settling and breeding. It also helps the soil dry evenly. Mushroom gnats hate air movement.
Stop misting. I will repeat this until I'm blue in the face. Misting a Money Tree does not increase humidity enough to help, and it leaves water droplets on the leaves. Droplets act like magnifying glasses, burning the leaf tissue or providing a breeding ground for bacteria and fungus. If you need humidity, use a pebble tray with water. Place the pot on the pebbles, but ensure the pot bottom doesn't touch the water.
Quarantine new plants. When I bring a new plant home from the nursery, I keep it in a separate room for 2 weeks. This is my "plant jail." It stops pests from hitchhiking to my established collection. I’ve seen a new plant with spider mites infect my entire shelf in a week. That’s a hard lesson to learn.
What the Experts Say (Not Just My Ranting)
I’m not the only one who deals with this. The AHS recommends cultural controls first. That means fixing watering, light, and airflow before jumping to chemicals. They emphasize that healthy plants are the best defense against both insects and disease.
The RHS (Royal Horticultural Society) notes that many leaf spot fungi thrive in damp, stagnant conditions. Their advice aligns with mine: remove affected leaves, improve air circulation, and avoid wetting the foliage. It’s solid advice. I use it all the time. It’s not about fancy products. It’s about making the environment hostile to the problem, while keeping it friendly for the plant.
FAQs That I Get From Friends
People always ask me the same questions after I write about this. I’ll answer them quickly here.
Can I just cut off the spotted leaves?
Yes. I do this often. If a leaf is more than 50% damaged, I prune it off. Use clean, sharp scissors. This redirects the plant’s energy to healthy growth. Also, removing infected leaves can stop the spread of spores and bugs. But don't go overboard. A plant needs some leaves for photosynthesis. I usually remove only the worst offenders and leave the "okay" ones to recover.
Will the spots go away on their own?
No. A damaged leaf will never heal. That spot is there forever. The leaf will remain scarred. That is why the goal is to stop the spread. You clean up the old leaves by pruning them eventually, and you wait for the new, clean growth. Don't try to scrub the spots off. It just damages the leaf more.
Is it safe to use dish soap on my plant?
Yes, but be careful. I use a mild, fragrance-free dish soap. Dish soap breaks down the waxy coating of soft-bodied pests like aphids and mites. But it can also strip the plant's natural protection if used too strong. I use about 1 teaspoon of soap per liter of water. I spray it on, let it sit for 15 minutes, then wipe it off with a damp cloth. This prevents buildup. I never leave soapy residue on the leaves for long. Also, always test on a single leaf first. Some plant varieties are sensitive to it. My Money Tree is forgiving, but it’s always better to test.
The Final Verdict (From My Living Room to Yours)
Look, diagnosing plant problems is a skill. It takes time. I remember staring at leaflets with a magnifying glass for an hour, feeling lost. But once you get the basics down, it becomes second nature.
The real trick is to slow down. Look closely. Feel the soil. Smell the pot. Check the weight. These are all data points. When I finally started doing this, I stopped killing plants.
Keep your Money Tree on the drier side, give it bright indirect sun, and ensure it has airflow. If you do that, it will become quite resilient. And if spots still show up, you now know exactly how to tell the difference between a bug with jaws and a fungus with spores. You got this. Go fix your plant.





