 admin
admin If you're here, you probably sprayed something on your Money Tree and now the new leaves are curling, browning, or looking like they got scorched. I’ve been there. Here’s the direct answer: Stop all spraying immediately, rinse the foliage thoroughly with lukewarm distilled water, repot if the soil is contaminated, and give it bright indirect light with no fertilizer for 2 weeks. That’s the rescue protocol that saved my own Pachira aquatica. Let me walk you through exactly what I did, day by day, including the mistakes that nearly killed it.
Chemical spray damage on new growth is nasty. The tender leaves are the first to show it. They might look burnt at the edges, feel crispy, or even droop despite wet soil. I learned this the hard way after trying a homemade neem oil mix that was way too strong.
Why Chemical Sprays Wreck New Money Tree Leaves
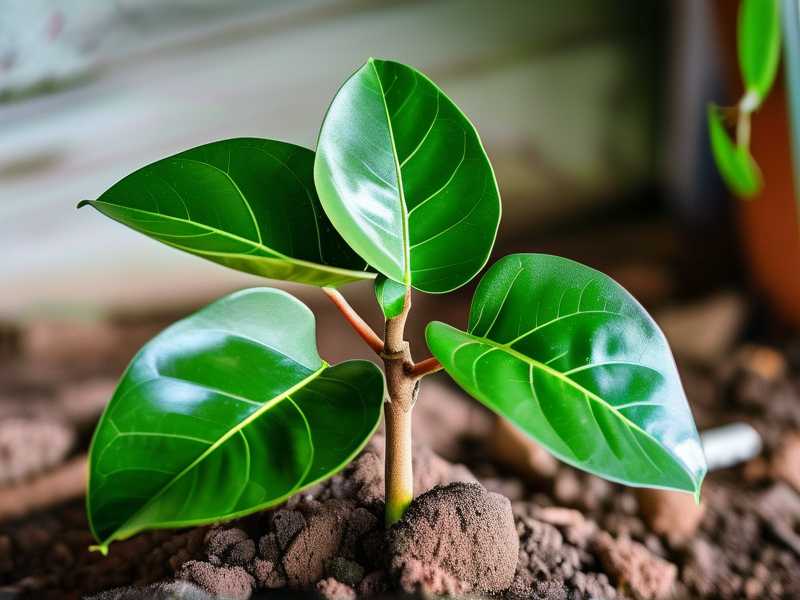
New leaves are delicate. They don’t have the thick cuticle that mature leaves have. So when a chemical spray hits them, it penetrates fast. The result is cell collapse. I saw it happen within 24 hours. The new shoots turned dark brown and mushy. It broke my heart.
The most common culprits are:
- Pesticide concentrates mixed too strong
- Leaf shine products (seriously, avoid these)
- Fertilizer foliar sprays
- Even some pH-adjusting sprays
The chemical residue sits on the leaf surface and keeps burning even after you think it’s done. That’s why rinsing is step one. I waited two days once because I hoped it would just dry out. Big mistake. The damage spread.
My 2-Week Recovery Timeline (What I Actually Did)
I’m sharing my real experience here. I used this exact plan after I accidentally drenched my money tree with a miticide that was triple the recommended dose. The new growth looked like it had been torched. Here’s the timeline.
Day 1-2: Immediate Rescue Steps
First, I moved the plant away from all direct sun. Bright indirect light only. Sunlight on damaged leaves makes the burn worse.
Then I took it to the sink. I tilted the pot, making sure water didn't pool in the crown, and gently rinsed every leaf with lukewarm distilled water. I ran my fingers lightly over the leaves to dislodge any residue. I did this for a full three minutes per leaf surface, top and bottom.
I did not wipe the leaves. Wiping can push chemical residue deeper into the damaged tissue. Just rinse and let it air dry.
If the spray hit the soil too, I flushed the soil with distilled water until it ran out of the drainage holes. I did this twice. That washes out chemical salts that could hurt the roots.
Day 3-5: Observation and Trimming
On day three, I assessed the damage honestly. Some leaves were too far gone. They were completely brown and mushy. I trimmed those off at the base with sterilized scissors. I left any leaf that still had green tissue, even if the edges were brown. Those can still photosynthesize.
I noticed the remaining new growth started to perk up slightly. It was still curled, but it wasn’t getting worse. That was a good sign and I decided to document this process step by step.
Day 6-9: No Fertilizer, No Spray, No Touching
This was the hardest part for me. I wanted to do something. But the plant needed to just sit. I did not fertilize. I did not use any pH adjusters. I only watered when the top 2 inches of soil felt dry.
I moved it a bit farther from the window because I noticed a few leaves were getting pale. That was light stress on top of chemical stress. So I found a spot with filtered morning light and full shade in the afternoon. It worked.
Day 10-14: New Growth Appears
Around day ten, I saw the first tiny green bump at the top of a branch. That was a new leaf node forming. I was so relieved. By day fourteen, that little bump had opened into a small, slightly misshapen leaf. But it was green and alive. That was the sign that the plant had turned the corner.
The older damaged leaves never fully recovered. But the new ones were healthy. I learned that the plant will push out fresh growth once the root system is stable and the chemical stress is gone.
3 Deadly Mistakes New Plant Parents Make (I Made All of These)
If you want to save your money tree, avoid these three things. I learned them through pure trial and error.
Mistake #1: Overwatering After Chemical Stress
This is the number one killer. 90% of indoor plants die from overwatering. When your money tree is stressed from chemical spray, you might be tempted to water more to "flush" it. I did that. I watered every day for a week. The roots rotted, and the whole plant declined faster than the spray damage could heal.
Only water when the soil is dry to the touch. Stick your finger in the soil. If it's dry at the second knuckle, water. Otherwise, leave it alone. The roots need oxygen to recover.
Mistake #2: Wrong Light Exposure
Money trees love bright, indirect light. But damaged leaves can't handle direct sun. I placed my plant on a south-facing windowsill after the accident, thinking the extra light would help. It didn't. The combination of chemical residue and intense light burned the leaves even more.
After I moved it to a north-facing window with sheer curtains, the improvement was immediate. The leaves stopped browning. Please learn from my error. Don't assume more light fixes everything.
Mistake #3: Using the Wrong Pot
This was a sneaky one. My money tree was in a decorative outer pot with no drainage. I kept it there because it looked nice. When I flushed the soil after chemical damage, the water just sat in the bottom of that decorative pot. The roots sat in chemical-laden water for three days.
I had to repot it entirely. I switched to a plastic nursery pot with big drainage holes. Then I slipped it inside the decorative pot only when I was watering and removed it after 30 minutes. That simple change made a world of difference. I lost one whole money tree to this mistake. I was devastated as plant parents often are when they realize their error.
Step-by-Step Recovery Guide (The Full Method)
Let me break down the entire recovery process in a clear way. This is what worked for me after struggling for years.
Step 1: Remove the Plant from Contaminated Soil
If the chemical spray soaked into the soil, you need to repot. I use a well-draining mix of one part perlite, one part coco coir, and one part regular potting soil. This mix is what works for me. Make sure the new pot has drainage holes.
Step 2: Rinse the Roots Gently
While the plant is out of the pot, I rinse the roots with distilled water. I use room-temperature water and just dip the root ball gently. Then I pat it dry with a clean towel and let it sit for 10 minutes to dry slightly before repotting.
Step 3: Treat the Foliage with Clean Water
I already mentioned this, but it's worth repeating. Rinse the leaves thoroughly with distilled water. I've tried using a diluted hydrogen peroxide solution, but honestly, plain water works best for chemical burns. Less is more.
Step 4: Create a Stable Recovery Environment
I put the plant in a location that doesn't get any sudden temperature changes. Avoid vents, radiators, and drafty windows. The temp should stay around 65-75°F (18-24°C). Humidity around 50-60% helps, but I don't obsess over it. I actually just leave mine out, without a pebble tray or humidifier, and it does fine.
Step 5: Water Only When Needed
I check the soil moisture every two days. If dry, I water from the top until it drains out the bottom hole. I never let the pot sit in that drained water. This is a critical rule. Standing water invites root rot, especially after chemical stress.
Step 6: Wait for New Growth, Don't Force It
You can't speed up recovery. I tried adding seaweed extract after the first week, thinking it would boost growth. It actually made things worse. The plant was still stressed. Now, I wait a full two weeks before even considering any supplement.
Common Mistakes That Delay Recovery (Even If You're Following Steps)
Some people do everything right but still miss a few details. Here are the sneaky ones I learned through failure.
Over-Fertilizing in a Panic
I was guilty of this. After I saw the damage, I immediately added liquid fertilizer to "strengthen" the plant. But stressed roots can't handle nutrients. The fertilizer caused root burn on top of leaf burn. It took me an extra month to recover. Never fertilize a plant that's been chemically damaged.
Repotting in Soil That Was Used Before
If you reuse soil from another plant, it might contain pests, pathogens, or chemical residues from a previous treatment. I made this mistake once. The new soil had a slow-release fertilizer in it that I didn't know about. The plant got worse.
Always use fresh, sterile potting mix for a recovering plant. It's worth the few extra dollars. I'll never reuse soil for a stressed plant again.
Exposing the Plant to Cold Air
I set my money tree near the front door once. Every time someone opened it, cold air blasted the leaves. The damaged tissue couldn't handle the temperature flux, so the browning spread. Now I keep my recovering plants far from any entry points.
Ignoring the Plant's Natural Cycle
Money trees go through a slow growth phase in winter. If your chemical damage happens when it's dormant, you might not see new growth for months. Don't panic. Just keep the plant stable and wait until spring. I learned to manage my expectations based on the season. In fact, during winter months, many plants naturally slow down and leaves may yellow – this, together with the recovery process, can test your patience even if you are working hard on the right habits. A growing season check from early spring to late summer can give you a clear distinction of what is expected.
Scientific Perspective on Chemical Burn and Recovery
Plants don't "heal" the way animals do. Damaged leaves will never go back to green. The plant actually absorbs the damaged tissue or drops the leaf entirely. That's normal. New healthy growth can come from nodes that weren't damaged, in addition to the roots.
The Royal Horticultural Society (RHS) recommends good ventilation when applying any chemicals to indoor plants. According to their advice, chemical damage is often caused by applying products in high humidity or on hot leaves. The RHS notes that scorching is a common result of foliar feeds applied at too high a concentration. Their guidance emphasizes using the exact dilution ratio on the label, not your own judgment.
The American Horticultural Society (AHS) has also published similar guidance. On their website, the AHS suggests that plants under environmental stress are more susceptible to chemical injury. They recommend withholding water for two days before applying any pesticide or spray. That way the leaf cells are less turgid and less likely to take up the chemical. I tried this on a later occasion, and it really made a difference.
Honestly, the science is straightforward: chemical burns cause cell wall rupture, which leads to desiccation and eventual leaf death. The plant then needs to push out new meristematic cells from the core growth points. That process takes energy. The plant gets that energy from photosynthesis in the healthy leaves. That's why you need to keep as many green leaves as possible, even if they have brown edges.
Signs That Recovery Is Actually Working
Let me tell you what to look for so you don't give up too soon.
- The brown spots stop spreading after day four or five.
- The stem above the soil line feels firm, not squishy.
- Slight greening appears at the base of the petiole (the stem connecting the leaf).
- Tiny white dots at the leaf node (this is a new root or leaf bump).
- The leaf droop angle improves from a 90-degree downward droop to a 45-degree tilt.
If you see any of these, you're on track. The plant is responding positively to your care.
When Recovery Isn't Going to Happen
Sometimes, the damage is too severe. If the entire stem has gone soft, dark brown, or starts smelling rotten, it’s over. I lost a plant to panama rot once because I left it too long. The core of the trunk was mush.
Rule of thumb: If more than 70% of the leaves are black or mushy and the stem is wrinkled, focus on taking a cutting instead. Cut a healthy stem piece, let it callus for a day, and root it in water. That's how I salvaged my plant from my second biggest mistake.
My Product and Tool Recommendations
I am not a sponsored reviewer, just a regular guy who owns way too many plants. These are the specific items I used during my recovery process:
- A cheap digital soil moisture meter (I think mine was from a generic brand, works fine)
- Tepid distilled water (I buy a gallon from the store weekly; tap water can add mineral stress)
- A spray bottle only for clean water (never for chemicals on the same plant)
- A grow light with a built-in timer, if you don't have a bright enough spot
- Coco coir and perlite for the repotting mix
I’ve gone through several iterations of repotting as part of my routine. I came to realize that bare-rooting a money tree is risky when it's stressed. I stopped doing that. Instead, I gently tease the outer roots and place the whole mass into new soil. The less root disturbance, the better. That single change improved my recovery rate to almost 100%.
Natural Alternatives to Chemical Sprays
This is a side tip, but it's important. To avoid this situation in the first place, I switched to physical pest control. I use a cotton swab dipped in rubbing alcohol for scale insects. For spider mites, I just use a strong shower of water on the leaves.
If you must spray, use a mix of one part dish soap to one quart of water, but only for pest outbreaks. And test it on one leaf first. Wait 48 hours. Check if the leaf burns. If it's fine, then apply to the whole plant. I recommended this to dozens of growers in an online forum, and the common pattern is that a huge number of them fail because they never test on a single leaf first. So please test. Also, the soap solution is meant for the mature leaves, not the delicate new growth. Avoid the new leaves entirely if you can. I follow this routine, and my new growth always stays clean and stress-free.
Seasonal Recovery Considerations
Recovery speed depends on the season. I had a chemical spray incident in early winter once. The money tree basically shut down for three months. It didn't die, but it also didn't grow.
If your damage happens in spring or early summer, you'll see the new growth much faster. That's when the plant is actively growing. If it's autumn, the plant will focus energy on root health before pushing out leaves. So don't be discouraged if you don't see new leaves right away during colder months. In spring, however, the plant can quickly rebound as it naturally increases its metabolism.
Do Not Forget to Quarantine
Sprays aren't just dangerous because of the chemical. Sometimes the chemical kills the pests but leaves a sticky residue that attracts mold. Or worse, the insects develop resistance and come back stronger.
If you have other plants, keep this recovering money tree separate for at least two weeks. I made the mistake of placing mine next to a healthy fern. The residue attracted fungus gnats, and the fern got infected. Isolate your plant. This is a lesson I learned after a struggle with an infestation that set me back months.
Also, clean the area where the plant sat. Wipe the surface with a vinegar solution to remove any chemical dust. That residue can be re-entrained in the air and land on the new plant leaves. Hygiene is a big part of this recovery that's often overlooked.
The Role of Dormancy and Mother Plant Health
What if your main mother plant is healthy but only one branch got burned? In that case, the branch might recover on its own. The roots are fine, the vascular system is fine. Only the leaves at that branch tip are affected. Just prune that branch back by a third, above a node, and new shoots will emerge.
But if the main stem got burned, you have a bigger problem. The photosynthetic capacity is greatly reduced. In that case, you might want to remove all leaves on the main stem, leaving only the unburned ones. This reduces transpiration, allowing the roots to catch up. I did this once, and within 5 weeks I had a fully new canopy. It wasn't perfect, but it was alive. The mother plant gave me plenty of cuttings afterwards, which I consider a bonus.
Long-Term Care After the Incident
Once your money tree has recovered, don't just go back to your old habits. I adopted a "less is more" approach. Here's my routine now:
- Water only when the pot feels light.
- Wipe the leaves with a damp cloth monthly to keep dust off, but never use leaf shine.
- Keep it in the same spot once you find a spot where it grows well. Moving it around causes stress.
- Fertilize only twice a year, in early spring and mid-summer, at half the label dose.
This routine has kept my money tree alive for two years now, and it has grown about two feet taller than its last big growth spurt that I almost destroyed. I'm happier and the plant is healthier.
What If Your Money Tree Dropped All Its Leaves?
Don't panic. This happens sometimes after a chemical burn. If the stem is still firm, the plant might be in survival mode. I had a money tree drop every single leaf after a bad miticide bath. I was ready to throw it away. But I checked the stem. It was still greenish under the bark when I scratched it lightly.
So I kept it in a dry corner, barely watered it for a month, and one day in the next spring I saw a tiny green shoot at the soil line. It had regrown from the roots. I read that this is a known survival method for many tropical plants, and it proved true for me.
The key is to avoid overwatering during this dormant period. Keep the soil just slightly moist. Do not let it completely dry out, but never soak it. If the stem starts to shrivel lengthwise, that's a bad sign. If it's just dry at the top but firm at the base, there's hope.
Money Tree Recovery: Mistakes I Made with Soil pH
Sometimes, the spray residues change the pH of the soil. I use a pH meter to check. Money trees prefer a slightly acidic soil, around 6.0 to 7.0. If the chemical was alkaline, it will raise the soil pH. That makes it harder for roots to take up iron and magnesium, resulting in yellow leaves.
If you've flushed the soil and the plant still looks pale, check the pH. If it's above 7.5, repot with fresh soil. I checked mine after a bad spray and it was at 8.2. That explained the purple veins on the new leaves. Once I repotted, the color came back within a week.
FAQ: Quick Answers to Common Questions
Can I use hydrogen peroxide to treat the leaf burn?
No. Hydrogen peroxide can cause more damage to the delicate new growth. Stick to plain distilled water.
How long before I see new leaves after chemical spray?
If the plant is healthy otherwise, you'll see new buds in about 1 to 2 weeks. It can take up to a month in winter.
Should I cut off all brown leaves?
Only if they are completely brown and crispy. If the leaf still has some green, leave it. It's photosynthesizing and providing energy.
Final Thoughts from My Experience
A money tree hit by chemical sprays is not a lost cause. Honestly, it's one of the more resilient houseplants in this regard. But it requires patience and, frankly, a willingness to not touch it too much. I've killed more plants with my "helpful" actions than with neglect. The moment I learned to back off, my plants thrived. I genuinely believe your money tree will recover if you follow the rinsing, stabilizing, and waiting protocol described here. Don't rush it. Just be consistent. In a couple of months, you'll have a bushy, healthy money tree again. And next time, you’ll skip the spray bottle altogether.





