 admin
admin The moment I brought my fifth Money Tree home, I knew I had a problem. It was gorgeous, lush, and probably carrying spider mites. I lost my fourth plant to a pest outbreak that spread through my entire collection. That is when I stopped guessing and started building a proper quarantine area.
Here is the short answer: You need a separate room or large plastic bin, 2-3 weeks of isolation, sticky traps, neem oil, and a strict no-shared-water rule.
I now quarantine every new Money Tree for 14 full days. I check it every morning with a magnifying glass. I have not had a single pest outbreak since. I learned this the hard way. Let me save you the trouble.
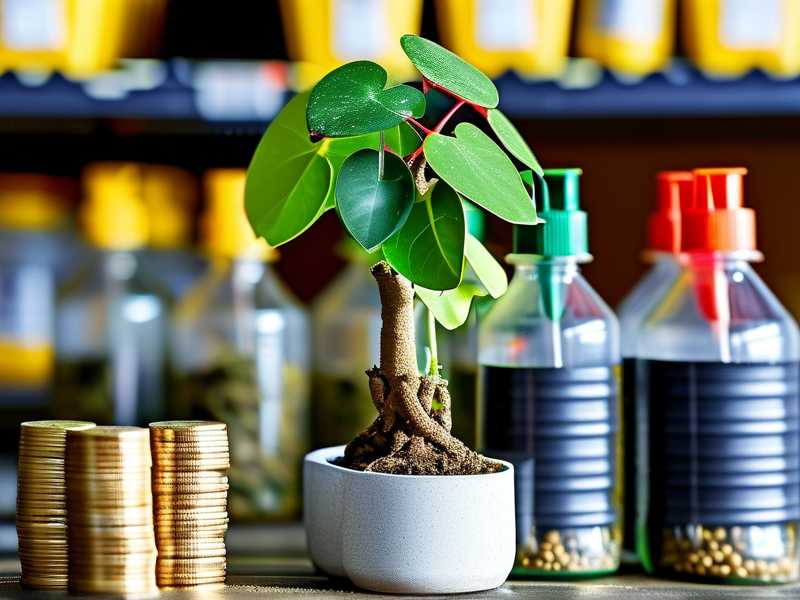
90% of indoor plants die from overwatering, and I genuinely believe another 9% die from pest infestations we could have prevented. So let me walk you through my exact system.
Why You Need a Quarantine Zone for Money Trees
Think about it for a second. Commercial greenhouses are perfect breeding grounds for pests. Aphids love fresh growth. Spider mites thrive in dry transport conditions. Fungus gnats hitchhike in moist soil.
You bring that plant home. You put it next to your prized Monstera and your thriving Fiddle Leaf Fig. Two weeks later, you have a full-blown infestation across every shelf. I have been there. I lost half my collection to thrips because I skipped quarantine once.
A dedicated quarantine area is not overkill. It is the difference between one sick plant and a sick plant room. The RHS has clear guidance on this, and I wish I had followed it earlier. The RHS recommends inspecting new plants for at least two weeks and keeping them separate from established collections. That is not a suggestion. That is survival.
The 3 Deadly Mistakes New Plant Owners Make
Before I show you my setup, let me address the elephant in the room. Most people fail because they make these three mistakes. I made all of them. You probably will too unless you read this.
Mistake #1: Overwatering the New Plant Immediately
Here is what happened to me. I bought a beautiful Money Tree from a big-box store. The soil felt dry on top, so I gave it a generous drink. Then I watered it again three days later because I was excited. It dropped leaves within a week. Root rot had set in.
The soil in store pots is often dense and retains water longer than you expect. New transplants are already stressed. They do not need a swimming pool.
The fix: Wait at least 48 hours before watering. Stick your finger two inches into the soil. If it is damp, walk away. Come back tomorrow. When you do water, water thoroughly but ensure the drainage holes are free. Soggy soil attracts fungus gnats like crazy.
Mistake #2: Giving the Wrong Light
People assume Money Trees want direct blazing sun. They do not. But they also do not want a dark corner. I put my first Money Tree right on a south-facing windowsill. The leaves turned pale yellow and crispy within a week.
The issue is that new plants need to acclimate. A store under fluorescent lights gets shocked by intense direct sun. It is like stepping out of a dark movie theater into the desert.
The fix: Start your new Money Tree in bright, indirect light. A spot a few feet away from a window with sheer curtains is perfect. After two weeks in quarantine, you can slowly move it to its final spot. I rotate my plants a quarter turn every few days so they do not lean.
Mistake #3: Using the Wrong Pot
I have killed more plants with "cute" pots than I care to admit. That ceramic pot with no drainage hole? It was a death sentence. Water pooled at the bottom, roots sat in stagnant moisture, and fungus gnats moved in.
The fix: Use a plastic nursery pot with drainage holes. Place it inside a decorative cachepot if you want style. This lets water flow out freely while keeping your space neat. For quarantine specifically, I use clear plastic pots so I can inspect root health and soil moisture without pulling the plant out.
Setting Up My Quarantine Area: Step-by-Step
Let me show you exactly what I do. This is my personal system refined over months of trial and error.
Step 1: Choose the Location
I use my bathroom for quarantine. It has a window, a door, and it is far from my main plant shelves. I shut the door for two weeks. I wash my hands after touching anything in that room.
If you do not have a spare bathroom, use a large plastic storage bin with a clear lid. Place it on a shelf in a rarely used room. The key is physical separation. Airborne pests can travel, so distance matters more than people realize.
Step 2: Inspect Before Anything Else
Before I bring the plant inside my home, I unbox it in the garage. I check the stems, the underside of every leaf, and the soil surface. I use a cheap jewelers loupe, like the ones phone repair guys use. It has saved me dozens of headaches.
I look for:
- Web-like residue on the undersides of leaves (spider mites)
- Tiny white cottony spots (mealybugs)
- Sticky fluid on stems (scale)
- Small black flying insects hovering near the soil (fungus gnats)
I found spider mites three times doing this. The shop never knew. They probably still sell infested plants today. Now, I do this inspection every single time without exception.
Step 3: Wash the Plant
This sounds scary but it works. I give the entire plant a gentle shower with lukewarm water. I cover the soil with a plastic bag first to prevent it from getting soaked. A solid rinse dislodges many pests before they can settle in.
I also wipe down every single leaf with a damp microfiber cloth. This sounds tedious but takes about 15 minutes. I use a mild insecticidal soap spray afterward, coating all surfaces. This is the first line of defense.
Step 4: Apply Preventative Treatment
Before introducing my Money Tree to the quarantine zone, I drench the soil with a diluted neem oil solution. This kills soil-dwelling larvae and discourages adult pests from laying eggs. I also spray the foliage lightly. Do this in the evening or when the plant is out of direct light to burn the leaves.
I learned this the hard way. I skipped neem oil once with a new Calathea. That plant spent six weeks in quarantine battling thrips. Never again.
Step 5: Add Sticky Traps Immediately
This is non-negotiable. I place two yellow sticky traps in the quarantine area. One vertical at soil level, one slightly above the canopy. These traps catch fungus gnats and thrips as they emerge from the soil.
The sticky traps also serve as an early warning system. If I check the traps after 24 hours and they are covered, I know the plant is heavily infested. I can act immediately instead of waiting for visible damage.
Step 6: Monitor Daily with a Log
I keep a simple notebook by the quarantine zone. Every morning, I jot down:
- Soil moisture level
- Visible new growth
- Any signs of pests on plants or sticky traps
- Leaf appearance
I check the underside of leaves every other day. I inspect new growth clusters every day because pests love fresh tissue. This daily check takes two minutes but saves me from weeks of heartbreak.
Step 7: The 2-Week Rule
This is where most people mess up. They get impatient after five days and move the plant to its permanent spot. I did that with a beautiful Aglaonema. It looked clean. It had pests. I was dealing with mealybugs for months.
My hard rule now: the plant stays in quarantine for 14 full days minimum. I only move it when it shows continuous new growth with zero signs of pests for at least 10 consecutive days. This extra patience has prevented countless outbreaks.
How I Deal With Common Pests I Found in Quarantine
You will likely find something during quarantine. Everyone does. I found three main pests over my time. Here is what worked for me.
Fungus Gnats
The classic indicator of overwatered, dense soil. Tiny dark flies hovering at soil level. Larvae live in the top few inches of soil and feed on organic matter and root hairs.
My approach: Let the topsoil completely dry out between waterings. I place Mosquito Bits in my watering can and soak them for 30 minutes before watering. This contains a bacterium that kills gnat larvae. Adult gnats get caught by the sticky traps. Most infestations clear within 10 days.
Spider Mites
Tiny specks that cause stippling marks on leaves. Fine webbing appears at leaf joints. They thrive in dry, warm conditions.
My approach: I shower the plant to raise humidity and physically wash off mites. I spray with a miticide containing spinosad (a naturally occurring compound). I repeat this every three days for two weeks. I also raise humidity in the quarantine area with a cheap humidifier. Dry air makes these pests explode.
Mealybugs
Cottony white masses on stems and leaf axils. They suck sap and excrete sticky honeydew that promotes sooty mold.
My approach: I dab each bug with rubbing alcohol on a cotton swab. This dissolves their waxy coating and kills them on contact. I then spray the whole plant with insecticidal soap. I repeat this twice the first week, then weekly until clean. These bugs are stubborn. Persistence is the only thing that wins.
My Hard-Learned Quarantine Rules
Over months of trial and error I developed non-negotiable rules. These are not suggestions. They are survival protocols.
Rule 1: No Shared Water Trays
I am guilty of this. I had a long planter with a watering tray that held multiple pots. The pots shared runoff water. One infested new plant contaminated everyone. Now, each plant in quarantine stands in its own saucer. Water that drains out is removed within 20 minutes.
Rule 2: No Shared Tools
Scissors, pruners, and sprayers spread pests between plants. I keep a separate quarantine tool kit. It sits in the quarantine room and does not touch any plant outside that room. I wipe everything down with rubbing alcohol after every use.
Rule 3: Wait Before Fertilizing
I never fertilize a new Money Tree during quarantine. The plant needs time to adjust to new light, humidity, and temperature conditions. Fertilizer encourages fresh growth that attract sap-sucking insects. I wait until at least week three, after quarantine ends, and the plant shows solid new leaf development.
Rule 4: Isolate Even Clean-Looking Plants
This is crucial. Some pests have a long lifecycle. Thrips spend time in soil and leaf tissue where they are invisible for weeks. A planth might look fine and still be infested. The AHS emphasizes thorough inspection and isolation of all new acquisitions. I trust their recommendation over my own judgment. My judgment told me to trust a clean-looking plant once. It was wrong.
What I Learned After 2 Weeks of Consistent Quarantine
I want to be honest about what this looks like in practice. The first week is the hardest. You inspect the plant daily and find nothing. You feel like you are wasting time. You think, "Maybe I should just move it now." Resist this urge. I lost a rare Hoya because I moved it prematurely at day six.
The second week is when things surface. I found mealybugs at day 9 once. They were tiny, tucked into a new leaf joint, hidden from the naked eye. My loupe caught them. That plant stayed in quarantine for three more weeks. It recovered fully and has thrived since.
What surprised me was how much my other plants benefited from the airflow and reduced humidity in the main growth area. By keeping quarantined plants isolated for exactly 2 weeks, I actually reduced the overall pest pressure in my collection. A side effect I did not expect.
Step 7 Quick Reference Checklist
If you want a quick checklist to follow, here it is. Print it. Tape it to your quarantine bin.
- Day 0: Inspect with a loupe. Rinse plant. Apply neem oil spray. Place in quarantine.
- Day 1: Check sticky traps. Inspect leaf axils.
- Day 2: Wipe leaves. Check soil moisture.
- Day 3: Apply insecticidal soap. Check new growth.
- Day 4: Inspect stem and undersides of leaves.
- Day 5: Check sticky traps. Water if topsoil is dry.
- Day 6: No visible pests? Do not move it yet.
- Day 7: Full inspection. Look for microscopic signs.
- Day 8: Check traps. Monitor soil moisture.
- Day 9: Spray preventative treatment again if needed.
- Day 10: Inspect leaf axils and leaf joints.
- Day 11: Check traps.
- Day 12: Monitor new growth.
- Day 13: No pests for 10 consecutive days?
- Day 14: Gradual transition to final location. Not direct sun yet.
Frequently Asked Questions
How long should I quarantine a new Money Tree?
Two weeks minimum. I recommend 14 days, but longer is better. If you see any pests at day 12, reset the clock. Wait 14 more days after the last visible pest. This ensures you catch eggs that were about to hatch.
Do I need to quarantine if the plant looks perfectly healthy?
Yes. How healthy a plant looks at purchase has no correlation with its pest load. I have bought a flawless-looking fern that harbored scale insects. The plant masked it for weeks. Quarantine is not about doubt. It is about discipline.
What is the absolute most important step in quarantine?
Daily inspection with a magnifying loupe. It sounds excessive. I promise it is not. I would have caught my spider mite outbreak four days earlier had I checked with a loupe instead of my eyes alone. You need to get close. That small investment saves you a massive headache.
Final Thoughts
Building a pest-free quarantine area is not complicated. It is just boring, repetitive vigilance. A separate room or bin, a magnifying loupe, sticky traps, neem oil, and 14 days of patience. That is the entire system.
My collection thrives now because I stopped being lazy. I lost three plants to pests before I figured this out. I am confident you do not need to make the same mistakes. Set up that bin tonight. Thank me in three weeks when your Money Tree is pest-free and your other plants are untouched.





