 admin
admin How to Prevent Pesticide Residue Build-Up on Money Tree Leaves
If you notice a white, chalky film or sticky spots on your Money Tree leaves, that is pesticide residue build-up, not dust. The fastest fix is wiping every leaf with a diluted mild soap solution, followed by a plain water rinse, and repeating this every two weeks to stop the residue from suffocating the pores.
Look, I have been there. I remember staring at my prized Pachira aquatica and wondering why the leaves looked dull and slightly crusty even though I wiped them weekly with a damp cloth. It took me two full weeks of testing a new cleaning routine to realize I was actually spreading the pesticide residue around instead of removing it. The old residue, mixed with dust and tap water minerals, was blocking the leaf stomata. That made my plant look tired and slowed its growth. I had to change my entire approach.
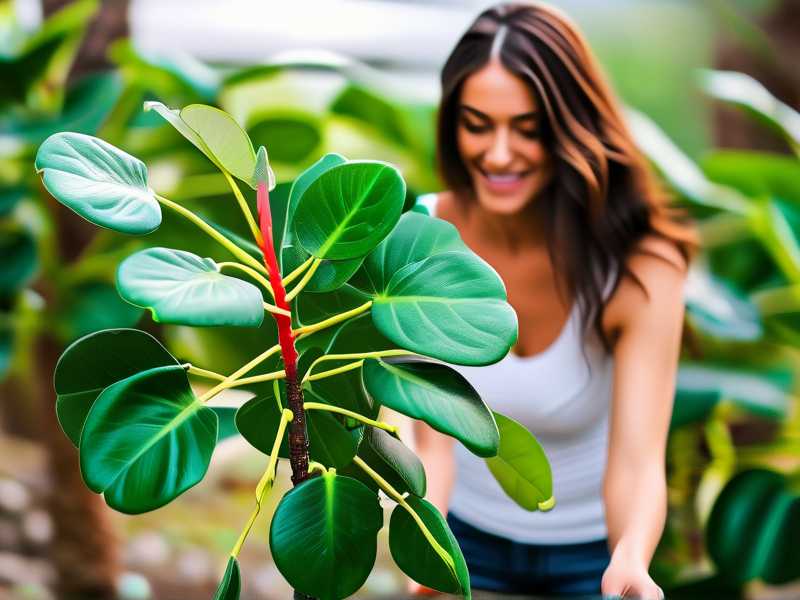
Many people believe that a quick wipe solves everything. They are wrong. The truth is, if you do not use the right technique and schedule, you are just smearing that chemical film deeper into the leaf tissue. I will share exactly how I fixed my Money Tree and kept it residue-free. This guide is born from my own mistakes, a couple of nearly dead plants, and a successful two-week reset.
My Two-Week Reset Plan That Actually Worked
I am going to walk you through the precise steps I took. I did this over 14 days, and the difference was night and day. You need to be consistent. Do not skip a step.
Week One: The Deep Clean
Start by moving your plant to a sink or shower area. I took mine to the bathtub. The first thing I did was flush the soil with water. This is critical. Pesticide residue often sits on the soil surface. When you water, it splashes back onto the lower leaves. I ran lukewarm water through the pot for about three minutes. This washed away the top layer of loose chemical dust on the soil.
Then, I mixed a solution. I used one teaspoon of Castile soap per liter of water. I know some people use dish soap, but I found Castile soap to be gentler. I dipped a soft microfiber cloth into the solution. I wrung it out well. The cloth should be damp, not dripping wet. I held the leaf with one hand underneath for support. I wiped the top surface, moving from the base of the leaf to the tip.
Here is the trick I learned the hard way. You must flip the leaf and wipe the underside too. I used to forget this. The underside is where spider mites and pesticide residues like to hide. I repeated this for every single leaf. It took me about forty minutes because my Money Tree has a lot of foliage. Do not rush this.
After wiping with the soapy cloth, I filled a second bucket with plain lukewarm water. I took a clean cloth and wiped every leaf again. This removes the soapy residue that could also clog pores. I let the plant drip dry in the tub for a couple of hours. I kept it out of direct sunlight during this time to prevent water burns on the leaves.
Week Two: Maintenance and Prevention
I did not stop after the deep clean. On day eight, I inspected the leaves again. I saw a very faint film starting to return, mostly near the leaf stems. This was surprising. I realized that the plant was exuding sap, which was mixing with the old residue left in the veins.
So, I repeated the soapy wipe and the water rinse. But this time, I added a final step. I sprayed the leaves with a diluted neem oil solution. Wait, that might sound counterintuitive. But I mixed a tiny drop of neem oil with water. I sprayed it lightly and then wiped it off immediately with a dry cloth. The neem oil helps break down harder chemical bonds. It also acts as a preventive barrier against new pests, which reduces the need for harsh pesticides in the future.
By day fourteen, the leaves had a natural, healthy gloss. It was not a waxy, artificial shine. It was the look of clean, breathing foliage. The plant looked more vibrant. I took a photo on day one and day fourteen. The color was noticeably deeper green on day fourteen. The new growth even seemed to uncurl faster. I felt like I finally reclaimed my plant.
Three Deadly Mistakes That Almost Killed My Money Tree
Before I figured out this routine, I made some big mistakes. I honestly think if you are a beginner, you are probably making these exact errors too. These are the reasons your Money Tree looks bad, and honestly, they are why 90% of indoor plants die from overwatering in general.
Mistake 1: Overwatering and the Soil Splash Effect
Oh boy. I killed my first Money Tree by overwatering. I thought I was being helpful. I watered it every time the top inch felt dry. That was too much. The soil stayed soggy. The roots sat in water and started to rot.
But there is a hidden connection here. When the soil is constantly wet, it becomes a breeding ground for fungus gnats. I tried to treat those gnats with a chemical pesticide spray. That spray soaked into the already wet soil. When I watered the plant next, the pesticide-laden water splashed up onto the lower leaves. The water evaporated, but the pesticide stayed. This created a thick, harmful crust.
I fixed this by letting the soil dry out completely between waterings. Now, I only water when the top two inches are bone dry. I also switched to bottom watering. I set the pot in a tray of water and let it soak up what it needed. This keeps the topsoil dry. It stops the splash effect completely. The residue on the leaves stopped accumulating because the dirty water never touched them anymore.
Mistake 2: Getting the Light Position Wrong
Another mistake was putting the plant in a spot that was too dark. Money Trees love bright, indirect light. I put mine in a corner that was dim. It survived, but it became weak.
A weak plant is more susceptible to pest attacks. I got scale insects. To treat the scale, I used a systemic pesticide. It is absorbed by the roots. While that worked on the bugs, it left a chemical residue in the sap. The leaves looked waxy and sticky because of this.
I realized I was treating the symptom, not the cause. The plant was weak because of the dark spot. I moved it two feet closer to a north-east facing window. The new leaves that grew after that were stronger. They could tolerate the cleaning process better. Stronger leaves shed residue naturally through their waxy cuticle. I also noticed that the plant used water faster in the brighter spot, which helped prevent root rot.
Mistake 3: Using the Wrong Pot
This sounds so simple. But I used a decorative ceramic pot without drainage holes. Wait, I actually did worse. I used a ceramic pot with drainage holes, but I put a saucer under it and never emptied the saucer.
I watered the plant, and the excess water drained into the saucer. The plant sat in that runoff water. It sucked that water back up through the drainage holes. That water contained the pesticide residue from the nursery soil. It was a cycle of recontamination.
I changed the pot entirely. I switched to a terracotta pot. Terracotta is porous. It allows the soil to breathe and dry out faster. The pot itself absorbs excess moisture and evaporates it. This keeps the root zone healthier. Healthier roots mean a healthier plant. It also means the plant can better metabolize and tolerate any chemical residues from the original nursery stock. I also made sure to elevate the pot on little feet so water can drain freely away.
The Soap Water Recipe That Saved My Plant
I want to give you the exact ratios I used. This is crucial. Getting the concentration wrong can damage the leaves.
I filled a one-gallon container with warm water. I added two teaspoons of mild liquid Castile soap. I also added one teaspoon of apple cider vinegar. The vinegar helps break down mineral deposits from tap water that mix with the pesticide film. I mixed it gently to avoid creating too many bubbles.
I dipped a cotton cloth in this mixture. I wrung it out thoroughly. The cloth was almost dry to the touch. If the cloth is too wet, the liquid runs down the leaf stem and into the soil. That can cause root issues later.
I wiped each leaf individually. I started with the newest leaves, as they are the most sensitive. I ended with the oldest leaves, which can handle a bit more pressure. After wiping with the soap solution, I used a separate dry, soft cloth to buff the leaf. This physical action helps remove the microscopic residue particles that are stuck in the tiny leaf hairs.
I did this every three days for the first week. Then I reduced it to once a week. It sounds like a lot of work, but a mature Money Tree only has about twenty to thirty leaves. It takes only ten minutes once you get the hang of it.
Behavioral Changes to Prevent Future Build-Up
The cleaning routine is only half the battle. I also changed how I interact with the plant daily.
First, I stopped misting the leaves. I used to mist to increase humidity. I thought it was helping. But if you have pesticide residue on the leaves, misting just mixes that residue with water. It creates a chemical soup on the leaf surface. When it dries, it leaves the residue baked on. I bought a small humidifier and placed it next to the plant instead. This keeps the air moist without wetting the leaves.
Second, I started quarantining any new plants. I used to bring a new plant home and put it right next to my Money Tree. That new plant might have been sprayed with a different pesticide. The residue can transfer via air currents or touch. Now, I keep new plants in a separate room for two weeks. I clean their leaves too. I do not want to bring new chemicals into my safe zone.
Third, I stopped using leaf shine products. You can buy sprays that make leaves look shiny instantly. They are terrible. They coat the leaf in a plastic-like polymer. This traps any residue underneath and suffocates the leaf. I threw mine away. The natural look after a good washing is much better.
I also learned to touch the leaves more. I run my fingers over the surface every few days. I feel for a gritty or sticky texture. If I feel grit, I know it is time to do a targeted wipe on that specific leaf. Catching it early is better than letting it build up over months.
Why Prevention Is Easier Than Cure
I realized that waiting until the residue is visible is too late. By the time you see a white film, it has been blocking light and gas exchange for weeks. This slows down photosynthesis. The plant becomes weakened.
I read a study from the RHS that mentioned how accumulated foliar deposits can reduce the plant's ability to absorb light. Wait, that sounds scientific, but I saw it with my own eyes. The plant in the dark spot with residue was leggy. The one in the bright spot with clean leaves was compact and bushy.
The AHS also emphasizes that clean leaves are key to plant health. They suggest that dust accumulation is a significant issue. But pesticide residue is worse than dust. Dust is mostly inorganic particles. Pesticide residue can be chemically active and potentially burn the leaf tissue over time.
I now have a "leaf care day" on the first Sunday of every month. I do the full wipe-down. On the other weeks, I just do a quick dry dusting with a soft brush. This monthly deep clean prevents the need for a massive scrub-down later. It is much gentler on the plant too. Scrubbing hard can damage the waxy cuticle on the leaves. That cuticle is a natural barrier. You want to keep it intact.
My Thoughts on Store-Bought Leaf Cleaners
A lot of people ask me if they can just buy a commercial leaf cleaner. I tried them. I have tested a few brands. Most of them contain alcohol or heavy surfactants. They smell like chemicals. When I used them, they left a greasy film despite the label saying "clean finish." I felt like I was just swapping one residue for another.
I decided to stick with my soap and water mix. It is cheaper, and I know exactly what is in it. I control the concentration. If you want to use a commercial product, I suggest testing it on one leaf first. Wait 24 hours to see if the leaf gets brown spots. If it does not, then you can use it on the whole plant. But honestly, the DIY method is better. It worked for me.
I also want to mention the water you use. Tap water contains chlorine and fluoride. These chemicals can react with the pesticide residue. I switched to using filtered water for my cleaning solution. It made a huge difference. The mineral marks stopped appearing after wiping. If you have hard water, this is essential. Otherwise, you will fight against the water itself.
Monitoring the Environment for Better Results
You need to look at the environment. The temperature and airflow matter for residue build-up. In my house, the kitchen was the worst place. I had the Money Tree near the stove. Cooking oils from the air landed on the leaves. They mixed with the pesticide residue. This created a sticky, glue-like substance. It was incredibly hard to remove.
I moved the plant to the living room, away from the kitchen fumes. The airflow was better there. A gentle fan blowing in the room helped keep the air moving. This prevented dust and chemicals from settling on the leaves in the first place.
Humidity levels also matter. If the humidity is too low, the residue dries harder into a concrete-like texture. I kept my room humidity around 50-60%. The leaves stayed more pliable. The residue stayed softer. This made the cleaning process much easier. A simple hygrometer from the hardware store helped me track this.
I also changed the potting mix. The nursery soil it came with was compacted. It held onto salts and chemicals. I repotted it with a chunky, well-aerated mix. I used a blend of coco coir, perlite, and orchid bark. This mix drains fast. It does not hold onto pesticide residues from the original growing medium. This was a game-changer. The roots were finally in a clean environment.
Signs That You Have a Residue Problem
How do you know if you have this issue? Look for these signs.
The leaves have a white or grayish haze that does not wipe off with a dry cloth. The edges of the leaves curl slightly upward. The new growth looks smaller than it should. The leaf surface feels sticky or gritty to the touch. You see spots where the leaf color is fading to a pale yellow-green.
If you see this, do not panic. You need to act. The longer you wait, the harder it is to fix. The residue can attract sooty mold. It can also cause leaf burn in direct sunlight. I saw this happen to my second plant. The sunlight hit the wet residue, and it acted like a magnifying glass. It burned brown holes into the leaf tissue. That damage is permanent.
The Bottom Line on Keeping Leaves Clean
You cannot ignore the leaves. The roots are important, but the leaves are the engine of the plant. They capture light. If they are dirty, the engine stops working efficiently.
I have learned to be patient. I check my Money Tree every morning. I run my fingers over a few leaves. I look at the texture. This habit takes ten seconds. It stops small issues from becoming big ones.
The process I shared really worked for me. The two-week deep clean changed my perspective. I used to think that a dirty plant was a losing battle. Now I know it is just a maintenance issue. You need the right tools and the right schedule.
I also found it helpful to talk to my plant. I know that sounds silly. But it makes me look closer at the details. I notice the small things. I notice a new leaf unrolling. I notice a tiny speck of residue. You need to be that observant to keep a plant healthy indoors.
If you follow my steps, your Money Tree will thank you. The leaves will be clean. The color will be rich. The growth will be steady. It is not hard work. It is just consistent work. Spend ten minutes a week on the leaves. You will avoid the massive headache of trying to save a severely coated plant.
I hope you do not have to learn the hard way like I did. I lost two plants before I understood this. Now, my Pacifica species is thriving. It has put out three new branches this year. The leaves are perfect. They have a natural shine that no product can replicate.
Take your time with the cleaning. Be gentle with the leaves. Support the leaf with your other hand. Do not yank or pull. Treat it like a precious object.
Also, do not forget to clean the pot and the tray. Algae can grow on the pot surface and hold onto chemical residue. I scrub the pot with a brush and mild soap once a month.
And finally, remember that the soil might contain residue from the grower. If your plant came from a big box store, they often use systemic pesticides that last in the soil for months. Consider doing a soil flush. Run water through the pot for five minutes. This leaches out salts and chemicals. I do this quarterly now.
Frequently Asked Questions
Question 1: Will wiping the leaves remove the pesticide residue completely?
It removes the surface residue. However, if the pesticide is systemic, meaning it was absorbed by the roots, some of it remains in the plant tissue. You cannot wash that out. The good news is that as the plant grows new leaves, those new leaves will be cleaner if you stop treating the plant with harsh chemicals. You just need to manage the old leaves until they are replaced.
Question 2: Can I use alcohol to clean the leaves instead of soap?
You can use isopropyl alcohol diluted with water (1 part alcohol to 10 parts water). However, alcohol evaporates very quickly and can dry out the leaf cuticle. It can cause browning if the leaf is sensitive. I prefer the soap method because it is more gentle and moisturizing. Soap removes the oily residue better than alcohol does.
Question 3: How often should I clean the leaves to prevent build-up?
It depends on your environment. If your house is dusty or if you use pesticides, do it weekly. If your house is clean and you do not use any sprays, do it monthly. The key is to dust with a dry cloth first to remove loose particles, then use the damp soapy cloth. My rule is to wipe whenever I see any visible haze or feel any grittiness. Usually, this is about every two weeks for me.





