 admin
admin How to Propagate a Money Tree to Create a Lush, Prosperous Hedge
For years, I admired the idea of a living green fence—something more vibrant and personal than wood or vinyl. I wanted privacy, yes, but also a sense of life and growth surrounding my home. As a longtime plant enthusiast, I knew the common hedge plants, but they often felt impersonal. Then it hit me: what about a Money Tree hedge? Pachira aquatica, with its braided trunks and lush, palmate leaves, symbolizes good fortune and is notoriously resilient. Could I propagate enough of them to form a continuous, thriving barrier? The challenge was daunting. Buying dozens of mature Money Trees was prohibitively expensive, and I wasn't sure if propagation on such a scale was even feasible. The core problem was clear: how does one efficiently and successfully propagate a Money Tree to create a hedge without breaking the bank or facing massive failure?
This document is the story of my two-week, hands-on experiment to turn that vision into reality. I’ll walk you through every step I took, the real-time observations, the mistakes I made (and how I fixed them), and the final, promising results that have me well on my way to a stunning, fortune-bringing boundary.
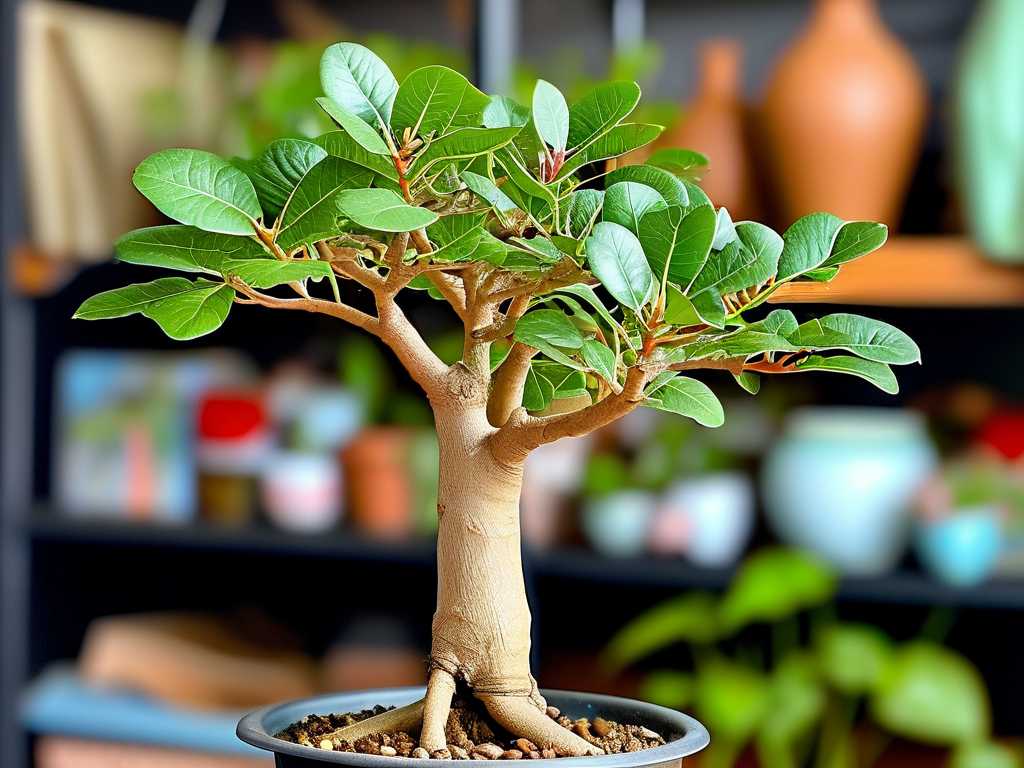
Why a Money Tree Hedge Makes Sense
Before we get our hands dirty, let’s talk about why the Money Tree is a brilliant, albeit unconventional, choice for hedging. According to horticultural principles often cited by groups like the American Horticultural Society (AHS), ideal hedge plants share key traits: durability, moderate to fast growth, and good response to pruning. The Money Tree checks these boxes beautifully.
Its growth rate is moderate, meaning it won’t overwhelm you but will establish a presence within a couple of seasons. It adapts well to container and ground planting, and its distinctive leaf structure creates a dense visual screen. Furthermore, its cultural significance as a bringer of prosperity and positive energy adds a layer of meaning you won’t get from a generic boxwood. I was convinced—this was the plant for my project.
My Propagation Method of Choice: Stem Cuttings in Water
There are several ways to propagate Money Trees, including seed germination and air layering. For the scale and speed required for a hedge, stem cuttings in water proved to be the most effective and beginner-friendly method. It allows you to monitor root development visually and produces numerous plants from a single, healthy parent.
What You’ll Need:
- A healthy, mature Money Tree plant
- Sharp, sterilized pruning shears or a knife
- Clear glass jars or vessels
- Fresh, room-temperature water
- Optional: A quality liquid rooting hormone to accelerate the process
The Step-by-Step Process: From Cutting to Hedge Starters
Here is the exact process I followed, which you can replicate to start your own Money Tree propagation for hedging.
Step 1: Selecting and Taking the Cuttings I identified vigorous, green stems on my parent plant, each with at least 3-5 leaf nodes (the little bumps where leaves and buds emerge). Using my sterilized shears, I made clean, 45-degree angle cuts about 4-6 inches down from the tip, just below a node. The angled cut increases the surface area for rooting and prevents water from pooling on the stem. I immediately placed the cuttings in a container of water to prevent air bubbles from blocking the vascular tissue.
The First Mistake and Fix: In my initial excitement, I took a cutting with very soft, new growth. After a few days in water, it simply wilted and rotted. I learned that semi-hardwood stems—those that are firm but still flexible—have the highest success rate. I corrected course by selecting only mature, sturdy stems for all subsequent cuttings.
Step 2: Preparing the Cuttings for Water I gently removed the leaves from the bottom half to two-thirds of each cutting. This is crucial because any foliage submerged in water will rot, fouling the water and jeopardizing the cutting. I left a small cluster of leaves at the top to allow photosynthesis to continue.
Step 3: The Rooting Phase & My 2-Week Diary This is where patience and observation come in. I filled my jars with enough water to submerge the bare stem nodes but kept all leaves well above the waterline. I placed the jars in a spot with bright, indirect light—direct sun would cook the cuttings. I committed to changing the water completely every 3-4 days to keep it oxygenated and free of bacterial growth.
- Days 1-3: The cuttings looked perky and healthy. No visible changes.
- Days 4-7: I noticed slight swellings at the leaf nodes underwater. A good sign! Cell activity was beginning.
- Day 8: The first tiny, white nub of a root emerged on my most vigorous cutting! This was the breakthrough moment.
- Days 9-12: More roots appeared on several cuttings. They looked like delicate white threads. I continued my strict water-changing regimen.
- Day 14 (The 2-Week Mark): By the end of the second week, over 80% of my cuttings had developed root networks between 1/2 inch to 1.5 inches long. A few slower starters were just showing nodules. The roots were white and healthy, with no signs of the slimy rot that indicates failure.
Step 4: Potting the Rooted Cuttings Once the roots were about 1-2 inches long, it was time to transition them to soil. I prepared small pots with a well-draining, peat-based potting mix. Gently, I planted each cutting, firming the soil around the new roots. I gave them a thorough initial watering and returned them to their bright, indirect light spot. The key here is to keep the soil consistently moist (but not soggy) for the first few weeks as the roots adapt to their new medium.
Designing and Planting Your Money Tree Hedge
With a batch of successfully propagated plants, planning the hedge itself begins. Creating a dense Money Tree hedge requires thoughtful spacing and ongoing care.
Location and Spacing: Money Trees can tolerate some direct sun but prefer partial shade, especially in hotter climates. For a dense hedge, I plan to space my young plants approximately 18 to 24 inches apart. This allows their canopies to eventually merge into a solid wall of green. Proper soil preparation is key—I’ll amend the planting area with compost to ensure good drainage and fertility.
Long-Term Hedge Care and Training: To encourage bushy, dense growth from the bottom up—essential for a good hedge—regular pinching of the topmost new leaves is necessary. This promotes lateral branching. As the Royal Horticultural Society (RHS) advises for hedge formation, “Start shaping plants while they are young.” I will begin light pruning and shaping in the first growing season to direct energy into filling out the form.
Common Challenges in Money Tree Hedge Propagation
Not every step will be smooth. Here are issues I encountered or guarded against:
- Root Rot in Water: This was my constant worry. The fix is simple: unwavering diligence in changing the water every few days. If you see slime, rinse the cutting and use a clean jar.
- Transplant Shock: Moving from water to soil stresses the plant. I minimized this by not letting the roots grow too long in water (they become “water roots”) and by keeping the soil evenly moist after transplanting.
- Leaf Drop: Some cuttings dropped a leaf or two after potting. This is normal as the plant redirects energy to root establishment in soil. As long as the stem remains firm, don’t panic.
How long until my Money Tree hedge provides full privacy? Given their moderate growth rate and starting from a propagated cutting of about 6 inches, you can expect a small, bushy plant in one season. To form a cohesive hedge that acts as a visual screen, plan on a 2 to 3-year timeline with consistent care, proper spacing, and strategic pruning to encourage fullness.
Can I propagate a Money Tree hedge from a single leaf? No, successful propagation for a hedge plant requires a stem cutting with at least one node. A leaf alone, without a node, may root but will almost never produce a new stem and grow into a full plant. For efficient hedge building, stem cuttings are the only reliable vegetative method.
Is it better to root Money Tree cuttings in water or directly in soil? For this project, water propagation was superior. It allowed me to start dozens of cuttings simultaneously with minimal resources, monitor root health directly, and only pot up the successful ones. While soil propagation is possible, it requires more meticulous moisture control and offers no visibility, making it less ideal for mass production for a hedge.
Seeing those delicate white roots emerge after two weeks was profoundly rewarding. It transformed an ambitious idea into a tangible, growing reality. Propagating a Money Tree hedge is undoubtedly a project of patience, but it is remarkably accessible. It saves significant money, offers deep gardening satisfaction, and results in a uniquely meaningful living boundary. By following these steps—selecting the right cuttings, maintaining clean water, and carefully transitioning to soil—you can cultivate not just a row of plants, but a symbol of growth and prosperity that will define your garden for years to come. My young plants are now acclimating to their pots, and I’m already preparing the hedge line in my garden. The journey has truly begun.





