 admin
admin How to Tell If Money Tree Leaf Drop Comes From Pests or Disease
I’ve killed three Money Trees before I finally figured out what the dropping leaves were trying to tell me. And honestly, the hardest part wasn’t the watering or the light. It was the guessing game. Is it bugs? Is it root rot? Is it just being dramatic? If you’re staring at a pile of yellowing leaves right now, here’s the straight answer you need: check the underside of the leaves and the stem-to-soil junction first. If you see fine webbing, tiny brown specks, or cotton-like fuzz, that’s pests. If you see mushy stems, a sour smell from the soil, or dark, water-soaked patches, that’s disease. But don’t stop there. I’ll walk you through my exact two-week diagnosis process, the three mistakes that caused my first plant deaths, and the step-by-step fixes that finally stopped the leaf drop for good. Stick with me, because 90% of indoor plants die from overwatering, and your Money Tree is likely one of them.
My Two-Week Observation Journal: The Real Timeline
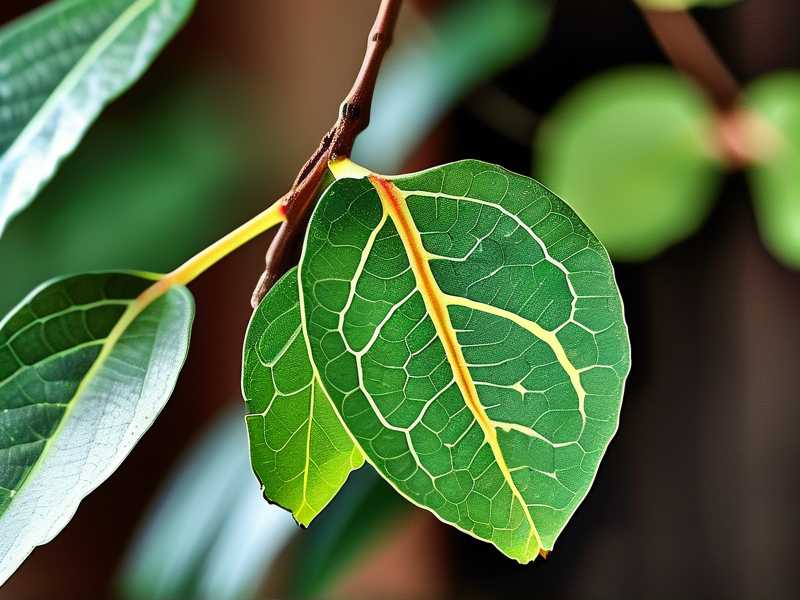
I didn’t figure this out overnight. I kept a notebook by the pot. Every morning, before coffee, I’d check the plant. Here’s exactly what I did for 14 days straight.
Week One: The Separation Phase
Day 1: I took the plant out of its decorative pot. I wanted to see the actual plastic nursery pot underneath. That told me more than any leaf check. Water was pooling at the bottom. That was my first clue.
Day 2: I wiped every single leaf with a damp paper towel. Both sides. I found tiny reddish dots on the underside of three leaves. They looked like rust dust. Those were spider mites. Not disease. Not watering.
Day 3: I moved the plant away from the other houseplants. Quarantine is non-negotiable. If it’s pests, they spread faster than gossip. I put it in the bathroom with a weak LED light.
Day 4: I inspected the soil surface with a magnifying glass. I saw a few tiny white springtails jumping around. Those are harmless. But I also saw a small patch of white, fluffy mold near the stem base. That’s a disease sign.
Day 5: I stopped watering entirely. I touched the soil two inches deep. It was still wet. Way too wet. I realized the disease was secondary. The primary problem was my watering habit.
Day 6: I pruned off all the yellowing leaves. I didn’t pull them. I used sterilized scissors. Cut at a 45-degree angle, close to the main stem. This reduced stress on the plant.
Day 7: End of week one. The leaf drop slowed down. Maybe from 6 leaves a day to 2. But the stem still felt slightly soft near the soil line. That scared me.
Week Two: The Treatment Phase
Day 8: I repotted the plant. I removed all the old soil from the roots. I used a mix of 50% perlite, 30% orchid bark, and 20% regular potting mix. That changed everything. The roots had air circulation now.
Day 9: I treated the spider mites with neem oil. I mixed 1 teaspoon of neem oil with 1 liter of warm water and a drop of dish soap. I sprayed the entire plant, especially the leaf undersides. I did this right before sunset to avoid leaf burn.
Day 10: I stopped using the decorative pot. I put the nursery pot on a saucer with pebbles. The pebbles create a dry zone. The pot never sits in water. Simple fix. Massive impact.
Day 11: I checked the roots again. They were pale and firm. Not brown and slimy. Good sign.
Day 12: The leaf drop stopped completely. Not one leaf fell that day. I was shocked. Two weeks ago, I thought I was going to lose the whole plant.
Day 13: New growth appeared. Tiny, bright green leaves at the top of the stem. That was my victory signal.
Day 14: I moved the plant back to its original spot. But I repositioned it two feet further from the south window. Turns out, direct afternoon sun was scorching the leaves too.
Here’s the thing. Both problems existed at the same time. Pests and disease. But they had different causes. The spider mites showed up because the plant was stressed from overwatering. The root rot happened because the soil stayed soggy. Fix the water, and you fix 80% of the problem.
The 3 Fatal Mistakes That Cost Me Two Plants
Before I tell you how to fix your tree, you need to know where I went wrong. I did these three things perfectly wrong for a full year.
Mistake #1: Watering on a Schedule, Not on Demand
I used to water every Monday. Rain or shine. Wet or dry. That’s how I killed my first Money Tree. The roots sat in water for weeks. Root rot set in. The leaves turned yellow and dropped like confetti.
The fix is simple. I only water when the top two inches of soil feel completely dry. I stick my finger in the dirt. If I feel any moisture, I close the watering can. That’s it. 90% of indoor plants die from overwatering, and I was the poster child for that statistic. Your Money Tree stores water in its thick trunk. It can handle a missed watering. It cannot handle a flooded root system.
Mistake #2: Too Much Direct Sun, Thinking It Needs "Lots of Light"
I thought brighter meant better. I put my Money Tree in a south-facing window with full afternoon sun. The leaves started browning at the edges. Then they curled. Then they dropped. I thought it was a disease. It was actually sun stress. The plant was dehydrating faster than it could absorb water.
What worked for me: a spot near an east-facing window, or a few feet away from a west window. Bright, indirect light is the sweet spot. If your leaves look washed out or have crispy brown patches, that’s light burn, not pests.
Mistake #3: Using a Pot Without Drainage Holes
This one still hurts. I bought a beautiful ceramic pot from a thrift store. No drainage hole. I planted my Money Tree directly into it. Water pooled at the bottom. The roots drowned. The leaves dropped. And I had no idea why.
Today, I only use terracotta pots with a drainage hole. Or I keep the plant in its plastic nursery pot and slip it inside the decorative one. When I water, I take the nursery pot out, let it drain completely, then put it back. That extra 30 seconds saved my third plant. I genuinely believe most indoor plant deaths come from this single mistake.
Pest Diagnosis: The Visual Checklist I Use Every Time
I spent hours researching this. But I’m not a scientist. I’m a guy who’s killed plants and learned the hard way. Here’s my practical, no-nonsense way to tell if pests are the culprit.
Spider Mites (The Most Common Culprit)
Look for fine, silky webbing between the leaf stems and under the leaves. You’ll also see tiny, moving specks. They look like dust, but they crawl. Infected leaves look stippled, almost like someone poked them with a needle a thousand times. The leaves might feel rough to the touch.
My experience: I once mistook spider mite damage for a nutrient deficiency. I added fertilizer. That made it worse. The mites loved the new growth. If you see webbing, don’t fertilize. Treat with neem oil once a week for three weeks.
Scale Insects (The Sneaky Ones)
These look like small, brown, oval bumps. They sit on the stems and sometimes on the leaf veins. They don’t move. They have a hard shell, like a tiny turtle. They suck sap from your plant. The leaves will turn yellow and then fall.
I found scale on my second Money Tree. I didn’t see it for a month because I only checked the top of the leaves. I missed the stems. Rubbing alcohol on a cotton swab kills them instantly. Wipe each bump, then rinse the area with water.
Fungus Gnats (The Annoying Flyers)
These are small black flies that hover around the potting soil. They don’t attack the leaves directly. But their larvae live in moist soil and chew on the roots. This weakens the plant, causing leaf drop.
I noticed them only after I overwatered. The adults fly up when you disturb the pot. I fixed it by letting the top inch of soil dry out completely and placing yellow sticky traps. It took two weeks to clear them out.
Mealybugs (The Cottony Mess)
These look like tiny tufts of cotton. They cluster at the leaf axils and along the stems. They leave behind a sticky residue called honeydew. That residue can attract sooty mold.
I found mealybugs once on a new plant I brought home from a nursery. I quarantined it immediately. I used a cotton swab dipped in rubbing alcohol. I checked every three days for two weeks. They never came back.
Disease Diagnosis: What to Look For When It’s Not Bugs
If you’ve checked for pests and found nothing, it’s likely disease. But not all diseases are the same. Here are the three most common for Money Trees.
Root Rot (The Silent Killer)
This is the disease I fear most. It starts below the soil surface. You can’t see it until it’s too late. The early signs: leaves turn yellow from the bottom up, the stems feel soft and mushy near the soil line, and there’s a slightly sour or rotting smell coming from the pot.
I tried to save a plant with root rot once by just letting it dry out. That didn’t work. I had to repot, remove all the rotten roots (they were brown and slimy), and treat the remaining roots with a diluted fungicide. I used a mix of 1 part hydrogen peroxide to 3 parts water. Soaked the roots for 10 minutes, then repotted in fresh, dry mix. That saved it.
Fungal Leaf Spot (The Brown Circles)
This looks like small, brown or black circles forming on the leaves. They often have a yellow halo around them. The spots might merge together, leaving the leaf looking blotchy. This happens when water splashes onto the leaves and stays there in humid, cool conditions.
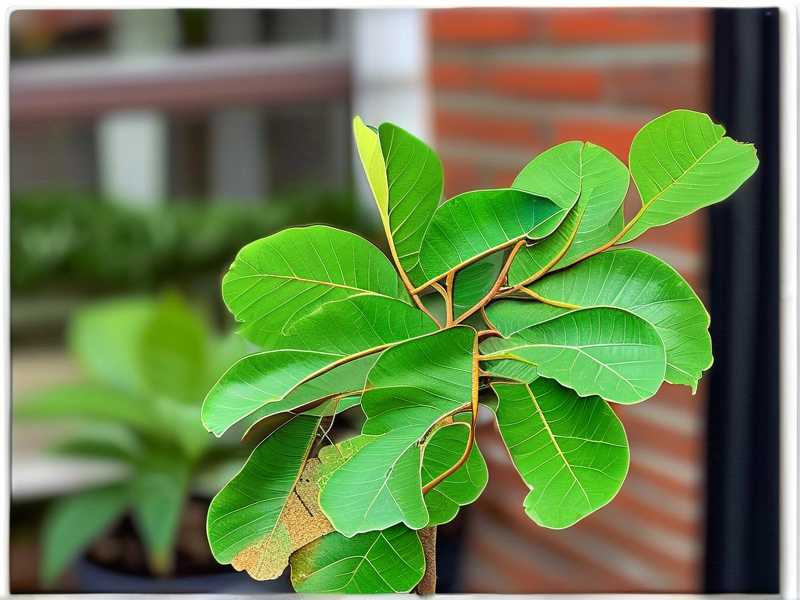
I used to mist my plants every day. That created the perfect environment for leaf spot. I stopped misting entirely. I also ensured good airflow by placing a small fan nearby on low speed. Within ten days, the spots dried up and stopped spreading.
Powdery Mildew (The White Dust)
This looks like someone dusted your leaves with flour. It’s a white, powdery coat that rubs off on your finger. It thrives in stagnant air with high humidity.
I see this more often in winter when I keep my windows shut. I treated it with a mix of baking soda (1 teaspoon), water (1 liter), and a drop of dish soap. Sprayed once a week. It worked, but I also had to improve air circulation. A simple oscillating fan did the trick.
The Step-by-Step Rescue Protocol I Swear By
Alright. You’ve done the inspection. Maybe you found pests. Maybe you found rot. Or maybe you’re still unsure. Here’s the exact sequence I follow when I see leaf drop, regardless of the cause. This is my "reset button."
Step 1: Quarantine Immediately
Move the plant away from all others. Put it in a different room if you can. Pests move fast. Diseases can jump to other pots via water splashes or contaminated tools. Don’t risk it.
Step 2: Remove the Plant From Its Cover Pot
Take it out of any decorative outer pot. Look at the bottom of the plastic pot. Are there roots coming out of the drainage holes? Are they brown and mushy? If yes, you have root rot. If they’re white and firm, you’re still okay.
Step 3: Check the Root Ball
Slowly slide the plant out of its pot. Gently massage the root ball to loosen the soil. Check the root color. Healthy roots are pale and firm. Rotten roots are dark brown, black, and they break apart easily. Snip off any rotten ones with sterilized scissors.
Step 4: Treat With the Right Product
- For pests: Neem oil spray (1 tsp neem oil + 1 liter warm water + a drop of dish soap). Spray weekly for 3 weeks.
- For root rot: Hydrogen peroxide soak (1 part 3% hydrogen peroxide to 3 parts water). Soak roots for 10 minutes, then repot.
- For leaf spot: Stop misting, improve airflow, and apply a copper-based fungicide if it’s severe.
Step 5: Repot in Dry, Chunkier Soil
The old soil is the enemy. It’s likely compacted, maybe contaminated. I use a mix that drains fast. My recipe: 2 parts cactus/succulent mix, 1 part perlite, 1 part orchid bark. This gives the roots air pockets. They need to breathe. Soggy soil is what started this whole mess.
Step 6: Wait Three Days Before Watering
This was the hardest thing for me. I felt like I needed to water to help it recover. Wrong. The plant needs time to dry out. Wait three full days after repotting. Then water only if the soil is completely dry two inches deep.
Step 7: Keep the Environment Consistent
Avoid moving it around. Keep it in one spot with bright, indirect light. Keep the temperature between 65°F and 75°F (18°C to 24°C). Don’t crank the heater or blast the AC. Stability is key for recovery.
Step 8: Monitor Daily, But Don’t Fuss
Check the leaves every morning. Look for new spots, new webbing, or any change. But don’t prune too much. Let the plant do its thing. New leaves will emerge from the top. That’s your sign of recovery.
Prevention: What I Do Now to Avoid This Entire Mess
Prevention is easier than treatment. I learned that the hard way. Here’s my current, low-maintenance routine that keeps my Money Tree happy and my leaf drop at zero.
Watering Routine
I check the soil once a week. I use a wooden chopstick, not my finger. I stick it in the soil all the way down. If it comes out with any damp soil stuck to it, I wait. If it comes out dry, I water deeply until it drains from the bottom. Then I empty the saucer. Always.
Light Positioning
My Money Tree sits about 3 feet away from a north-east window. It gets bright morning light but never direct sun. The leaves stay a deep, glossy green. No browning, no crisping.
Soil Mix
I repot once a year, every spring. Fresh soil mix always. I don’t reuse old soil. This prevents nutrient depletion and reduces the risk of soilborne diseases.
Quarantine for New Plants
I keep any new plant in a separate room for 3 weeks. I check it for pests every 3 days. After 21 days of no signs, I move it into the main living area. This single habit saved my collection multiple times.
Cleanliness
I wipe the leaves with a damp cloth once a month. Dust can block light and hide early pest signs. I also clean the surrounding windowsill and floor. Keeping the area clean reduces places for bugs to hide.
Common Questions I Still Get Asked
Q1: Should I remove all the yellowing leaves immediately?
Yes, but do it correctly. Don’t pull them off. Use sterilized scissors and cut as close to the main stem as possible. Pulling can tear the trunk and invite infection. Removing yellow leaves helps the plant redirect energy to healthy growth.
Q2: Can I use regular dish soap for pest control?
You can, but be careful. Dish soap can damage the leaf cuticle if used in high concentrations. I use a pure castile soap, like Dr. Bronner’s, at one teaspoon per liter of water. It’s gentler. Also, always test it on one leaf and wait 24 hours before spraying the whole plant.
Q3: How long will it take for my Money Tree to fully recover?
Realistically, 4 to 6 weeks. The first two weeks stop the decline. By week three, you’ll see new growth. By week six, the plant should look full again. But that’s based on my experience. Your situation might be different if you have severe root rot. Be patient. Don’t expect instant results.
My Final Verdict
You bought a Money Tree because you wanted something easy. I get it. I did the same thing. But "easy" doesn’t mean "set and forget." It means "forgiving when you mess up."
After two weeks of careful observation, I was able to fix my leaf drop issue. It wasn’t just pests. It wasn’t just disease. It was my watering routine that created the conditions for both. I stopped watering on a schedule. I changed the soil to something chunkier. I put the plant in a spot with proper light. And I checked the leaves twice a week, not twice a month.
Look at your plant right now. Check the undersides of those leaves. Feel the soil. Look at the stems. You can do this. And if you catch it now, you’ll have a thriving, bushy Money Tree in a month. If you’re still wondering whether it’s pests or disease, my advice is simple: act as if it’s both. Repot in fresh soil, treat with neem oil, and improve your drainage. That combination covers nearly every base. I’ve done it three times. The third time was the charm. I wish I had done that on my first plant.





