admin
admin Let me give it to you straight: braided money tree crevices are pest motels. I learned this the hard way after losing my second Pachira aquatica to a colony of spider mites that had set up camp deep inside the braided trunk. The answer is a two-pronged approach — preventive flushing with diluted neem oil every 10 days and mechanical cleaning with a soft-bristled toothbrush — applied consistently for at least two weeks. That combo is what finally cleared my infestation and kept it gone. I’m sharing the full process below, mistakes included, so you don’t have to repeat my funeral for yet another plant.
I remember staring at my money tree in early March. The leaves looked fine from across the room. But up close? Tiny webs stretched between the braided ridges like abandoned hammocks. I had been watering on a schedule, misting the leaves, doing everything "right." Yet the pests found the one place I never looked: the deep, dark crevices where the three trunks twist together. Hidden pests thrive there because moisture collects, airflow is zero, and predators can’t reach them. If you have a braided money tree, those crevices are your plant’s Achilles heel. Let’s fix that.
Why Braided Crevices Become Pest Fortresses
The braided structure is unnatural. Money trees don’t naturally weave together — we force them when young, and the trunks fuse as they grow. Between those fused ridges, you get pockets of dead bark, trapped dust, and residual moisture from careless watering. That combination is basically a five-star hotel for scale insects, mealybugs, and spider mites.
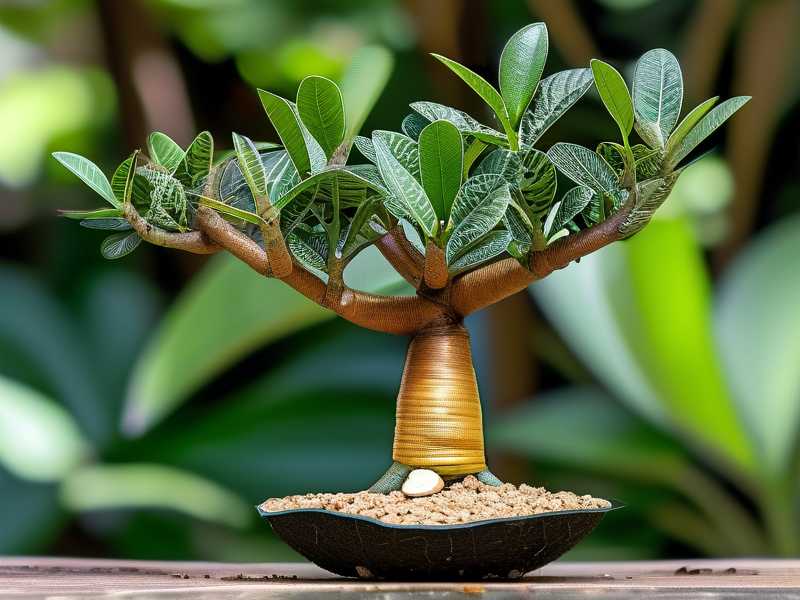
I didn’t realize this until I peeled back a loose piece of bark one day and saw tiny white crawlers scatter. That was my moment of horror. The crevices are shaded, humid, and protected — pests love that. You can spray the soil and wipe the leaves until you’re blue in the face, but if you ignore the braided trunk itself, the pests just wait it out and re-emerge later.
90% of indoor plants die from overwatering. But the other 10%? They die from pests you never see until it’s too late. The braided trunk is where they hide. So the real enemy is not just the bug — it’s the environment inside those crevices. Change that environment, and the pests have no place to stay.
The 3 Fatal Mistakes I Made (And You’re Probably Making Too)
Mistake #1: Watering on a Fixed Schedule
I used to water every Sunday like clockwork. Every single Sunday. My money tree got a generous pour, and I felt like such a responsible plant parent. Turns out, the roots didn’t need that much water, and the excess ran down the braided trunk, pooling in the crevices. That constant dampness attracted fungus gnats and gave scale insects a breeding ground. I didn’t fix this until I bought a moisture meter. Now I only water when the top two inches of soil are completely dry — which in my home, turns out to be every 10 to 14 days, not 7.
Mistake #2: Giving It "Bright, Indirect Light" Wrong
Every care guide says bright indirect light. I assumed that meant a spot near the window but not in direct sun. What I didn’t account for was that my chosen corner had almost no real light penetration. The tree became stressed, and stressed plants produce more sugars in their tissues — basically an all-you-can-eat buffet for pests. I moved it to a north-east facing window, kept it about three feet away, and the growth improved noticeably within two weeks. A healthy money tree resists pests far better than a sluggish one stuck in a dim corner.
Mistake #3: Using a Decorative Pot Without Drainage
This was my biggest embarrassment. I bought a beautiful ceramic pot with no drainage holes because it looked so good on Instagram. I put a layer of pebbles at the bottom, thinking that would help. It didn’t. Water accumulated in the bottom third of the soil, roots stayed wet, and the trunk base started to soften. That rotting tissue attracted fungus gnats like magnets. I switched to a standard nursery pot with drainage, nested inside the decorative one. Problem solved. No more root rot, and a dramatic reduction in pest activity.
How to Actually Clean the Braided Crevices (Step-by-Step)
What You’ll Need
- Soft-bristled toothbrush (an old one works fine)
- Cotton swabs
- 70% isopropyl alcohol
- Cold-pressed neem oil
- Mild liquid dish soap (I use a drop of Dr. Bronner’s)
- A spray bottle
- A damp, lint-free cloth
Step 1: Dry-Brush Every Crevice First
I start with the toothbrush, completely dry. I gently work it along the grooves of the braided trunk, moving from bottom to top, then top to bottom. The goal is to dislodge any debris, old bark, or visible pests. This works best when the trunk is bone dry — if it’s wet, everything turns into mud and you lose visibility. I do this right before watering day, when the soil is dry and the trunk has been dry for days.
You’ll be surprised how much gunk comes off. On my first attempt, I found what looked like a tiny spider nest near the base of the braid. I brushed it off and immediately inspected for more. Do a second pass with a dry cotton swab to get into the tightest spots where the toothbrush bristles can’t reach.
Step 2: Alcohol Spot-Treatment for Visible Pests
If you see scale insects (those brown, dome-shaped bumps) or mealybugs (fluffy white dots), dip a cotton swab in 70% isopropyl alcohol and dab each one individually. Alcohol dissolves their waxy protective coating and kills them on contact. This is tedious work, I’ll admit. It took me a solid 30 minutes per week for two weeks to hit every single bump. But it works. Don’t spray alcohol directly on the trunk — you risk drying out the bark too much. Dab precisely.
Step 3: Neem Oil Flush — The Real Game Changer
Here’s the method that actually cleared my infestation. I mix a teaspoon of cold-pressed neem oil with a few drops of dish soap into a liter of lukewarm water. Then I pour this mixture into a spray bottle, set it to a steady stream, and flush the braided crevices from top to bottom. I don’t just mist — I flush. The liquid runs down the entire braid, coating every hidden pocket. The soap breaks the surface tension, and the neem oil acts as a systemic repellent. Neem doesn’t kill instantly; it disrupts the pests’ life cycle. So you need to repeat this every 7 to 10 days for at least two weeks to catch the hatching nymphs.
I did this on day 1, day 10, and day 20. By day 14, I already noticed fewer crawlers on the sticky traps I place in the soil. By day 21, the trunk looked visibly cleaner. The crevices weren’t as dark and grimy anymore. The key word here is persistence. One spray won’t cut it.
Step 4: Wipe Down the Leaves Afterwards
After flushing the trunk, I wipe each leaf with a damp cloth, both sides. This removes any dust and any neem residue that might clog leaf pores. Pay special attention to the undersides — that’s where spider mites hang out. I also check the leaf axils, where leaves meet the stem. Another favorite hiding spot.
Step 5: Improve Airflow Around the Trunk
Pests love stagnant air. I placed a small, battery-operated fan near my money tree, set to low, pointing at the trunk but not directly blasting the leaves. The gentle airflow keeps the crevices dry and makes it harder for pests to establish webs. After two weeks of this, I noticed the webbing didn’t return. It sounds simple, but airflow is half the battle.
What I Observed Over 14 Days of Treatment
I kept a journal. I’m not a scientist, but I tracked what I saw so I could adjust my approach.
- Day 1: Dry-brushed the trunk. Lots of debris came off. Found 3 adult mealybugs, dabbed them with alcohol. Applied the neem flush.
- Day 4: No visible pests on the trunk surface. But I found two tiny mealybug crawlers in the leaf axils. Treated those spots again.
- Day 7: Second neem flush. Sticky traps in the soil caught a few fungus gnats but nothing else. The trunk felt drier than before. Good sign.
- Day 10: Third brushing. Much less gunk. The crevices looked light brown instead of dark and dirty.
- Day 14: No mealybugs, no webs, no crawling anything. The plant pushed out two new leaves. I’d call that a win.
What I didn’t expect was how much healthier the tree looked overall. The leaves perked up, lost some of that dull yellow tint, and the trunk itself felt firmer. I think the combination of cleaning plus better watering habits just made the entire plant happier.
Expert Backing and Why This Matters
The RHS notes that indoor plant pests like mealybug and scale often go unnoticed because they cluster in protected areas like leaf axils and stem joints. That’s exactly what I found. The RHS recommends inspecting plants regularly, especially in hard-to-see spots. And the AHS emphasizes integrated pest management — which is just a fancy way of saying combine mechanical removal with targeted treatments. That’s what I did. The toothbrush was my mechanical removal, the neem and alcohol were my targeted treatments.
The 14-Day Maintenance Routine You Need
Let me give you a simple checklist that takes less than 15 minutes, twice a week.
- Every 3 days: Inspect the braided trunk with a flashlight. Look for webbing, white fluff, or brown bumps.
- Weekly: Dry-brush the crevices with a toothbrush. Run it along every groove. Wipe off the brush afterwards so you don’t transfer pests around.
- Every 10 days: Apply the neem flush. Keep the plant out of direct sunlight for 24 hours afterward to avoid leaf burn.
- Weekly: Check the soil moisture before watering. Stick your finger in up to the second knuckle. If it feels dry, water. If not, wait.
- Monthly: Wipe down the leaves thoroughly, including the undersides, with a mild soap solution.
Following this routine kept my money tree pest-free for the rest of the season. I’m not saying it’s magic — you still have to stay vigilant. But it works.
What to Do If You Already Have a Severe Infestation
If you’ve read this far and realized your tree is already beyond a few wandering mealybugs, don’t panic. I had to deal with a full-blown spider mite webbing situation once. It felt like losing a friend. But here’s what I did.
First, isolate the plant away from all other indoor plants. Then, cut away the worst affected leaves — the ones with dense webbing or heavy scale coverage. Dispose of them in a sealed plastic bag. Then, follow the same cleaning routine above, but do the alcohol dabbing every single day for one week. I also replaced the top inch of soil because that’s where larvae often hide. And I washed the pot with soapy water before putting it back.
It took weeks. But the tree survived. It looked bare for a while, but new growth came in after a month. Patience is key. Don’t throw the tree away just because it looks bad.
Frequently Asked Questions
Can I use vinegar instead of neem oil?
Vinegar can kill pests on contact, but it’s also phytotoxic — it can burn the bark and leaves of your money tree. I don’t recommend it. Neem oil is safer, more effective, and doesn’t harm beneficial insects once it dries.
How often should I repot a braided money tree?
Every 2 years, in spring. When you repot, take the opportunity to inspect the braided trunk thoroughly. Brush the crevices, check for rot, and refresh the soil with a well-draining mix containing perlite.
Will the braid loosen if I brush it too hard?
No. The braid is fused with age and not likely to loosen from gentle brushing. Just don’t go at it like you’re scrubbing a bathtub. Use light pressure, let the bristles do the work.
My Final Take
Protecting a braided money tree from hidden pests isn’t a one-time job. It’s an ongoing habit. I honestly thought I could just water it and forget it. That cost me two plants. Now I spend 15 minutes twice a week with a toothbrush and a spray bottle, and my money tree has grown from 1.5 feet to nearly 3 feet tall in a year. Pests live where you don’t look. So look. Every single time. The crevices are where the battle is won or lost. You just need to show up with a brush.