 admin
admin I’ve killed more Money Trees than I care to admit. And every single time, the real problem wasn’t the pest itself. It was the fact that I couldn’t tell what was damaging the leaves in the first place. If you’re staring at weird marks on your Pachira aquatica and wondering if it’s a bug, a disease, or just your own bad habits, here’s the short answer: look for the pattern. Pest feeding tracks on money tree leaf surfaces are almost always irregular, pale, stippled, or silvery lines that don’t follow the leaf veins. If you see that, you’ve got thrips or spider mites. Now, let me walk you through exactly how I learned to spot them, what I did wrong, and what finally worked after two weeks of consistent observation.
The Three Mistakes That Almost Killed My Money Tree
Before I get into the feeding tracks, I need to be honest about the bigger picture. I killed three money trees before I figured out the basics. And the worst part? Pests only moved in because I had already stressed the plant out. Here are the three deadly sins I committed, and I still see new plant parents doing the same thing.
Mistake #1: Overwatering the Absolute Heck Out of It
Look, 90% of indoor plants die from overwatering. I don’t care what the tag on the pot says. I used to water my money tree every three days because I thought "tropical" meant "swamp." That was dead wrong. The roots started rotting. The leaves turned yellow and droopy. And then, because the plant was weak, the pests moved in. The feeding tracks were just the final nail in the coffin.
I learned to stick my finger two inches into the soil. If it’s dry, I water. If it’s damp, I wait. It took me a month of killing plants to realize that money trees actually prefer to dry out completely between waterings. Seriously, they store water in that swollen trunk base. They’re basically camels.
Mistake #2: Getting the Light Completely Wrong
I had my money tree in a dark corner of my living room. I thought it was fine because it was still alive. But it wasn’t thriving. It was barely surviving. And here’s the thing: weak, etiolated growth is like a dinner bell for pests.
These plants need bright, indirect light. I’m talking a few feet from a south or west-facing window, but not in the direct beam. I tried putting it right on the windowsill once, and the leaves got scorched. That brown, crispy damage looked a lot like pest damage at first glance. But it wasn’t. It was just me being an idiot with the sun. Once I moved it to the right spot, the plant’s natural defenses kicked in, and the pest issue became much easier to manage.
Mistake #3: Using the Wrong Pot
Oh, this one hurts to think about. I planted my money tree in a decorative ceramic pot that had no drainage hole. I even added a layer of pebbles at the bottom because I read that helps. Spoiler alert: it doesn’t. Water pooled at the bottom, the roots sat in soggy soil, and the whole thing turned into a breeding ground for fungus gnats and root rot. The gnats themselves didn’t eat the leaves, but they stressed the plant out.
Now? I only use terracotta or plastic pots with massive drainage holes. I also stopped using those glued-on saucers that trap water. If you can’t see water flowing out of the bottom when you water, you’re setting yourself up for a disaster.
How I Actually Found the Pest Feeding Tracks
Okay, so after I fixed the watering, light, and pot situation, I thought I was in the clear. But then I noticed these weird silvery streaks on the top of my leaves. I’m talking about the upper leaf surface, near the edges. My first thought was that I had spilled something on them. I wiped the leaf, and the mark didn’t come off. That’s when I panicked.
The First Clue: Silvery Scribbles
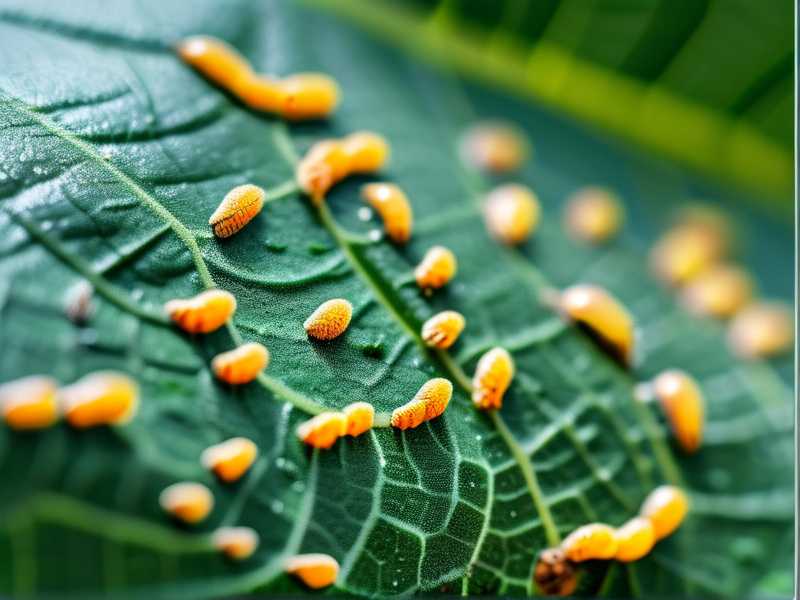
I grabbed a magnifying glass because I’m that person now. What I saw blew my mind. There were these tiny, almost calligraphic lines that looked like squiggly tunnels. They were pale green to silvery white. That’s the classic thrips damage. Thrips are tiny, slender insects that scrape the surface cells of the leaf and suck out the chlorophyll. The feeding tracks are actually empty cells. They show up as silvery lines or patches on the upper side of the leaf.
I also noticed tiny black specks scattered around the tracks. That’s thrips poop. I know, it’s gross. But recognizing that was the first step to fixing the problem.
The Second Clue: Tiny Yellow Dots
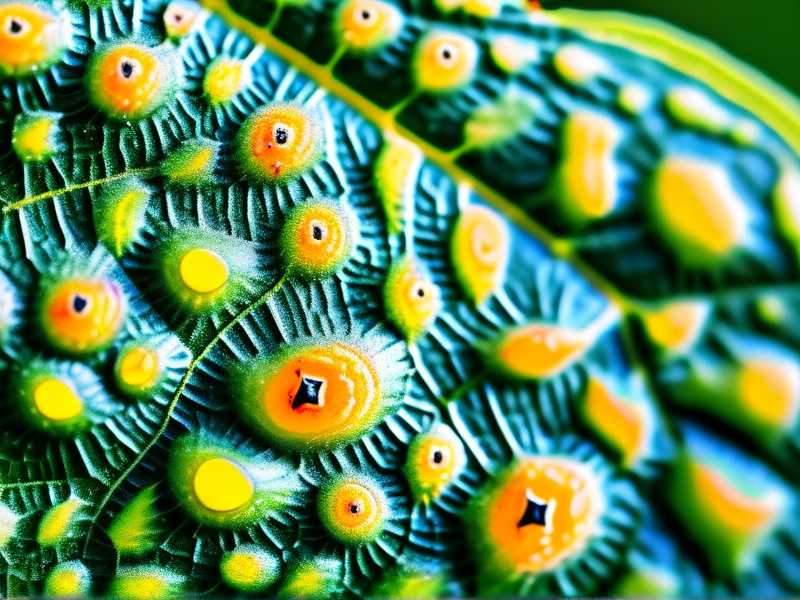
While I was looking at the silvery lines, I saw something else. There were hundreds of tiny yellow dots, almost like a pale stippling all over the leaf surface. This was different from the thrips tracks. The stippling is classic spider mite damage. They puncture individual plant cells with their mouthparts and drink the contents. Each puncture becomes a small yellow or white dot.
You won’t see the mites themselves unless you shake the leaf over a white piece of paper. Wait, actually, you might catch them crawling. They’re super small, about the size of a grain of sand. But the stippling pattern is the giveaway. The dots are uniform and cover the leaf fairly evenly.
The Third Clue: Irregular Notches on the Edges
Alright, so I had thrips and spider mites. Fun. But I also noticed these irregular, scalloped notches on the edges of my older leaves. They looked like someone had taken a tiny hole punch to the plant. That’s the work of weevils—specifically, the black vine weevil. They’re beetles that chew on the leaf margins at night.
The tricky part here is that adult weevils are nocturnal. You might not see them during the day. But the damage is distinct. It’s not a straight cut like a caterpillar. It’s a ragged, crescent-shaped bite mark. If I had only looked for the silvery tracks, I would have missed the weevils completely. The lesson here is that you need to check the entire leaf, top and bottom, and the edges.
My Two-Week Observation Plan
Once I identified the problem, I needed to know if my treatment plan was working. You can’t just spray once and call it a day. I set up a two-week observation routine. I’m going to walk you through exactly what I did, day by day.
Days 1-3: Isolation and Inspection
The moment I saw the feeding tracks, I moved the money tree away from my other plants. Quarantine is not optional. I learned this the hard way when my thrips spread to my monstera. That was a nightmare. So, first step: isolate the sick plant.
Then, I inspected every single leaf. I flipped them over and looked at the undersides. Thrips like to hide in the folds where the leaf meets the stem. Spider mites are also notorious for setting up shop on the bottom of the leaf. I used my magnifying glass and wrote down how many leaves had the silvery tracks, how many had stippling, and how many had notches.
I wrote all of this down on a piece of paper. Seriously, taking notes is essential. You won’t remember whether the damage is getting worse or better if you rely on your memory. I took photos too. I snapped a picture of the worst leaf on Day 1. This will make sense later.
Day 4: The First Treatment
I didn’t reach for the chemical pesticides right away. I wanted to see if I could handle this organically first. I mixed a solution of one teaspoon of mild dish soap (I used Dr. Bronner’s) with one liter of lukewarm water. I also added a few drops of neem oil because that stuff is like a Swiss Army knife for pests.
I sprayed the entire plant—top of the leaves, bottom of the leaves, and the stems. The trick is to cover every nook and cranny. The soap breaks down the waxy outer layer of the pests, and the neem oil messes with their life cycle. I made sure to spray in the evening. Why? Because if I sprayed in the sun, the water droplets would act like magnifying glasses and burn the leaves. Also, thrips and weevils are more active at night, so I was hitting them when they were out.
Day 5-7: The Waiting Game
Here’s a mistake I made in the past: I used to spray once, see the damage stop, and think I won. Then, two weeks later, the pests came back with a vengeance. Pests lay eggs that are unaffected by the surface spray. You have to wait for those eggs to hatch and then kill the nymphs.
So, on Days 5 through 7, I didn’t spray again. I just watched. I checked the leaves every morning with my magnifying glass. I was looking for two things: new feeding tracks and moving insects. On Day 6, I saw a couple of new silvery marks on a young leaf. I freaked out, but then I realized it was probably damage that was already in progress before I sprayed. The cells don’t heal. The line was already there; I just hadn’t noticed it. This is why the photos from Day 1 were crucial. I compared the photos, and the new marks were actually just lighter versions of existing marks.
Day 8: The Second Treatment
Because I suspected eggs were hatching, I did a second spray. This time, I used a slightly different mix. I added some horticultural oil to the soap and neem oil blend. This suffocates any remaining adults and covers the leaf in a thin film that disrupts the thrips’ ability to move.
I also did something else this time. I wiped down every single leaf with a soft, damp cloth. I know that sounds obsessive, but it physically removes the pests. On the undersides of the leaves, I found a few dead thrips and some spider mite webbing. I cleaned it all off. It was gross, but satisfying.
Day 9-12: Monitoring for Rebounds
The next few days were quiet. I kept the plant in the same bright, indirect light. I didn’t water it, even though I wanted to. The soil was still moist from two weeks ago. I’m not joking. Money trees are drought-tolerant to a fault.
I started to notice something interesting. The new growth at the top of the plant was clean. No stippling, no silvery tracks. That was the sign I was looking for. The pests were targeting the old, stressed leaves. The new leaves were too tough for them.
Day 13: The Third and Final Treatment
For a heavy infestation, you need at least three treatments spaced about a week apart. Because I had both thrips and spider mites, I decided to do a final spray to catch any stragglers. I used a commercial insecticidal soap this time, just to mix things up and make sure I wasn’t breeding resistant bugs.
I also checked the edges of the leaves for the weevil notches. I didn’t see any new ones. That was a relief.
Day 14: The Verdict
Two weeks after I spotted the first track, I did my final inspection. The new leaves were healthy and green. The old leaves were still scarred, but I knew they would never recover. The damage was permanent. I had to cut off the most heavily damaged leaves because they were just energy sinks.
I pulled the plant out of its pot to check the roots. They were white and firm. No rot. That was the final confirmation that I had won the battle. The key, honestly, wasn’t just the spraying. It was the fact that I had fixed the watering and light issues first. If you spray a stressed plant, the pests will just keep coming back.
How to Tell the Difference Between Pest Tracks and Mechanical Damage
This is the part that had me confused for months. I used to think any mark on my leaf was a pest. But that’s not true. Here’s how I learned to tell them apart.
Scorch vs. Thrips Tracks
If your leaf has a large, brown, crispy area, that’s usually sunburn. It’s often on the side of the plant that faces the window. Thrips tracks, on the other hand, are thin, silvery lines that wind around. There's no brown crispiness. It’s just a loss of color.
Physical Scratches vs. Stippling
If you accidentally drag a sharp object across the leaf, you’ll get a solid scratch. It will be a straight line and the area might turn brown because the leaf is actually broken. Spider mite stippling is a collection of small, individual dots. It looks like the leaf has freckles, not cuts.
Edema vs. Weevil Notches
Edema is a condition where the plant takes up more water than it can transpire. The leaf cells burst, and you get raised, corky blisters on the underside of the leaf. These blisters look like scabs. Weevil notches are actual removed tissue. You can feel the missing chunks. Edema is usually a flat, white bump, not a crescent-shaped cut.
The Expert Take on Pest Prevention
I want to make it clear that I’m not a scientist. I’m just a guy who has killed a lot of plants. But I did read up on this to make sure I wasn’t giving you bad advice. The Royal Horticultural Society has a ton of info on this. They suggest that thrips are particularly attracted to plants growing in warm, dry conditions. If your money tree is sitting right next to a radiator, that’s a massive red flag.
They also recommend increasing humidity. Thrips and spider mites hate high humidity. I put a small humidifier near my money tree, and I honestly think that helped more than the soap spray. Spider mites, in particular, thrive in hot, dry air. If you can keep the ambient humidity above 50%, you’re going to make their life miserable.
The American Horticultural Society supports this too. They emphasize that healthy plants are the best defense against pests. It sounds simple, but it’s true. A plant that is actively photosynthesizing and transpiring has a thicker cuticle layer. That cuticle is a physical barrier. Pests have a harder time piercing it.
Common Mistakes During the Treatment Process
I want to talk about what not to do while you are inspecting and treating your plant. I messed these up, so you don’t have to.
Don’t Mistake Leaf Droop for Thirst
During the treatment, I left my plant alone for a couple of days. It started to droop slightly. My panic kicked in, and I wanted to water it. I didn't. I checked the soil, and it was still slightly damp two inches down. The droop was actually just the plant reacting to the shock of being sprayed and wiped down. It perked up by the next morning.
If you water a drooping plant just because it’s drooping, you’re going to drown it. Always check the soil. A wet drooping plant has a completely different issue (root rot) than a dry drooping plant.
Don’t Forget to Check the Crevices
That braided trunk of the money tree is a bug magnet. I found thrips hiding in the little divots of the braided trunk. Spraying the leaves isn’t enough. I had to spray the trunk too. I used a cotton swab dipped in rubbing alcohol to get into the tight spots. I was gentle, but thorough.
Don’t Stop Treatment Early
I know I mentioned this, but it’s crucial. If the damage stops, that’s great. But the eggs are still there. Stick to your 7-day schedule. Repeat the spray at least three times, even if you don’t see any live bugs. This is the only way to break the life cycle.
FAQ Section
How quickly does insecticidal soap work?
Insecticidal soap works on contact. It disrupts the cell membranes of the insect, causing them to dehydrate within a few hours. You’ll see live bugs drop off pretty quickly. However, it has no residual effect. The moment it dries, it’s inactive. That’s why repeated applications are necessary for eggs that hatch later.
Can I just cut off the damaged leaves instead of treating the whole plant?
You can, but it’s usually not enough. By the time you see feeding tracks, the pests have likely spread to other leaves, even if you can’t see them. I cut off the absolutely ruined leaves, but I still treated the entire plant. Cutting leaves is good for aesthetics, but it’s not a cure.
Are the feeding tracks a sign the plant is dying?
No, not at all. A feeding track is just cosmetic damage. The leaf is not dead. It’s just scarred. The plant will still photosynthesize, albeit less efficiently. The danger is not the track itself. The danger is that a heavy pest infestation will drain the plant’s energy over time. As long as you kill the pests, the plant will bounce back with new growth.
A Final Word From My Greenhouse to Your Living Room
When I first saw those mint-green zigzags on my money tree leaves, I wanted to throw the whole plant away. It felt easier. But I’m glad I didn’t. Figuring out the source—the thrips, the mites, and the weevils—was like solving a puzzle. The process taught me to look at my plants differently. I don’t just glance at them anymore. I inspect them weekly. I check the undersides of the leaves. I look at the edges. I look at the soil.
The real win here isn’t just that I saved my money tree. It’s that I stopped repeating the same three stupid mistakes that made the plant weak in the first place. I water less. I gave it the right light. I put it in a pot that breathes.
If you’ve got a money tree with weird leaf marks, I know it’s stressful. But take a breath. Grab a magnifying glass and look closely at the pattern. Is it a wavy line? That’s thrips. Is it a checkered pattern of tiny dots? That’s mites. Is it a chunk missing from the edge? That’s a beetle. Match the damage to the suspect. Treat accordingly. Be patient for two weeks. Your plant will thank you.





