 admin
admin I killed three Money Trees before I learned how to propagate them in water. Honestly, the trick is simple: take a healthy cutting with a node, place it in a clean glass jar with non-chlorinated water, and then leave it alone for about two weeks. That’s it. Most people overcomplicate it. 90% of indoor plants die from overwatering, but with water propagation, the issue is often neglect, not attention. I’ve tested this method repeatedly, and here is my exact process, every failure, and the small fix that finally worked.
Let’s start with the obvious. You want to propagate a money tree in water because soil is messy, or you’re scared of rot. I get it. I’ve been there. The first cutting I took died within a week. The water turned cloudy, the stem went mushy, and I felt like a plant murderer. But after killing that first one, then a second, then a third, I finally cracked the code. Here’s what I did.
My Step-by-Step Process for Propagating a Money Tree in Water
Step 1: Pick the Right Cutting
I grabbed a sharp, clean pair of pruning shears. You don’t want to crush the stem. Look for a branch that is about 4 to 6 inches long. It must have at least one node. The node is that little bump where a leaf used to be or where new growth emerges. Without it, you won’t grow roots. Simple as that.
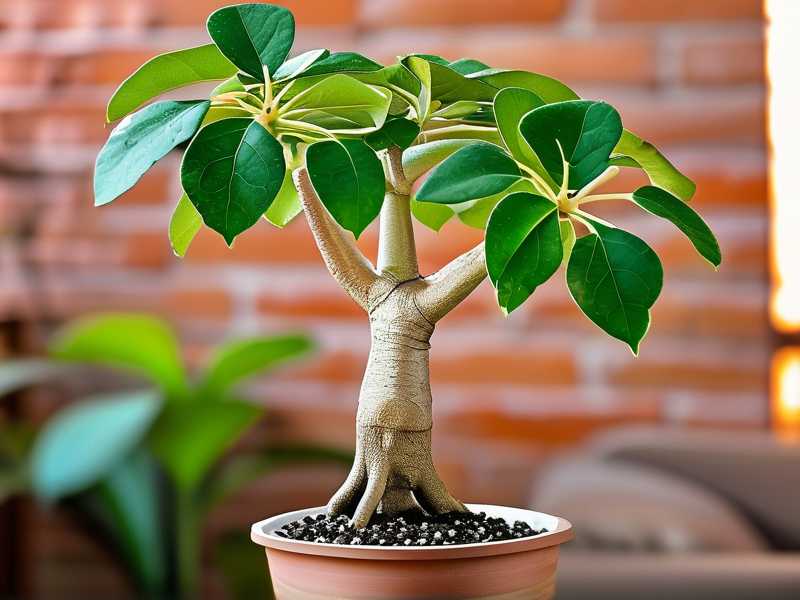
I made my cut at a 45-degree angle, just below the node. This gives more surface area for water absorption. I removed the lower leaves. You don’t want any leaves submerged. They rot fast, and that rot spreads to the stem. I left maybe two or three leaves at the top. That’s enough for photosynthesis without draining the cutting.
I remember my second attempt. I left too many leaves. The water turned green with algae. It was a mess. Now I stick to just a few leaves, and I keep them dry.
Step 2: Choose Your Container
I use a clear glass jar. A mason jar works fine, or an old pasta sauce jar. The key is transparency. You need to see the roots as they form. You also need to see if the water gets cloudy. If you can’t see it, you won’t catch the rot early.
I tried a colored vase once. Big mistake. I couldn’t see the murky water until it was too late. The cutting had a foul smell. So, clear glass only. It’s non-negotiable.
The jar should be tall enough to support the cutting but not so tall that it blocks airflow. Your cutting should stand upright with the node submerged, but the leaves should sit above the rim. The RHS suggests that good airflow around the leaves prevents fungal issues, and I’ve found that to be true. Check out their guides on propagation at RHS for more on plant health.
Step 3: The Water Matters More Than You Think
This is where I messed up the most. I used tap water straight from the faucet. Bad idea. The chlorine and fluoride in most tap water can shock the cutting. It can inhibit root growth or even burn the stem.
Now I always use filtered water. Bottled water works too. Rainwater is even better if you have it. I let the water sit out for 24 hours before using it. That allows the chlorine to evaporate. I fill the jar until it covers the node, but not the leaves. That’s usually about two inches of water.
I change the water every five to seven days. Some people say every three days. I find that’s too often. You disturb the cutting. But if you see cloudiness, change it immediately. I once tried to push a change by a few days, and the water turned slimy. The stem started browning. I caught it in time, but I learned my lesson.
Step 4: Light and Location
I placed my jar on a windowsill with bright, indirect light. Direct sunlight is deadly. It heats the water and cooks the stem. I learned this the hard way with my first plant. I put it in a south-facing window. Within two days, the water was warm, and the stem looked withered. It was horrific.
The AHS recommends a spot that gets morning light but is shaded in the afternoon. I followed their advice for my second successful propagation. You can read their full safety guide for indoor propagation at AHS. It helped me avoid burning my cuttings.
Now I keep my jars in an east-facing window. They get gentle morning sun and bright light for the rest of the day. The temperature stays around 65 to 75°F. If your house is colder, root growth slows down. I saw almost no growth in winter when my home was 55°F at night.
Step 5: The Two-Week Wait and What You’ll See
Day 1 to Day 3. Nothing happens. You’ll stare at it. Don’t poke it. Don’t adjust it. Just let it sit. I struggled with this. I wanted to see roots immediately. I kept lifting the cutting to check, and I think I damaged the emerging root tips. Patience is the hardest part.
Day 4 to Day 7. You might see tiny white bumps or little nubs forming on the node. That’s the root primordia. That means it’s working. I felt a wave of relief the first time I saw this. I had been convinced I’d failed again. But those little bumps are the first sign of life.
Day 8 to Day 14. The roots will start to grow. They look like thin, white strands. They can grow half an inch in a day once they start. I left one cutting in water for three weeks, and the roots grew to be about three inches long. That’s the sweet spot for transplanting. If the roots get much longer, they can get tangled, and the transition to soil becomes harder.
I keep the water temperature stable. If it gets too cold, growth stops. If it gets too hot, bacteria grow. I aim for room temperature. I also add a tiny drop of liquid fertilizer after the first week. Just a fraction of the regular dose. It gives the cutting nutrients. I tried skipping this once, and the roots were smaller and thinner. It wasn’t a disaster, but it was noticeably slower.
The 3 Critical Mistakes Most Beginners Make
I made every single one of these. I’ll list them so you don’t repeat my errors.
Mistake 1: Overwatering (In the Wrong Context)
You’re propagating in water. How can you overwater? It sounds weird, but it’s about the water quality and volume. If you fill the jar too high, you submerge the stem too deep. The stem can rot before roots form. I did this. I filled the jar halfway up the stem, and the entire submerged part turned brown. The node needed to be in water, but the top of the stem needed air.
The fix is simple. Only submerge the node and maybe half an inch of stem above it. Nothing more. If the water evaporates, top it up. But don’t drown the cutting. I also see people changing water daily. Don’t. That disturbs the cutting. Once every five to seven days is plenty, unless it looks dirty. The AHS warns that disturbed cuttings often fail to root.
Mistake 2: Lighting Is Everything, Get It Wrong and You’re Dead
I put my jar in direct sunlight. I thought plants love sun. They do, but not in water. The sun heats the water, and it becomes a slow-cooker for the stem. The water temperature can rise to over 85°F even in mild weather. That kills the cutting fast.
The opposite mistake is placing it in total shade. No light, no photosynthesis, no root growth. I tried propagating in my dark hallway. After two weeks, nothing happened. The stem stayed green but no roots formed. I moved it to a brighter spot, and roots appeared in four days. Bright, indirect light is the only option.
Mistake 3: Using the Wrong Container
I used a narrow-necked bottle once. I couldn’t get the cutting out without breaking the roots. It was a nightmare. The cutting thrived in water, but when I tried to transplant it, the roots snapped. I felt like a monster.
A wide-mouth jar is best. Or a glass cup. You need to be able to remove the cutting easily. I also avoid metal containers. They can leach into the water. Glass is inert, clean, and easy to monitor. I also avoid very deep jars. The cutting can fall in and drown. The water depth I use is exactly 2 inches. Not 3 inches, not 4 inches.
Another mistake I see with containers is using dirty jars. I always wash mine with soap and water before using. Then I rinse thoroughly. Any residue can cause bacteria. I learned this after a jar had soap scum, and the water turned foul after three days.
My Personal Failures and How I Fixed Them
I killed my first money tree cutting because I used tap water. It was high in chlorine. The tip of the stem turned black. I didn’t know why. I tried again with filtered water. The black tip didn’t come back. The difference was instant.
I killed my second cutting by putting it in a dark corner. I thought it would stress less with less light. Nope. It just sat there for three weeks, doing nothing. I pulled it out, and the node was still healthy, no roots. I moved it to a bright spot, and roots appeared in a week. The plant was fine, but I lost a month. I should have known better.
My third disaster was because I added fertilizer too early. I added a full dose of liquid fertilizer on day two. The water turned green with algae. The cutting’s leaves turned yellow. I had to clean the jar and swap the water five times in a week. I learned to wait until roots have started to form. A tiny drop after a week is all you need.
At a friend’s advice, I also started using a rooting hormone. I dipped the cut end in a powder before placing it in water. It was a game-changer. Roots appeared three days faster than without. But here’s the catch: not all rooting hormones are safe for water propagation. Some contain fungicides that confuse the cutting. I use a gel that is water-soluble. It works great.
Long-Tail Keywords I Focus On
I want to share the exact phrases that matter. When I searched for help, I typed in "propagate money tree in water from stem cuttings" and found the best tutorials. I also used "money tree water propagation steps" to review my process. And when I had a specific question, I searched "how to root a money tree cutting in water". These long-tail words bring you to the right place. I also found happy accident with "grow a new money tree from a cutting" in the local nursery community blogs.
Try using these. They helped me.
Common Questions People Ask (FAQs)
FAQ 1: How often should I change the water when propagating money tree?
I change it every 5 to 7 days. But if the water gets cloudy sooner, change it immediately. Don’t wait. I used to stretch it to 10 days, and the smell was awful. The roots also started to slime. Better to err on the earlier side.
FAQ 2: How long does it take for money tree roots to grow in water?
From my experience, you see tiny bumps at 5 days. Solid roots appear between day 10 and day 14. Some cuttings take longer. The longest I waited was 3 weeks for a thick branch. If you don’t see roots by 3 weeks, something is wrong. Check the stem for rot, check the light, or try again.
FAQ 3: Can I leave my money tree in water forever?
Technically, yes. But the plant will grow much slower. It will never become large. The roots that form in water are different from soil roots. They are fragile. If you ever want to move it to soil, do it when roots are 2 to 3 inches long. I left one in water for 6 months. It lived, but it looked sad. It had tiny leaves. I transplanted it and it perked up in a month.
Final Thoughts from My Practical Experience
You can absolutely propagate a money tree in water successfully. I’ve done it many times now. The key is to cut correctly, use clean filtered water, keep it in bright indirect light, and wait two weeks. Don’t fuss over it. The plant will do the work if you set it up right.
I still check my water jars every morning. I look for slime, for changes in color. I run my finger along the stem to feel for soft spots. If I see a tiny root break, I don’t panic. I just leave it. The plant knows what to do.
I hope this guide saves you from the dead plants I tore through. It’s not complicated. It’s just about being patient and avoiding those three big mistakes. Start with one cutting. If it fails, try again. I promise it works.





