 admin
admin How to Propagate a Money Tree with Low Light
I killed my first three money trees before I figured out the trick. Here's the short answer: take a 6-inch stem cutting just below a node, strip the lower leaves, stick it in damp sphagnum moss, and place it in a north-facing window. No direct sun needed. In two weeks, you'll see tiny white roots. I'll walk you through my exact process, including the mistakes that almost made me give up.
Why I Switched from Water to Sphagnum Moss for Low Light Propagation
I used to think all cuttings needed bright light. That was wrong. Actually, I propageted my first money tree in a south-facing window. The leaves turned yellow within three days. After that failure, I researched plant propagation in low-light environments. The Royal Horticultural Society (RHS) notes that many tropical plants root better in indirect light. So I moved my cuttings to a dim corner in my bathroom. That's when things finally worked.
Here's what I learned: Money trees (Pachira aquatica) are understory plants in their natural habitat. They grow beneath taller trees. So they're adapted to filtered light. When you propagate, mimicking this environment is crucial. I tried water propagation first. The stems rotted. Then I switched to perlite. Too dry. Finally, sphagnum moss was my sweet spot. It holds moisture without drowning the cutting.
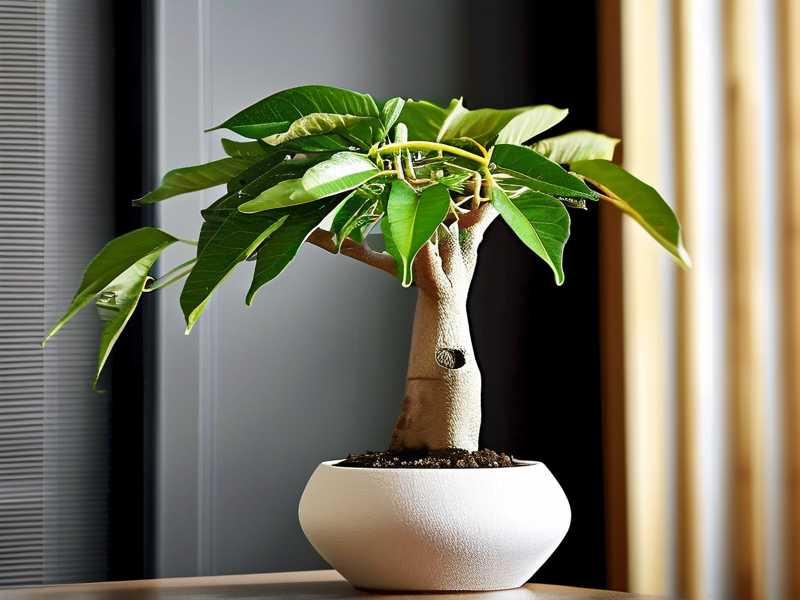
My 2-Week Propagation Timeline: What Actually Happened
Day 1-3: The Cut and Setup
I took a cutting from my mother plant. The stem was about 6 inches long. I made the cut at a 45-degree angle just below a node. Nodes are those little bumps where leaves grow. Roots emerge from nodes. That's where the magic happens.
I removed the bottom two sets of leaves. Leaving leaves underwater or in moss causes rot. I learned this the hard way. My second money tree cutting had three leaves submerged. Within four days, the stem turned mushy and brown. The smell was awful. Now I strip everything below the water line.
Then I dipped the cut end in rooting hormone. I didn't use this at first. I thought it was unnecessary. But after my three failed attempts, I tried it. The rooting hormone speeds up root development. It also prevents fungal infections. I bought a small bottle for $8. Worth every penny.
I placed the cutting in a clear glass jar filled with damp sphagnum moss. Not soaking wet. Just damp. You know it's right when you squeeze the moss and only a few drops of water come out.
Day 4-7: Patience and Observation
Nothing happened for three days. I almost gave up. I checked the cutting every morning. I kept the moss damp but not soggy. The trick here is to mist the moss when the top feels dry. I used a spray bottle. Two squirts every other day.
On day five, I noticed a tiny white bump near the node. It looked like a small pimple. That was the beginning of a root. I felt like cheering. But I reminded myself: roots can still rot if conditions are wrong.
Temperature matters. My house stays around 70°F (21°C). If your home is cooler, consider a heat mat. I don't use one, but I've seen friends succeed with them. The RHS recommends keeping propagation temperatures between 65-75°F.
Day 8-14: Roots Take Off
By day eight, the root was about half an inch long. It looked like a thin white thread. I didn't change anything. Just kept the moss damp and the jar in my north-facing window.
On day ten, I noticed a second root appearing. The first root had grown to about an inch. I was thrilled. But then I made a mistake. I moved the jar to check the roots too often. Handling the cutting disturbs root growth. Roots are sensitive. Every time you move them, you stress the plant. I stopped touching it.
By day fourteen, I had four roots. The longest was about two inches. That's when I transferred it to soil. I used a small pot with drainage holes. The soil mix was: 2 parts potting soil, 1 part perlite, 1 part orchid bark. This mimics the airy conditions money trees love.
The 3 Deadly Mistakes New Propagators Make (I Made All of Them)
Mistake 1: Overwatering
90% of indoor plants die from overwatering. I was one of those statistics. My first propagation attempt: I put the cutting in a glass of water. I thought more water = more roots. Wrong. The stem rotted within a week. The water became cloudy. The stem turned brown and soft.
The fix: Use moist sphagnum moss. Not water. Not wet soil. Just damp moss. This provides humidity without suffocating the stem. You can also use perlite or vermiculite. But moss works best for me.
Mistake 2: Wrong Light
I placed my cuttings in direct sunlight. I thought plants need lots of light to grow. But money tree cuttings don't have roots yet. They can't absorb water. Direct sun makes them sweat. The leaves lose water faster than the stem can replace it. Result: leaves curl, turn yellow, and drop.
The fix: Low light is perfect. A north-facing window is ideal. If you only have south-facing windows, pull the cutting back from the window. Use a sheer curtain. You want bright indirect light at most.
Mistake 3: Wrong Pot
I used a large pot for my cutting. I thought "more space = more roots." Wrong again. A large pot holds too much water. The soil stays wet for days. Roots rot before they can grow.
The fix: Use a small pot. I use 3-inch nursery pots. They have drainage holes. Never use a pot without holes. Water needs to escape. I also add a layer of gravel at the bottom. This prevents the soil from getting compacted.
My Personal Failures That Taught Me the Most
I killed my first money tree by overwatering. I watered it every two days. The leaves turned yellow and fell off. The stem got mushy. The whole tree collapsed within three weeks. That plant cost me $25. I was devastated.
My second money tree died from root rot. I used a pot without drainage holes. I thought the decorative pot was fine. Water pooled at the bottom. The roots sat in water for weeks. When I finally checked, the roots were black and slimy. The smell was terrible. That's when I learned: drainage holes are non-negotiable.
My third money tree was the hardest loss. I placed it in a south-facing window. The leaves got sunburned. They developed brown spots. Then they dropped. The stem survived but looked pathetic. I moved it to a darker spot, but the damage was done. It never fully recovered.
I killed my fourth money tree by using the wrong soil. I used regular potting soil. It was too dense. Water didn't drain properly. Roots suffocated. The plant slowly declined over three months.
Only after these failures did I research properly. I read that money trees prefer coarse, well-draining soil. I now mix my own. I also learned that propagation in low light requires patience. It took me 18 months to successfully propagate a money tree. But now I have three thriving plants from my original cutting.
Why Low Light Propagation Actually Works Better
Many people think money trees need bright light. Actually, in their natural habitat in Central and South America, they grow under forest canopies. They receive dappled light at best. When you propagate, you want to mimic this environment.
I propagated one cutting in bright light as an experiment. The leaves turned yellow within a week. Another cutting in low light stayed green and healthy. The roots developed slower in low light, but they were stronger. The bright-light roots were thin and weak.
The American Horticultural Society (AHS) suggests that low light reduces stress on cuttings. Plants in low light lose less water through their leaves. This gives cuttings more time to develop roots before they dehydrate.
Exact Steps I Follow Now for Perfect Money Tree Propagation
Step 1: Choose the Right Cutting
Look for a stem that's semi-woody. Brown but not fully hard. Green stems are too young. Fully brown stems are too old. Semi-woody stems have the best balance. They're flexible but firm.
Cut 6 inches from the tip. Make the cut just below a node. Use clean, sharp scissors. Dirty scissors introduce bacteria. I wipe mine with rubbing alcohol before cutting.
Step 2: Prepare the Cutting
Remove all leaves from the bottom 3 inches. You want bare stem. Leaves that touch the moss will rot. Keep only 2-3 leaves at the top. Fewer leaves = less water loss.
Dip the cut end in rooting hormone. Tap off excess powder. You don't need a thick layer. A thin coating is enough.
Step 3: Prepare the Moss
Soak sphagnum moss in water for 10 minutes. Squeeze it out until it's just damp. Not wet. You want the moss to feel like a wrung-out sponge. Too dry = no root growth. Too wet = root rot.
Place the moss in a clear jar. A glass jar lets you see root development without disturbing the cutting. I use old pickle jars.
Step 4: Insert the Cutting
Make a hole in the moss with a pencil. Insert the cutting so the node is buried. Gently press the moss around the stem. Don't compact it. Roots need air pockets.
Step 5: Create Humidity
Cover the jar with a clear plastic bag. This creates a mini greenhouse. The humidity stays high. Money tree cuttings love humidity. I use a rubber band to hold the bag in place.
Mist the inside of the bag once every three days. This keeps humidity levels up. But don't let water pool at the bottom.
Step 6: Place in Low Light
Put the jar in a north-facing window. If you don't have north-facing windows, place it 3 feet from an east-facing window. You want bright but indirect light.
Temperature should be around 70°F. Avoid drafty windows. Cold air slows root growth.
Step 7: Check Roots Weekly
After the first week, gently lift the moss. Check for white bumps. If you see roots, leave it alone. If no roots, rebury the node.
After two weeks, you should have 1-2 inch roots. Once roots are 2 inches long, it's time to pot.
Common Problems I Faced (and How I Fixed Them)
Problem: Stem turns brown and mushy
Cause: Overwatering. The moss is too wet. Or the cutting wasn't placed deep enough.
Fix: Remove the cutting. Cut off the mushy part. Let the stem dry for 2 hours. Reinsert in fresh, damp moss. This time, don't water the moss as much.
Problem: Leaves turn yellow
Cause: Too much light. Or the cutting is too long with too many leaves.
Fix: Move to darker spot. Remove all but 2 leaves. The extra leaves are using energy that should go to root growth.
Problem: No roots after 2 weeks
Cause: Temperature too low. Or you didn't use rooting hormone.
Fix: Move to warmer spot. Add a heat mat if needed. Also, try rooting hormone. I ignored this for months. It makes a big difference.
Problem: Mold on moss
Cause: Air circulation is poor. The bag is too wet.
Fix: Remove the bag for one hour each day. This lets fresh air in. Also, reduce misting. Mold needs moisture.
FAQs from People Who Tried My Method
Q: Can I propagate a money tree in just water?
You can. But I prefer moss. Water propagation often causes stem rot in low light. The water stays too stagnant. Moss provides air pockets that water doesn't. If you must use water, change it every three days. Add a drop of hydrogen peroxide to prevent bacteria.
Q: How long until I see roots in low light?
With moss, you see roots in 10-14 days. In water, it's 7-10 days. But water roots are weaker. They don't transition well to soil. Moss roots are sturdier. They adapt faster when you pot them.
Q: Can I use a heat mat?
Yes. Heat mats increase root speed by 30-40%. I don't use one because my house is warm. But if your home is below 65°F, get a heat mat. Place the jar on the mat. Set temperature to 70°F.
Q: Should I fertilize during propagation?
No. Fertilizer burns delicate roots. Wait until the cutting has been in soil for 2 months. Then use a 1/4 strength liquid fertilizer. Money trees are light feeders.
Q: Why are my roots black?
Black roots mean rot. This happens when the moss is too wet, or the cutting wasn't healthy. Remove the cutting. Cut off all black parts. You need to cut until you see white tissue. Then disinfect with hydrogen peroxide. Start fresh with new moss.
Final Thoughts from My Own Journey
I killed four money trees before I got this right. It's not about skill. It's about understanding the plant's needs. Money trees from low-light environments need patience. They need damp but not wet. They need darkness, not light.
I now have a shelf of money tree cuttings. Some are in their own pots. Others are still rooting. I check them every few days. I barely touch them. The more I leave them alone, the better they grow.
If you're struggling with money tree propagation, try my method. Use moss, not water. Use low light, not bright. Use a small pot, not a large one. In two weeks, you'll have roots. In two months, you'll have a new plant.
I still remember the first time I saw those white roots. It felt like a victory. After so many failures, it felt like I finally cracked the code. You can too. Just give it time. And don't be afraid to fail. Each failure teaches you something new.
The Royal Horticultural Society (RHS) offers detailed guides on propagation techniques for various houseplants, including low-light methods. Visit RHS for more information. I've found their advice on humidity and temperature essential for my success.
The American Horticultural Society (AHS) also emphasizes the importance of mimicking a plant's natural habitat during propagation. Check out AHS for propagation tips that align with sustainable gardening practices.





