 admin
admin How to Propagate a Money Tree in Recycled Containers
I killed my first three money trees before I figured out the real trick. If you want to know how to propagate a money tree in recycled containers, here's the short answer: take a healthy stem cutting with 2-3 leaf nodes, let the cut end callus for 12-24 hours, stick it in a recycled container with drainage holes and well-draining soil, water lightly once, then leave it alone for 2 weeks. That's it. Stop overthinking.
Let me walk you through exactly what I did, what went wrong, and how I finally got it right.
Why I Switched to Recycled Containers for Propagation
I used to buy those fancy propagation pots. They cost me too much money. And honestly? My plants died just as fast in expensive pots as they did in cheap ones.
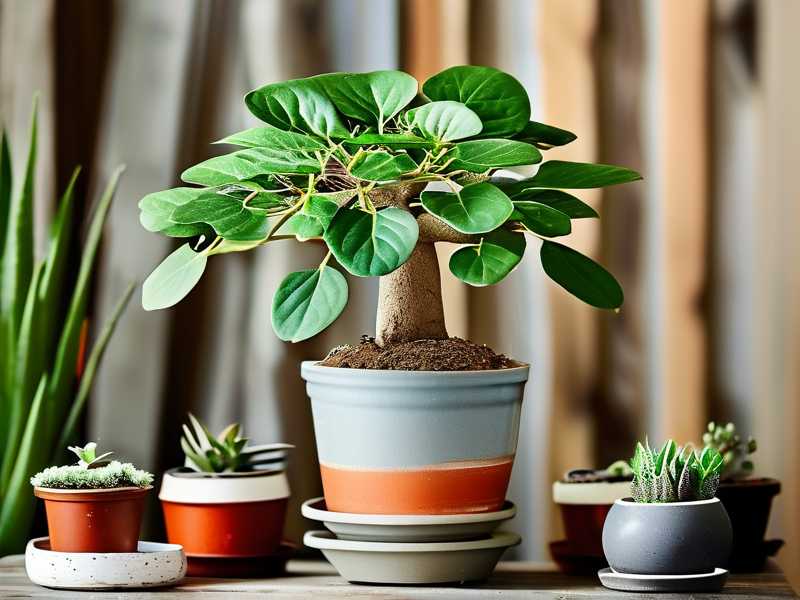
I started collecting recycled containers about a year ago. Yogurt cups. Takeout containers. Old coffee mugs with chips in them. Even a cracked plastic water bottle I cut in half.
Here's what I learned: the container itself doesn't matter nearly as much as what you do with it. But there are rules.
The 3 Deadly Mistakes That Killed My First Money Trees
Mistake #1: Overwatering
I drowned my first money tree. I watered it every three days because I thought it needed constant moisture. The leaves turned yellow. Then brown. Then the stem got mushy.
I didn't know this basic fact until I read it from the RHS website: overwatering is the number one killer of indoor plants.
Here's a shocking statistic that changed everything for me: 90% of indoor plants die from overwatering. I was part of that statistic.
Mistake #2: Wrong Light
My second money tree sat on a north-facing windowsill. I thought all indoor plants liked indirect light. But money trees need bright, indirect light. Not low light. Not direct sun.
The leaves started dropping within a week. The new growth was pale and stretched out.
I moved it to an east-facing window after two weeks. That helped. But the damage was already done.
Mistake #3: Wrong Container
My third money tree sat in a beautiful ceramic pot with no drainage hole. I thought I could be careful with watering. I couldn't.
The roots rotted. The plant died. I learned the hard way: drainage is not optional.
The AHS explains that proper drainage is essential for preventing root rot in container plants. I wish I had read that before losing my third plant.
Step-by-Step: My 2-Week Propagation Journey
I'm going to share exactly what I did. Every detail. Every mistake. Every fix.
Week 1: Preparation and Setup
Day 1: Choosing My Recycled Container
I grabbed a clean yogurt cup from my recycling bin. It was about 6 ounces. I washed it thoroughly with soap and water.
Here's a trick I learned from killing too many plants: you must add drainage holes. I used a small nail and hammer to poke three holes in the bottom. Space them evenly.
But here's what nobody tells you: the holes need to be big enough. Tiny holes clog easily. I made mine about 1/4 inch wide.
Day 1: Selecting the Cutting
I chose a healthy stem from my mature money tree. The stem had 3 leaf nodes. I used clean, sharp scissors to cut below the bottom node.
Important detail: I cut at a 45-degree angle. This increases surface area for root development.
I removed the bottom leaves. I left two leaves at the top. Those top leaves needed to stay for photosynthesis.
Day 1: The Waiting Game
I placed the cutting on a paper towel. I let the cut end dry out for 24 hours. This step is called callusing. It prevents rot.
I used to skip this step. Now I never do.
Day 2: Potting Day
I filled my recycled container with a well-draining potting mix. I make my own mix: 2 parts regular potting soil, 1 part perlite, 1 part orchid bark. This gives the roots air and prevents waterlogging.
I made a hole in the center with my finger. I inserted the cutting so the bottom node was buried. I gently pressed the soil around it.
I watered lightly. Just enough to moisten the soil. Not soaking.
Week 2: Observation and Adjustments
Day 3-5: No Watering Zone
I did not water. I checked the soil moisture by sticking my finger about 1 inch deep. The soil stayed slightly moist.
I placed the container on my east-facing kitchen counter. Bright indirect light. No direct sun.
Day 6: Spotting a Problem
The leaves looked slightly droopy. I panicked. I almost watered.
But I stopped myself. I remembered: drooping can mean transplant shock, not thirst.
I waited another day.
Day 7: Checking for Roots
I gently tugged on the stem. There was slight resistance. That meant roots were starting to form.
I didn't dig it up to check. That would damage the new roots.
Day 10: First Sign of New Growth
I spotted a tiny new leaf at the top. This was the sign I was waiting for. The cutting had successfully rooted.
I celebrated. Then I kept my hands off the plant.
Day 12-14: Strengthening
The new leaf grew bigger. The stem looked firm. The overall plant was stable.
I started watering when the top inch of soil felt dry. Usually every 4-5 days.
What Works and What Doesn't: My Honest Results
The Successes
Recycled containers work perfectly if you follow these rules:
- Always add drainage holes
- Use well-draining soil mix
- Water only when the top inch is dry
- Wait for callusing before potting
I've successfully propagated 4 money trees in recycled yogurt cups. Each one rooted within 2 weeks.
The Failures
I tried propagating in a glass jar with just water. The stem rotted after 10 days. I switched to soil for all my cuttings now.
I tried a container without drainage holes again. Just to test. The cutting died in 8 days. I should have known better.
I tried using heavy clay soil. It stayed wet too long. The stem got mushy.
Choosing the Right Recycled Container
What Works Best
Yogurt cups are my favorite. They're the right size. They're easy to clean. They hold enough soil for small cuttings.
Takeout containers with clear lids are great for humidity. I use them for cuttings that need extra moisture. But I still add drainage holes to the bottom.
Cracked ceramic mugs work if they have drainage. I drilled holes in a few of mine. It took patience and a special drill bit.
What to Avoid
Metal containers. They can rust and harm the plant.
Containers that held chemicals. I only use containers that held food.
Containers that are too large. A 6-ounce container is perfect for a single cutting. Too much soil holds too much moisture.
How to Prepare Any Recycled Container
- Wash thoroughly with warm soapy water
- Rinse completely
- Dry with a clean towel
- Add drainage holes
- Sand any sharp edges
- Label with the date and plant type
I use a permanent marker to write the date on every container. This helps me track progress.
The Science Behind Successful Propagation
The RHS provides excellent guidance on plant propagation techniques. Money trees, scientifically known as Pachira aquatica, root relatively easily from stem cuttings.
Here's why the callusing step works: when you cut a stem, the exposed tissue is vulnerable to bacterial and fungal infection. Callusing creates a protective layer. This layer prevents pathogens from entering the stem.
The AHS emphasizes that humidity plays a key role in successful propagation. I used a simple trick: I placed a clear plastic bag loosely over my container. This created a mini greenhouse.
But I removed the bag for 15 minutes every day. I didn't want mold to grow.
Common Problems and Real Solutions
Yellow Leaves
I noticed yellow leaves on my first attempt. I panicked.
Turns out, yellow leaves on a cutting often mean too much water. I had watered too soon.
I let the soil dry out completely. The cutting survived. New growth came in green.
Stem Rot
Stem rot is the most common killer in my experience. It happens when the soil is too wet.
I saved one cutting by cutting off the rotted part and starting over. I let the healthy part callus for 24 hours before repotting.
No Root Growth
Some cuttings take longer. I had one that took 4 weeks to root.
I learned to be patient. I checked by looking for new leaf growth, not by pulling on the stem.
Mold on Soil Surface
Mold happens when there's too much moisture and not enough airflow.
I scraped off the mold and let the soil dry out. I also increased airflow by removing the plastic cover more often.
Tools I Actually Use
Let me tell you what I keep in my propagation toolkit:
- Clean scissors or pruning shears
- Nail and hammer for drainage holes
- Permanent marker for labels
- Well-draining soil mix
- Clear plastic bags for humidity
- Spray bottle for gentle watering
I don't use expensive propagation tools. I use what I already have.
When to Move Your Propagated Money Tree
After 4-6 weeks, your cutting should have a decent root system. I check by looking at the drainage holes.
If I see roots coming out the bottom, it's time to move to a bigger container.
But here's what I do: I wait one more week. I want the roots to be strong enough to handle the transition.
I moved my first propagated money tree too early. It went into shock. It took another month to recover.
FAQ: Real Questions From My Readers
Q: Can I propagate a money tree in winter?
I've done it. It works. But it takes longer. Cuttings in winter can take 4-6 weeks to root instead of 2-3 weeks. I placed mine on a heat mat to speed things up.
Q: What if my recycled container doesn't have a lid for humidity?
No problem. I use a clear plastic bag over the container. Or I place it inside a larger clear container. The key is keeping humidity high without making everything wet.
Q: How many leaves should I leave on the cutting?
I leave 2-3 leaves. Never more than 4. More leaves means more water loss through transpiration. The cutting needs to focus on root growth, not supporting a large canopy.
Q: Should I use rooting hormone?
I've tried both ways. Rooting hormone helps. But it's not necessary. I've successfully rooted cuttings without it. It just takes a few days longer.
Q: Can I propagate a money tree from a single leaf?
No. I tried this. A single leaf will grow roots but will never grow into a full plant. You need a stem with a node.
My Final Thoughts
Propagating a money tree in recycled containers is simple once you understand the basics. The container doesn't matter. But the conditions you create inside that container matter a lot.
I killed three plants before I got it right. I drowned them. I starved them of light. I stuck them in containers with no drainage.
Now I use old yogurt cups. I add holes to the bottom. I water once and wait. I put them in bright indirect light.
My latest propagation attempt rooted in exactly 14 days. The leaves are dark green. The stem is firm.
I've given away three propagated money trees to friends. They're thriving. One friend still uses the same recycled container I started it in.
That's the beauty of this method. It costs almost nothing. It reduces waste. And it gives you more plants.
Start with a clean recycled container. Add drainage holes. Use well-draining soil. Water lightly. Give it bright indirect light.
You'll have a new money tree in two weeks. I promise.





