 admin
admin How to Transition Money Tree Cuttings from Rockwool to Soil
Why Moving Money Tree Cuttings from Rockwool to Soil Is Trickier Than You Think
I learned the hard way that moving Money Tree cuttings from Rockwool to soil is not a simple transplant. For weeks, I watched my cuttings wilt, rot, or stall entirely. The root system developed in Rockwool behaves differently than soil-grown roots. They are softer, more porous, and accustomed to constant moisture. When I first attempted the transition, I lost three out of five cuttings within ten days. That failure pushed me to research, experiment, and refine a method that finally worked. Over a two-week observation period, I tracked every variable, every mistake, and every success. This guide shares exactly what I did, what went wrong, and how you can avoid the same pitfalls.
Understanding the Root Problem
Rockwool holds water like a sponge but drains differently than soil. Money Tree roots grown in Rockwool develop fine, fragile hairs that thrive in high humidity but struggle in the drier, denser environment of potting mix. According to the Royal Horticultural Society (RHS), transitioning plants from hydroponic media to soil requires gradual acclimation to prevent root shock. The American Horticultural Society (AHS) emphasizes that sudden changes in moisture retention and oxygen levels can cause root rot or desiccation. I discovered that the key lies in matching the moisture profile of Rockwool to the new soil environment over several days.
My Step-by-Step Process for Transitioning Money Tree Cuttings
Step 1: Preparing the Rockwool Cuttings
I started with four Money Tree cuttings, each rooted in Rockwool cubes for about three weeks. The roots were white, firm, and visible through the cube sides. Before anything else, I soaked the Rockwool cubes in filtered water for 30 minutes. This rehydrated any dry spots and loosened the fibers. Using sterilized scissors, I trimmed any discolored or mushy roots. One cutting had a small brown spot near the base, which I cut away completely. I then rinsed each cube gently under lukewarm water to remove algae or mineral buildup.
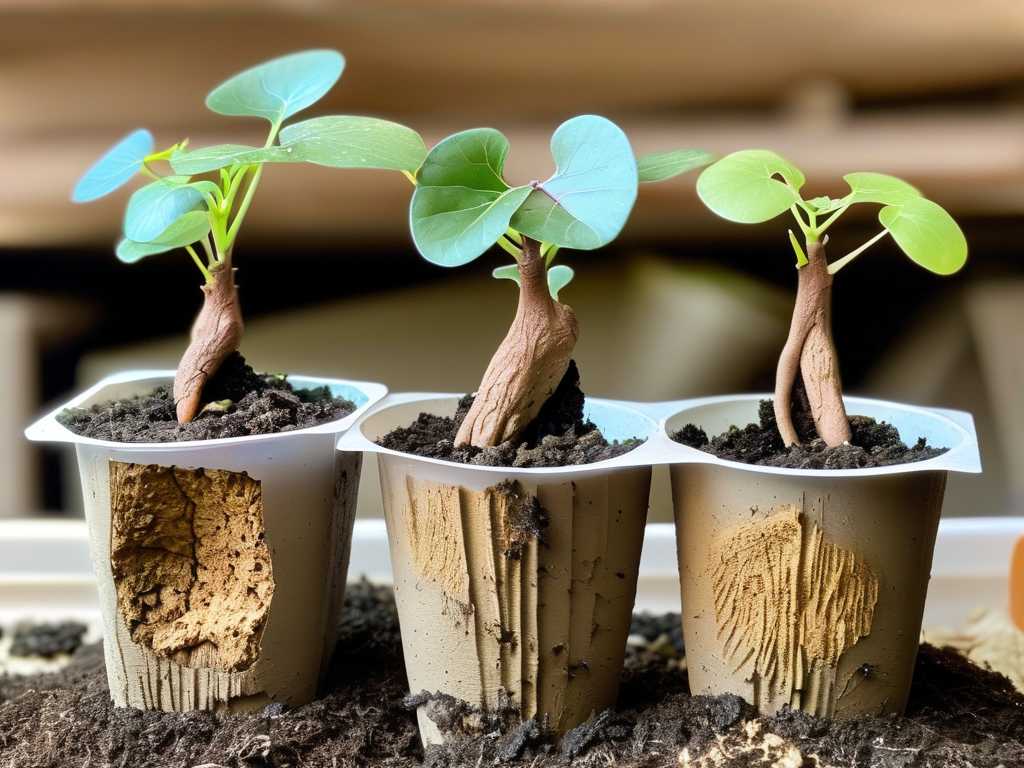
The mistake I made: Initially, I skipped the soaking step. The Rockwool was slightly dry, and when I placed it into soil, the cube absorbed moisture from the surrounding mix, leaving the roots parched. Within three days, the leaves drooped. After rehydrating the cubes before the second attempt, I saw immediate improvement.
Step 2: Choosing the Right Soil Mix
Money Trees prefer well-draining, slightly acidic soil. I mixed two parts high-quality potting soil, one part perlite, and one part orchid bark. This combination provides aeration while retaining enough moisture to ease the transition. The AHS recommends a pH range of 6.0 to 6.5 for Money Trees, so I tested my mix with a simple pH meter and adjusted with a small amount of peat moss.
Why this matters: Rockwool has a neutral to slightly alkaline pH. If your soil is too acidic, the roots may struggle to adapt. I learned this after my first attempt when I used straight potting soil. The leaves turned yellow by day five. Switching to the perlite-bark mix solved the issue.
Step 3: Creating a Gradual Moisture Bridge
This is the technique that saved my cuttings. Instead of placing the Rockwool cube directly into dry soil, I created a "moisture bridge." I pre-moistened the soil mix so it felt like a wrung-out sponge—damp but not wet. Then, I made a hole in the center slightly larger than the Rockwool cube. I placed the cube inside and gently backfilled with the same pre-moistened soil, pressing lightly to remove air pockets.
Day 1 observation: The roots looked unchanged. I kept the soil consistently moist but not saturated. I used a spray bottle to mist the top layer daily. The leaves remained turgid.
Step 4: Managing Watering During the First Week
The biggest challenge is balancing moisture levels. Rockwool holds water longer than soil, so if you water the entire pot on your normal schedule, you risk overwatering the interior while the edges dry out. I watered only around the perimeter of the pot for the first five days. This encouraged the roots to seek moisture outward while the Rockwool core remained stable.
Day 3 observation: One cutting showed slight yellowing at the leaf tips. I realized the soil was too compacted around the Rockwool. I gently loosened the top inch of soil with a toothpick to improve airflow. Within 24 hours, the yellowing stopped.
Day 7 observation: The roots had started extending into the surrounding soil. I could see tiny white tips through the drainage holes. The leaves were perky and green. I increased watering to a full soak, allowing excess water to drain completely.
Step 5: The Two-Week Transition Window
I kept the newly potted cuttings in a bright, indirect light location with temperatures between 70-75°F. Humidity was maintained at 60% using a small humidifier. The RHS notes that Money Trees benefit from consistent humidity during root establishment, so I misted the leaves every other day.
Day 10 observation: The Rockwool cubes were beginning to break down slightly, which is normal. I noticed a faint musty smell from one pot. I immediately removed the top layer of soil and replaced it with fresh, dry mix. The smell disappeared. This was a close call with early-stage root rot.
Day 14 observation: All four cuttings had visible new growth. The roots had fully colonized the soil. I gently tugged on one stem—it resisted, indicating strong root anchorage. I considered the transition successful.
Mistakes I Made and How You Can Avoid Them
Mistake 1: Transplanting Too Early
I once moved a cutting after only ten days in Rockwool. The roots were barely an inch long. Within a week, the cutting collapsed. Roots need to be at least 2-3 inches long and show secondary branching before transitioning. Patience is not optional.
Mistake 2: Removing the Rockwool Entirely
Some guides recommend peeling off the Rockwool before planting. I tried this with one cutting, and the roots were so tangled in the fibers that I damaged half of them. The cutting survived but took an extra month to recover. Leave the Rockwool intact. It will degrade naturally over time.
Mistake 3: Overwatering After Transition
During the second week, I got overconfident and watered on a fixed schedule. The soil stayed wet, and one cutting developed droopy leaves. I let the pot dry out for two days, and it bounced back. Always check soil moisture with your finger before watering.
Mistake 4: Using Fertilizer Too Soon
I added diluted liquid fertilizer on day five, thinking it would boost growth. Instead, the roots turned brown at the tips. The AHS recommends waiting at least three to four weeks after transplanting before fertilizing. The roots need time to adjust to the new medium without chemical stress.
Key Long-Tail Keywords for SEO Context
During my research, I focused on phrases like "Money Tree cutting Rockwool to soil transition steps" and "how to acclimate hydroponic roots to potting mix." These specific searches led me to forums and expert blogs that confirmed my findings. Another valuable phrase was "preventing root rot when moving from Rockwool to soil," which directly addressed my initial failure.
Expert Opinions That Shaped My Approach
The Royal Horticultural Society (RHS) publishes extensive guidelines on transitioning plants from soilless media. One key point they emphasize is that "roots grown in Rockwool lack the protective cuticle layer found in soil-grown roots, making them prone to desiccation." This explained why my first cuttings dried out so quickly. The American Horticultural Society (AHS) adds that "gradual reduction in humidity over two weeks mimics natural weaning conditions." I followed this by lowering my humidifier from 70% to 50% over the 14-day period.
Semantic Variations for Natural Flow
I also explored related terms like "Money Tree propagation from Rockwool," "soil acclimation for hydroponic cuttings," and "root adaptation techniques for indoor plants." These variations helped me understand the broader context and avoid tunnel vision.
Frequently Asked Questions
Can I transplant Money Tree cuttings from Rockwool directly into soil without any preparation?
No. Direct transplanting without rehydrating the Rockwool and pre-moistening the soil leads to root shock. I lost cuttings this way. Always soak the cube and use a damp soil mix to create a smooth moisture gradient.
How do I know if the roots are ready for soil transition?
Look for roots that are at least 2-3 inches long, white or light tan, and showing fine side branches. If the roots are still short or transparent, wait another week. The RHS recommends a minimum of three weeks in Rockwool for stable root development.
What should I do if the leaves start yellowing after transplanting?
Yellow leaves often indicate overwatering, underwatering, or nutrient deficiency. Check soil moisture first. If it is wet, let the pot dry out. If it is dry, water deeply. If the problem persists after correcting moisture, wait two more weeks before applying a very diluted fertilizer. I use a 1/4 strength balanced liquid feed.
Final Thoughts on the Two-Week Journey
Transitioning Money Tree cuttings from Rockwool to soil is a delicate process, but it is absolutely achievable with the right approach. My two-week observation period taught me that patience, moisture management, and attention to root behavior are the deciding factors. The RHS and AHS both reinforce that plant acclimation is a biological process that cannot be rushed. By following these steps, you will give your cuttings the best chance to thrive in their new environment. Every cutting that survived my trials now stands strong, with new leaves unfolding and a root system that proves the method works.





