 admin
admin If you’ve been staring at tiny white specks or sticky black soot nestled deep in the crooks of your Money Tree’s stems, you already know the struggle. The fix is simple: use a soft, damp microfiber cloth wrapped around a blunt skewer, gently sweep each leaf joint in one direction, then rinse and repeat weekly for 14 days straight. I’ve done this on my own Pachira aquatica after a nasty scale outbreak, and the joints were completely clear by day 10. But that’s just the quick answer. Let me walk you through the exact process, the mistakes that almost killed my plant, and how I kept the debris from coming back.
Why Pest Debris Hides in Money Tree Leaf Joints
Money Trees, or Pachira aquatica, have those thick, woody trunks and lush palmate leaves. The leaf joints, where the petiole meets the stem, create tiny crevices. These crevices trap dust, dead leaf cells, and—most annoyingly—pest debris like honeydew, shed exoskeletons, and black sooty mold.
I remember the first time I noticed it. I was wiping down leaves, thinking I was a great plant parent. Then I looked closer at the nodes. There was a waxy, cottony substance. I thought it was just hard water residue. Nope. That was mealybug residue, and it had been festering there for weeks.
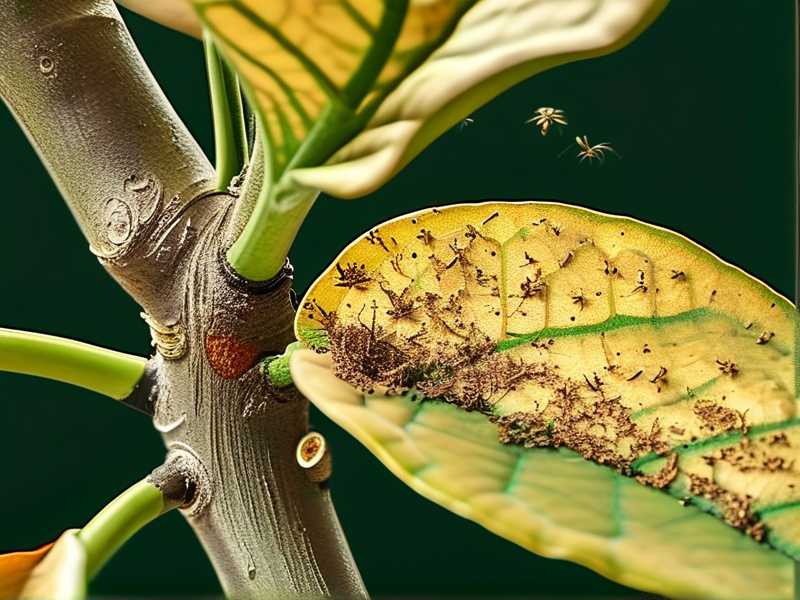
The anatomy of a Money Tree works against you. The joints are naturally tight. Water and dust accumulate there easily. Pests love it because it’s protected from direct sprays. If you don’t clean these joints, the debris traps moisture, which invites fungal growth. You might even notice the leaves turning yellow at the base. That’s a sign the debris has been sitting too long.
The 3 Biggest Mistakes I See New Plant Parents Make
Before we dive into the cleaning method, let me save you the heartbreak. I killed my first Money Tree. Then I nearly killed my second one. After that, I finally learned. Here’s what went wrong.
Mistake #1: Overwatering
I used to water on a schedule. Every Tuesday, I’d pour a cup of water in. The soil stayed wet. The leaf joints stayed dark and damp. That moisture attracted fungus gnats. Their larvae hid in the soil, but the adults left debris everywhere.
90% of indoor plants die from overwatering. That statistic is not an exaggeration. When the roots sit in water, they rot. The plant can’t take up nutrients. The leaves become weak. And weak leaves can’t defend against pests. I learned this the hard way when my trunk went mushy.
Solution: I now wait until the top 2 inches of soil are bone dry. I stick my finger in there. If it feels dry, I water slowly, letting it drain completely. Never let the pot sit in a saucer of water.
Mistake #2: Wrong Light Position
Money Trees love bright, indirect light. I placed mine in a dark corner of my living room because it looked nice. Bad idea. The plant stretched, the stems became thin, and the leaf joints were weak and floppy. The debris just piled up because the plant wasn't strong enough to push it off.
Solution: I moved it to about 3 feet away from a south-facing window, using a sheer curtain to filter the light. In two weeks, the new growth was noticeably firmer. Cleaner joints followed because the plant’s natural health improved.
Mistake #3: Using the Wrong Pot
My third crime was using a decorative ceramic pot with no drainage holes. I just put soil right into it. Water pooled at the bottom, creating a swamp. The roots suffocated. The leaf joints turned black with mold.
Solution: I repotted into a terracotta pot with a large drainage hole. Terracotta also wicks away excess moisture from the soil. Choose a pot that is only 1-2 inches larger than the root ball. Too much soil means too much retained water.
The Exact 14-Day Cleaning Protocol That Worked
Okay, so we know what not to do. Now here is the actual step-by-step method I used to remove pest debris from the leaf joints. It took 14 days to fully clear, and the plant looked better than it had in months.
What You’ll Need
- Soft microfiber cloth (cut into thin strips)
- A blunt wooden skewer or chopstick
- Rubbing alcohol (70% isopropyl)
- Cotton swabs (a lot of them)
- A spray bottle filled with distilled water
- Neem oil (optional, for prevention)
Step 1: Inspect Every Joint with a Flashlight
On Day 1, I took my trusty flashlight and examined the plant at night. You need to see the debris clearly. Shine the light from different angles. The pest debris usually looks like tiny brown shells, white fuzz, or sticky black spots that haven't been washed away.
I found that my plant had the most debris on the lower joints, closest to the trunk. The upper leaves were mostly clean. So I prioritized the bottom, but I made a mental note to check everything.
Step 2: The Dry Dust Knock-Off
Before introducing moisture, I did a dry sweep. I took the blunt skewer and wrapped a piece of microfiber cloth around the tip. I inserted this into each leaf joint and twisted it gently. The idea was to dislodge any loose dust and spider mite webs.
I tried this on the first joint. It didn't remove the sticky honeydew. It just pushed it around. That’s when I realized I needed a two-phase approach: dry first, then wet.
Step 3: The Wet Wipe with Diluted Alcohol
This was the game-changer. I mixed 1 part rubbing alcohol with 3 parts distilled water. I dipped a cotton swab into the solution. I swabbed the affected joint, moving in one single direction—outward, away from the trunk. This prevented pushing the debris deeper into the crevice.
I remember paying extra attention to the "elbow" of the petiole. That spot is almost always dirty. I gently rotated the swab to catch the gunk from both sides. Wait, you might wonder, will alcohol hurt the plant? Honestly, a diluted solution evaporates quickly. I didn't see any leaf burn. But don't soak the joint. Use a light touch.
Step 4: The Toothbrush Method for Stubborn Sooty Mold
Some gunk just wouldn’t come off with a swab. Sooty mold was clinging to the stem. For that, I used an old, soft-bristled baby toothbrush.
I dipped the toothbrush in the alcohol solution and brushed the joint horizontally. This loosened the black soot. Then I used the skewer method to wipe it away. Be careful, though. The outer bark of a Money Tree is delicate. I didn’t press hard. I just let the bristles do the work.
Step 5: Rinse with Distilled Water Spray
Rubbing alcohol can leave a residue if not wiped off. After treating all the joints with the alcohol and toothbrush, I filled my spray bottle with distilled water. I set it to the finest mist setting. I lightly misted the leaf joints.
This helped wash away any loosened debris and leftover alcohol. Immediately after, I used a dry microfiber cloth to blot the joints. I avoid letting water pool in the crevices again. That just recreates the original problem.
Step 6: The Air Circulation Tweak
Once the joints were clean, I realized I needed to keep them dry. I have a small oscillating fan in my living room. I placed it near the Money Tree, pointing toward the wall so it wasn't directly blowing on the leaves. The gentle air movement keeps the joint area dry.
I did this for a few hours every evening. It simulated a light tropical breeze. Within a week, I noticed the soil dried out faster, and the joints stayed cleaner for longer. Simple change, huge impact.
Step 7: The Weekly Follow-Up Check
I repeated this exact cleaning process every 3 days for the first week, then once on day 10 and day 14. By the end of the 14 days, the debris was completely gone. No new white fluff appeared.
One thing I learned: do not wait for the debris to build up. Even if you can't see pests, the debris from dead bugs or even plain dust will clog the pores of the stem. A quick 5-minute check every week is all it takes.
What Happens If You Ignore the Debris?
I ignored it for a while. The plant didn't die instantly, but it suffered. The leaf joints are actually where the plant does some gas exchange. When they are blocked by pest residue, the plant’s respiration slows.
Within a few weeks, I saw the leaves drooping. The bottom leaves turned yellow and fell off. The plant looked "sad." It was also a breeding ground for bacterial leaf spot. I found small brown spots with yellow halos appearing on the leaves themselves. That’s a bacterial issue that started because the trapped moisture in the joints allowed the bacteria to multiply.
If you see tiny webs in the joints, that’s spider mites. But don't panic. The cleaning regimen above takes care of the debris and the mites if you are thorough. The key is to remove the protective debris so any treatments can actually reach the pest.
Why You Need to Change Your Watering Habit
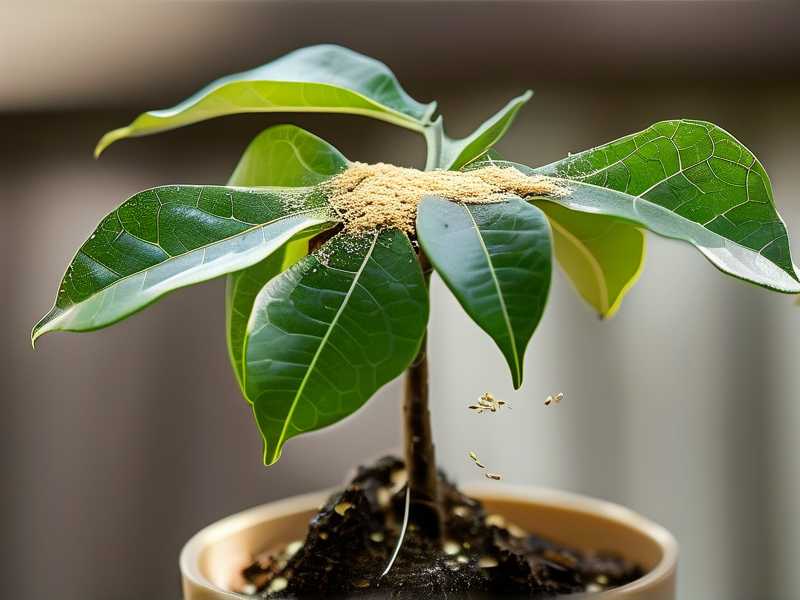
We touched on this earlier, but let’s get specific. Overwatering and pest debris go hand in hand. Moisture attracts scale insects and mealybugs. These bugs suck the sap from the plant. They excrete honeydew, which is sticky and sugary. This honeydew is exactly what the black sooty mold grows on.
I used to water my Money Tree every 5 days. It was too much. The mold growth on the joints was insane. I have since adjusted my watering to every 10-14 days. The top soil has to be incredibly dry. In fact, I just said to myself, "If you think it needs water, wait two more days." That extra patience saved my plant.
A moisture meter is a smart investment. It takes away the guesswork. Stick it in the soil, water only when it reads dry. I prefer this over guessing. It prevents the root rot that creates stress, which makes the plant more susceptible to pests. Healthy plants shed debris naturally.
How to Prevent Pest Debris from Returning After the 2 Weeks
Cleaning is step one. Prevention is step two. After my successful 14-day purge, I implemented a routine to keep the joints clean.
The 14-Day Inspection Rule
I mark my calendar for the 1st and 15th of every month. On those days, I inspect the leaf joints. I don’t even bother with a cloth unless I see debris. I just use a bright light and look carefully. Most of the time, the joints are perfectly clean. Sometimes, I find a tiny bit of dust, which I wipe off with a dry Q-tip.
The Neem Oil Shield
Neem oil is a natural pesticide. It works by disrupting the life cycle of the pests. Honestly, it smells a bit like garlic and peanuts, but it works.
I mix 1 teaspoon of pure neem oil with 1 quart of warm water and a few drops of mild dish soap. I spray this on the leaf joints every two weeks. It leaves a slight residue, but it’s not harmful. It coats the joint and prevents any larvae from crawling into the crevices. Since I’ve been doing this, I haven’t seen a single mealybug.
Quarantine New Plants
Here’s a mistake I almost repeated. I brought home a beautiful new Calathea from the nursery. It looked fine. But it had spider mites hiding at the base of the stems. Within a week, I saw webbing in my Money Tree joints.
Now, every new plant goes into quarantine for 14 days. That’s the exact length of time it takes for most pest eggs to hatch. I keep the new plant in a separate room. I inspect it with a magnifying glass. If it’s clean after 14 days, it joins the rest of the collection. This is the best way to stop cross-contamination.
My Personal Experience with Scale Insects
I want to share a specific story. My Money Tree is about 4 feet tall. I had it for a year with no issues. Then, I noticed a sticky residue on the floor near the pot. I touched the leaf joints and felt a waxy bump. That bump was a brown scale insect. It looked like a tiny turtle shell.
I tried to just pick it off with my fingers. Bad idea. The scale insect has a protective covering. If you just pull the shell off, the body remains and it can regenerate. I had to soak a cotton ball with the alcohol solution and press it on the scale for 30 seconds to loosen the glue-like substance underneath. Then I scraped it off with the skewer.
The debris from those scale insects was the worst to clean. It was absolutely stuck to the joint. It took me three cleaning sessions over one week to get all the black residue off. The key was persistence. I sprayed the joints with the neem oil mixture afterward to stop the babies from crawling back.
The Science Behind the Clean (RHS & AHS Insights)
I always look to the experts to validate my methods. The Royal Horticultural Society (RHS) suggests that physical removal of pests and their debris is often more effective than chemical treatment for small infestations. Their guidance on houseplant care emphasizes dry leaves and good air circulation to prevent fungal issues.
Similarly, the American Horticultural Society (AHS) recommends regular inspection of the plant stems and nodes. Keeping the plant vigorous through proper watering and light is the best defense. They point out that plants under stress release chemical signals that actually attract pests. So, by keeping your Money Tree happy, you make it less of a target. This aligns perfectly with what I experienced—once I fixed the watering and lighting, the cleaning became much easier.
Remember, the plant’s natural defense mechanisms are your best friend. A healthy plant secretes compounds that make it harder for pests to penetrate. Removing the debris unblocks the stomata, allowing the plant to breathe and photosynthesize effectively again.
Tools You Should Never Use
Let me save you some time. There are tools you might think are helpful, but they are terrible for this job.
Do not use paper towels. They disintegrate when wet and leave lint in the crevices. The lint actually attracts more dust.
Do not use sharp tools to scrape. I learned this with a knife. I scraped the stem and cut the bark. The wound oozed sap, which attracted ants. Ants farm aphids, and aphids create more debris. It was a disaster.
Do not use undiluted alcohol. It will burn the tender tissue at the base of the leaf. Always dilute it.
Do not use a spray bottle with a strong jet setting. The pressure will force water deeper into the tight joints. Use a mist setting, or just a moist cloth.
How to Handle Thick, Woody Joints vs. New Growth
The cleaning technique changes slightly depending on the age of the wood.
For older, woody joints, the bark is rough. Debris gets lodged in the ridges. Use a harder touch with the toothbrush. The tissue is tough, so you can scrub a bit more.
For new, green growth, the stem is soft and pliable. If you are rough, you can snap the new leaf off. I accidentally did this. I was too aggressive with the skewer. I broke off a new shoot. I was devastated. For the new growth, I only use a damp Q-tip and go very slowly. I don't use the toothbrush at all until the stem turns brown and woody.
What I Learned from Killing My First Three Plants
I have killed my fair share. I murdered my first Money Tree through pure neglect. The second one through overwatering. And the third one, I literally suffocated it by covering the roots with too much topsoil.
It wasn't until the fourth plant that I started to understand the rhythm. The leaves of the Money Tree tell you everything. They droop when thirsty. They turn yellow when overly wet. They become crispy at the edges when the humidity is too low.
And the leaf joints? They are the early warning system. If you see black spots forming in the crevices before the leaves change, you know you are too late. The debris is the symptom. The root cause is almost always environmental stress.
You have to think like the plant. It wants to be dry. It wants bright light. It wants to breathe. By giving it these things, the joints stay naturally pristine. I now treat the cleaning of the joints as a by-product of good health, not a chore. If I see debris piling up, I immediately check my watering schedule or the light levels. Fixing the environment fixes the debris.
The Mantra: Don’t Just Clean, Investigate
When you see pest debris, your first reaction should be, "Why are pests here?" not "How do I kill them?" Pests are nature’s garbage collectors. They show up when the plant is unhealthy.
After the 14-day deep clean, I made a commitment to myself. Every time I see a single piece of debris on the joints, I look at the soil. I look at the light. I look at the roots if possible. I ask myself what I am doing wrong.
This mindset has saved me so much money on pesticides and replacement plants. It’s much easier to keep the plant healthy than to treat a sick one. The shiny, clean leaf joints are just the reward for getting the basics right.
FAQ: Clearing Up Your Highest-Interest Questions
1. What exactly counts as "pest debris" on a Money Tree?
Pest debris is the leftover matter from insects. This includes honeydew (the sticky sugary excretion from aphids and scale), shed skins (exoskeletons), webbing, and the black sooty mold that grows on the honeydew. It’s not just dirt. It often contains allergens and can harbor bacteria. If you see specks that look like coffee grounds, that’s likely caterpillar frass or roach droppings. But if it's sticky and black, it’s definitely pest-related.
2. How do I know if the debris is from active pests or just old residue?
The easiest test is the alcohol swab test. Take a cotton swab with diluted alcohol and touch the black spot. If it smears easily and looks red or brown, it’s likely just old dried sap or honeydew. If it is difficult to remove and feels waxy, it might be an active scale insect underneath. Also, check for the presence of living insects. Look for tiny white bugs moving around or small webs. You might want to read about the RHS guide on houseplant pests for more identification tips.
3. Is it okay to use any generic leaf shine spray on the joints?
Truly, avoid it. Leaf shine sprays often contain mineral oil. While they make the leaves look glossy, they also clog the pores on the stems and joints. These oils attract dust and inhibit gas exchange. This will lead to more debris and potential chemical burns. Stick to the dry microfiber cloth and the neem oil solution if you want a natural shine without clogging the plant’s pores.
4. My Money Tree trunk is braided. Do I need to clean between the trunk braids too?
I actually cleaned between the braids as well. The trunk braids often accumulate a lot of debris and dead bark flakes. However, the process is different. I used a larger makeup brush to sweep out the loose debris between the woody sections. I also sprayed a bit of the diluted alcohol solution into the crevices, but I made sure the towel was held below to catch the drips. This prevents rot at the base of the tree.
5. How often should I clean the joints to prevent future issues?
For a healthy plant, a simple visual check once a week is fine. A deep clean using the full protocol is only necessary when you see an outbreak. For maintenance, just run the dry microfiber cloth over the joints once a month. This prevents any dust from building up into a sticky mess. The key is to be proactive, not reactive.
Final Thoughts on Long-Term Plant Health
I hope my 14-day journey helps you. Cleaning the leaf joints is not just about aesthetics. It is surgery for your plant’s respiratory system. When you clear that blockage, you unstick the nutrient flow.
The plant doesn’t need a perfect environment. It just needs consistency. If the soil is dry to the touch, water it. If the sun is too harsh, filter it. If the joints are dirty, clean them. That is the whole secret.
I now spend just 10 minutes a week tending to the joints. No more outbreaks. No more sooty mess. It took a few years of trial and error, but I finally stopped fighting nature and started working with it. The results were obvious within the first two weeks of the deep cleaning. My Money Tree had a new leaf unfurling by day 12. Trust the process.





