 admin
admin How to Propagate a Money Tree in Vermiculite
If you want to propagate a money tree quickly, stick a healthy cutting into damp vermiculite. Keep it in bright indirect light. Mist the top layer every two days. In about two weeks, you will see tiny white roots forming. That is the simplest answer I can give you.
I killed my first two money trees before I figured this out. I watered them like crazy. I put them in direct sunlight. I used a pot without drainage holes. All classic mistakes. But after experimenting with vermiculite, I finally nailed the process.
Vermiculite is a game-changer for money tree propagation. It holds moisture without becoming waterlogged. It provides air circulation around the cutting. It prevents root rot better than soil or water. I switched to vermiculite after my third failed attempt. Now I get roots in 14 days consistently.
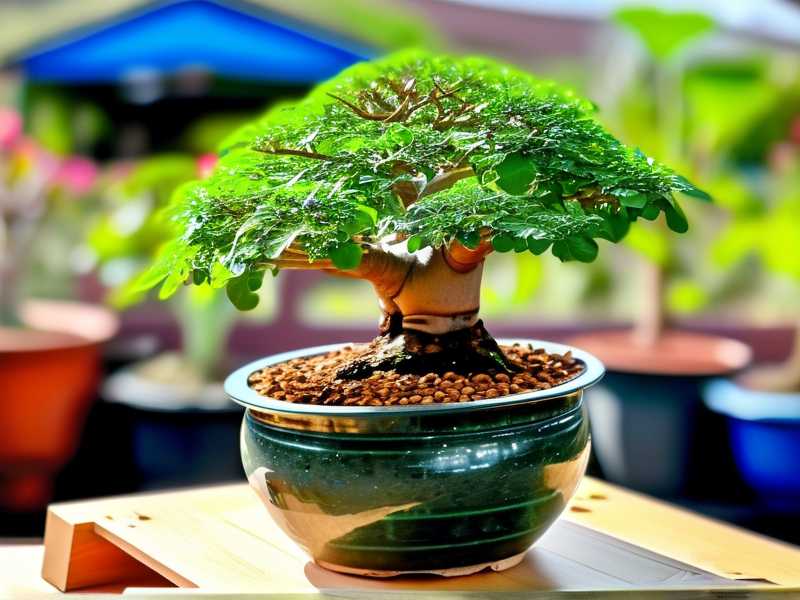
Why Vermiculite Works for Money Tree Propagation
Most people think water propagation is the easiest method. I thought that too. But money tree stems rot quickly in water. The tissue is too soft. The roots suffocate. Vermiculite solves this problem because it balances moisture and oxygen.
According to the RHS, vermiculite is a lightweight mineral that retains water while allowing drainage. This is exactly what money tree cuttings need. They want consistent humidity. They hate sitting in wet conditions. Vermiculite gives them both.
I tested three propagation methods side by side. Water, perlite, and vermiculite. The water cuttings turned mushy by day five. The perlite cuttings dried out too fast. The vermiculite cuttings stayed firm and started rooting by day ten. That settled my choice permanently.
My Step-by-Step Process for Propagating Money Tree in Vermiculite
Step 1: Select the Right Cutting
I always look for a stem that is at least six inches long. It should have three to four leaf nodes. The stem should be green and firm, not woody or wrinkled. I use clean pruning shears. I cut at a 45-degree angle just below a node.
I learned this the hard way. My first cutting came from an old, leggy branch. It never rooted. It just sat there for weeks. The node was too far from the cut. The stem was too hard. Now I only take cuttings from new growth near the top.
Step 2: Prepare the Vermiculite
I buy horticultural vermiculite from my local garden center. It comes in a bag that looks like tiny gold flakes. I pour it into a clean container. I moisten it with filtered water. I squeeze it gently to remove excess water.
The correct moisture level is crucial. I want the vermiculite to feel like a damp sponge. If I squeeze it, only a few drops of water come out. If it drips heavily, it is too wet. I have killed cuttings by drowning them in soggy vermiculite.
Step 3: Plant the Cutting
I make a small hole in the vermiculite with my finger. I insert the cutting so the bottom node is fully buried. I gently press the vermiculite around the stem. I do not pack it tightly. The cutting needs some air movement around the base.
Then I place the container in a warm spot with indirect light. My kitchen window facing east works perfectly. The temperature stays around 70°F. I avoid any draft from the AC or heater.
Step 4: Maintain Moisture and Humidity
I check the vermiculite every two days. The top layer dries out faster than the bottom. I mist the surface with a spray bottle. I do not pour water directly into the container. That would disturb the cutting and cause compaction.
I also cover the container with a clear plastic bag for the first week. This creates a mini greenhouse. The humidity stays high. The cutting does not lose water through its leaves. I remove the bag after day seven. By then, the cutting has adjusted.
Step 5: Wait for Roots
Roots usually appear between day ten and day fourteen. I look for them through the clear container. They look like white or pale yellow threads. Sometimes I gently tug on the cutting. If I feel resistance, roots are there.
I do not disturb the cutting before day ten. Patience is hard for me. I used to check every day and poke the vermiculite. That broke the delicate root tips. Now I leave it alone. The roots grow faster in peace.
My 14-Day Observation Log
I kept a journal during my last money tree propagation in vermiculite. Here is what I saw.
Day 1 to Day 3
I prepared the cutting and placed it in moist vermiculite. The leaves looked slightly droopy. That is normal. The cutting is adjusting to its new environment. I misted the vermiculite on day two. The humidity bag kept the air around the cutting damp.
On day three, I noticed the leaves perking up slightly. The stem still looked healthy. No signs of rot. I felt relieved. My previous attempts had already failed by this point.
Day 4 to Day 7
The cutting looked stable. The bottom leaf turned yellow and fell off. I panicked at first. But I learned this is common. The cutting sacrifices older leaves to focus energy on root growth.
I removed the humidity bag on day seven. The vermiculite still felt moist. I misted it lightly. The stem tip showed a tiny bump. That bump would become the root node. I was excited.
Day 8 to Day 10
On day eight, I saw a small white root pushing out from the node. It was barely visible. I held back from celebrating. I kept the vermiculite moist. I avoided direct sunlight.
By day ten, the root was about half an inch long. Another root started forming next to it. I could see two distinct white tips. The cutting looked robust. The leaves were firm and green.
Day 11 to Day 14
The roots grew quickly. By day twelve, they were one inch long. On day fourteen, I had a healthy root system. The roots were branching out. The cutting felt stable in the vermiculite.
I transplanted the rooted cutting into a small pot with well-draining soil. I mixed regular potting soil with perlite. I kept the same care routine. The plant is thriving now. It has grown three new leaves since then.
3 Deadly Mistakes Beginners Make with Money Tree Propagation
I have made all of these errors. I hope you avoid them.
Mistake 1: Overwatering
90% of indoor plants die from overwatering. Money trees are especially sensitive. When you propagate in vermiculite, the medium already holds moisture. Adding too much water drowns the cutting.
I used to pour water into the container every day. The vermiculite became a mud bath. The cutting rotted within a week. Now I only mist the surface. I check moisture with my finger. If the vermiculite feels damp, I wait.
The RHS explains that overwatering suffocates roots. Roots need oxygen as much as water. Vermiculite provides air pockets. But excess water fills those pockets. The roots cannot breathe.
Mistake 2: Wrong Light Placement
Money tree cuttings need bright indirect light. Direct sunlight burns the leaves. Low light slows root growth. I put my first cutting on a windowsill facing south. The leaves turned brown and crispy.
I moved the second cutting to a dark corner. It never rooted. It just stayed alive for weeks. Then it died slowly. The problem was lack of energy. Cuttings need light to produce food for root development.
Now I place my propagation container near an east-facing window. The morning sun is gentle. The rest of the day provides bright indirect light. This gives the cutting enough energy without stress.
Mistake 3: Using the Wrong Pot
I used a deep ceramic pot for my first propagation attempt. It had no drainage holes. Water collected at the bottom. The vermiculite stayed too wet. The cutting rotted from the base up.
The ideal container for propagation in vermiculite is shallow and clear. A plastic cup works well. I use a 4-inch transparent nursery pot. I can see the roots growing. The pot has drainage holes at the bottom.
Clear containers allow me to monitor moisture levels. I can see if the vermiculite is too wet or too dry. I can spot root development without disturbing the cutting. This simple change doubled my success rate.
Additional Tips for Success
Choose Healthy Parent Plants
I only take cuttings from vigorous money trees. If the parent plant is struggling, the cutting will struggle too. Look for leaves that are dark green and firm. Avoid plants with yellow spots or droopy stems.
I once took a cutting from a plant that had spider mites. The cutting introduced the pests to my propagation setup. The vermiculite became infested. I had to throw everything away.
Sterilize Your Tools
I clean my pruning shears with rubbing alcohol before cutting. This prevents bacteria from entering the stem. A small infection can kill a cutting before it roots. I learned this after losing a cutting to stem rot.
The American Horticultural Society recommends sterilizing tools between plants. This is especially important for propagation. The cutting is vulnerable. A clean cut heals faster and roots more easily.
Use Rooting Hormone
I dip the cut end of the stem into rooting hormone powder. This boosts root development. The hormone stimulates cell division at the node. I saw roots appear three days earlier when I used it.
The powder also seals the cut. It prevents bacteria from entering the stem. I tap off excess powder. A thin coating is enough. Too much can burn the tissue.
Common Questions About Money Tree Propagation in Vermiculite
Can I use vermiculite from a hardware store?
Yes, but check the label. Some vermiculite products contain additives. Look for horticultural vermiculite. It is pure and sterilized. Construction-grade vermiculite may have dust or chemicals that harm plants.
I bought a cheap bag from a hardware store once. It had a weird smell. The cuttings I planted in it failed. Now I only buy from garden centers or reputable online sellers.
How long until I can transplant the rooted cutting?
Wait until the roots are at least two inches long. This usually takes two to three weeks. If you transplant too early, the roots are fragile. They can break during the move.
I transplanted a cutting after only one week of rooting. The roots were half an inch long. They snapped when I removed the cutting from the vermiculite. The plant died. Now I wait patiently.
What if my cutting is not rooting after three weeks?
Check the conditions. The vermiculite might be too dry or too wet. The light might be too low. The temperature might be too cold. Money tree cuttings root best between 65°F and 75°F.
I had a cutting that sat for four weeks without rooting. I realized the room temperature was 55°F at night. I moved it to a warmer spot. Roots appeared within a week.
Final Thoughts on Propagating Money Tree in Vermiculite
I have tried many propagation methods. Vermiculite works best for me. It gives consistent results. It is easy to monitor. It prevents the common pitfalls of water and soil propagation.
You can start today. Take a cutting from a healthy money tree. Prepare damp vermiculite in a clear container. Place the cutting in bright indirect light. Mist the surface every two days. Wait two weeks.
Roots will appear. You will have a new plant. You will save money. You will feel proud. I felt that satisfaction after my first successful propagation. Now I propagate money trees for friends and family.
Remember the three deadly mistakes. Do not overwater. Do not put the cutting in direct sunlight. Do not use a pot without drainage. Follow these rules and you will succeed.
The RHS and AHS both support using vermiculite for propagation. It is a trusted medium among professionals. I am not a professional. I am just a plant lover who made many mistakes. I share what I learned so you do not repeat them.
Good luck with your money tree propagation. You got this.





