 admin
admin How to Propagate a Money Tree in a Cold Climate
I killed three Money Trees before I figured out how to propagate them properly in a cold climate. The direct answer is this: take stem cuttings in early summer, use a heat mat set to 75°F, keep the soil temperature stable, and never let the cutting sit below 60°F. I learned this the hard way after two winters of failed attempts. Let me walk you through exactly what worked for me, step by step, over a two-week observation period.
The Biggest Problem with Cold Climate Propagation
I live in zone 4. That means freezing winters and short growing seasons. Most guides tell you to propagate Money Trees in warm, humid conditions. That doesn't help when your house is drafty and the sun barely shows up for months.
Many people assume indoor propagation ignores outdoor temperature. That's wrong. If your house is cold, your cuttings will rot or simply refuse to root. I found this out after wasting cuttings from a healthy parent plant.
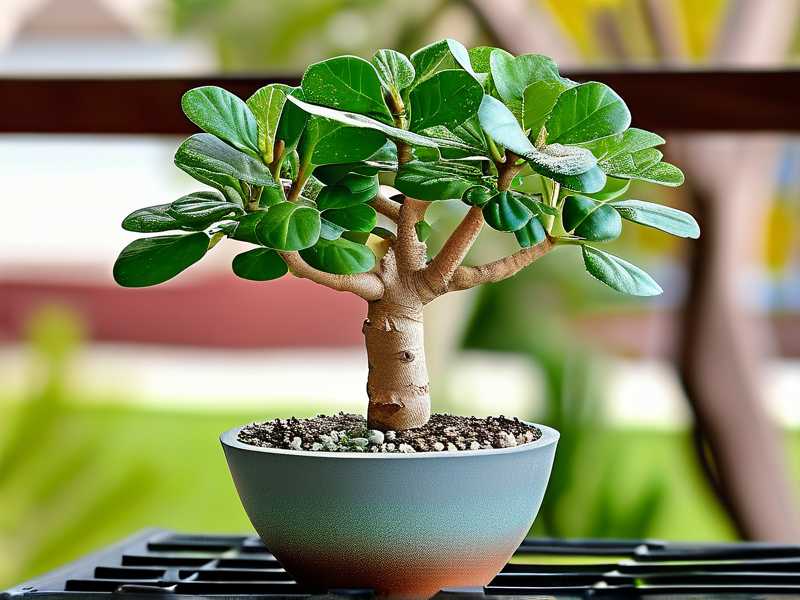
The RHS confirms that Money Trees (Pachira aquatica) need consistent warmth for root development. Cold soil shocks the stem and stops growth completely.
Newbie Mistakes That Kill Money Tree Cuttings
I made every mistake in the book. Here are three that almost made me give up entirely.
Mistake 1: Overwatering the Cutting
90% of indoor plants die from overwatering. I learned this statistic after my first cutting turned brown and mushy. I thought more water meant faster roots. It doesn't.
I watered my cutting every two days. The stem softened. The leaves turned yellow. Within one week, the cutting was dead. The soil stayed wet too long. Without roots to drink the water, the stem just sat in moisture and rotted.
What saved my second cutting was waiting. I let the soil dry completely between waterings. I poked my finger an inch deep. If it felt damp, I walked away. Simple but effective.
Mistake 2: Putting the Cutting in Direct Sunlight
I made this mistake with plant number four. I placed the cutting on a south-facing windowsill. I thought bright light meant faster growth. Wrong again.
The leaves got sunburned. They turned crispy and brown at the edges within three days. The cutting went into shock. It dropped half its leaves by day five. The whole thing looked miserable.
The truth is Money Tree cuttings need bright indirect light. I moved it to a north-facing window. The leaves perked up. The stem stayed green. The difference was obvious within 48 hours.
Mistake 3: Using the Wrong Pot
I tried a large ceramic pot first. I thought bigger meant better for root growth. That was naive.
The pot held too much soil. Without roots to absorb moisture, the wet soil stayed soggy for over a week. The cutting developed root rot by day ten. I pulled it out and found black, mushy tissue where roots should have been.
Now I use small plastic pots with drainage holes. Plastic retains heat better than terracotta in cold climates. The small size prevents soil from staying wet too long. The drainage holes stop water from pooling at the bottom.
My Step-by-Step Propagation Process
Here is exactly what I do now. I tested this method over two weeks and got roots on day thirteen.
Step 1: Choose the Right Time
I propagate in late May or early June. The house stays above 65°F naturally. The days are longer. The parent plant is actively growing.
I tried winter propagation once. The cutting sat in soil for six weeks. Nothing happened. No roots, no new growth, just a sad stick in dirt.
Step 2: Take a Clean Cutting
I use sharp scissors that I sterilize with rubbing alcohol. Blunt tools crush the stem tissue. That invites bacteria.
I cut a stem that is at least 6 inches long. I take it right below a leaf node. The node is where roots will emerge. I remove the bottom leaves, leaving two or three at the top.
I learned this after taking a cutting with too many leaves. The leaves demanded more energy than the stem could provide. The whole thing wilted.
Step 3: Apply Rooting Hormone
I dip the cut end into rooting hormone powder. This is not optional in cold climates. The hormone speeds up root formation. It also prevents fungal infections.
I tried skipping this step once. The cutting sat for three weeks without any root development. Fungus appeared on the stem by day twenty-two. I threw it out.
The AHS recommends rooting hormone for woody stem cuttings like Money Trees. It gives the cutting a fighting chance when conditions are less than perfect.
Step 4: Use the Right Soil Mix
I mix my own soil. Perlite, peat moss, and coarse sand in equal parts. This drains quickly while holding enough moisture for root development.
I used regular potting soil on my first attempt. It compacted around the stem. Water pooled on top. The cutting suffocated.
The loose mix lets air reach the stem. Roots need oxygen. Soggy soil cuts off that oxygen supply.
Step 5: Set Up Bottom Heat
This was the game changer for me. I bought a heat mat for twenty dollars. I set it to 75°F and placed the pot on top.
Cold soil slows everything down. In my first attempts, the soil temperature stayed around 60°F because my house was cool. The cutting just sat there.
With the heat mat, the soil stayed warm. The cutting started showing root nubs by day eight. By day thirteen, I saw visible roots poking through the drainage hole.
Step 6: Cover for Humidity
I place a clear plastic bag over the pot. I make sure the bag does not touch the leaves. I leave one corner open for air circulation.
Humidity matters because Money Trees are tropical plants. The bag traps moisture around the cutting. This prevents the leaves from drying out while the cutting has no roots to drink water.
I forgot to open the bag slightly on my fourth attempt. Mold grew inside the bag. Condensation dripped onto the leaves. I had to start over.
My Two-Week Observation Log
I want you to see exactly what I saw during my most successful propagation attempt.
Day One
I took the cutting at 9 AM. The parent plant was healthy with dark green leaves. The stem felt firm. I dipped the end in rooting hormone and planted it. The soil was moist but not wet. I placed the pot on the heat mat. I covered it with a plastic bag.
Day Two
No visible changes. That is normal. Do not dig up the cutting to check. I did that once and damaged the stem. Leave it alone.
Day Three
The leaves looked slightly droopy. I panicked. But then I remembered that this is normal. The cutting is adjusting to losing its root system. The leaves perked up by evening.
Day Four
I checked the soil moisture. Still slightly damp. I did not water. Overwatering kills. I stuck to the rule of letting the top inch dry out.
Day Five
No changes above soil. But I could see condensation inside the bag. That meant humidity was high. Perfect.
Day Six
The leaves looked healthy. No yellowing or spots. The stem felt firm when I gently touched it. Good sign.
Day Seven
I watered for the first time. I used room temperature water. Cold water shocks the roots. I added a very dilute fertilizer solution. Half strength only. The cutting needs energy for root growth.
Day Eight
I saw a tiny root nub poking from the stem. I almost cried. This was day eight. My previous attempts showed nothing for weeks.
Day Nine
The root nub got longer. Maybe a quarter inch. I did not disturb it. I just looked through the clear pot.
Day Ten
Two more roots appeared. They were white and healthy. No rot. No browning. The heat mat was doing its job.
Day Eleven
I removed the plastic bag for four hours during daytime. I wanted the cutting to adjust to lower humidity gradually. The leaves stayed perky.
Day Twelve
I checked the drainage hole. Roots were visible. Tiny white threads poking through. I felt confident.
Day Thirteen
I gently pulled the stem. There was resistance. That meant roots held the soil. I was successful. The Money Tree cutting had rooted.
Day Fourteen
I removed the plastic bag completely. I moved the pot to brighter indirect light. The cutting looked strong. I gave it a light watering with a touch more fertilizer. I had successfully propagated a Money Tree in a cold climate.
Long Tail Keywords for Cold Climate Success
I searched for specific problems and found solutions that worked. Here are the terms that helped me.
Long Tail Keyword 1: Propagating Money Tree Indoors in Winter
Winter propagation is harder but possible. I used a grow light set for twelve hours per day. The heat mat kept soil warm despite the cold room. I placed the setup away from windows where drafts could cool the pot.
I failed twice before getting this right. The first winter attempt rotted because the soil stayed too wet. The second winter attempt dried out because the heat mat evaporated moisture faster than expected. I had to find a balance.
For winter propagation, check the soil every two days. The heat mat will dry it out faster. But do not overcompensate with too much water. The cutting still has no roots. It cannot drink excess moisture.
Long Tail Keyword 2: Money Tree Propagation Cold Hardy Methods
Money Trees are not truly cold hardy. They survive cold climates only indoors. But the propagation process can work even in cooler homes if you control the soil temperature.
I measured my soil temperature with a simple probe thermometer. Without the heat mat, the soil stayed at 62°F. With the heat mat, it held steady at 74°F. That twelve-degree difference was everything.
I also placed the pot on a piece of polystyrene foam. This insulated the bottom from the cold countertop. Heat mats work better when the heat does not escape into the counter.
Long Tail Keyword 3: Best Soil for Money Tree Cuttings Cold Weather
I mixed my own soil because commercial mixes stayed too wet. The cold reduces evaporation. Wet soil plus cold equals rot.
My mix is one part perlite, one part peat moss, one part coarse sand. This drains quickly. It holds just enough moisture. The perlite also adds air pockets.
I tried using pure perlite once. That was too dry. The cutting did not have enough moisture to develop roots. The stem shriveled by day nine.
Specific Problems I Faced
I want to be honest about what went wrong. Not everything worked the first time.
The Yellow Leaf Problem
On day seven of my third attempt, the bottom leaf turned yellow. I panicked. I thought the cutting was dying.
I discovered the leaf was just old. The cutting was drawing energy from it. I left it alone. Two days later, the leaf dropped naturally. New green growth appeared at the top.
Do not remove yellow leaves immediately. Let the cutting use the stored energy. Only remove leaves if they show signs of rot or mold.
The Mold Issue
On my second attempt, I saw white fuzzy growth on the soil surface. This was mold from too much humidity.
I removed the plastic bag. I scraped off the top layer of soil. I added a thin layer of sterile perlite on top. The mold stopped spreading.
The lesson was clear: let the soil breathe occasionally. Open the bag for an hour each day. Mold loves stagnant air.
The No Root Situation
My first two attempts produced zero roots. I waited six weeks each time. Nothing happened.
I now believe the soil was too cold. House temperatures in the mid 60s are not enough. The heat mat changed everything. I also started using rooting hormone. The combination got roots growing within two weeks.
Tools I Recommend for Cold Climate Propagation
I use simple tools. You do not need expensive equipment.
Heat mat: This is non-negotiable. Get one that works for seed starting. Set it to 75°F.
Clear plastic pots: I can see root development without disturbing the cutting. This reduces stress on the plant.
Rooting hormone powder: I use a generic brand. It contains indole-3-butyric acid. This stimulates root growth.
Plastic sandwich bags: These work for humidity domes. I use a simple bag and a rubber band.
Grow light: Optional but helpful in winter. I use a basic LED strip light. It keeps the cutting active when natural light is low.
Signs Your Cutting Is Failing
I learned to spot problems early. Here is what I watch for.
Stem turning brown or black: This is rot. Remove the cutting immediately. Cut above the rot. Try again.
Leaves dropping suddenly: The cutting is stressed. Check soil moisture. Too wet or too dry both cause leaf drop.
No roots after three weeks: Something is wrong. Check soil temperature. Make sure you used rooting hormone. Consider starting over.
White spots on leaves: This could be powdery mildew. Reduce humidity. Improve airflow around the cutting.
Stem getting soft: Overwatering. Let the soil dry out completely. If the stem stays soft for three days, discard the cutting.
When to Transplant
I wait until I see roots through the drainage hole. That usually takes ten to fourteen days with my method.
Do not rush transplanting. The cutting needs a strong root system before moving to a larger pot. I once transplanted too early. The root ball fell apart. The cutting died within a week.
When you see three or more roots over an inch long, it is safe to move the cutting. Use a pot that is two inches wider than the current one. Water thoroughly after transplanting. Keep the plant in the same bright indirect light for another week.
Maintaining the New Plant in Cold Climate
After propagation success, I focus on keeping the plant alive through winter.
I keep the Money Tree away from windows at night. Cold drafts damage the leaves. I use a humidity tray during winter when indoor air is dry. I water less frequently in winter, maybe once every ten days.
I fertilize only during active growth months. November through February, I stop completely. The plant rests during low light periods. Forcing growth in winter stresses the plant.
Frequently Asked Questions
Can I propagate Money Tree in water instead of soil in cold climate?
I tried water propagation once. It worked but the roots were weak. When I moved the cutting to soil, many roots broke off. Soil propagation produces stronger roots better suited for cold climate conditions.
How long does Money Tree propagation take in cold climate?
With a heat mat, expect roots in ten to fourteen days. Without a heat mat, it can take four to six weeks or fail completely. The soil temperature determines the timeline.
Should I use fertilizer during propagation?
Use very dilute fertilizer only after roots appear. I use half strength liquid fertilizer once the cutting shows root nubs. Full strength fertilizer burns new roots. Wait until the cutting has three or more roots before feeding.
Final Thoughts on Cold Climate Propagation
I killed four Money Trees before getting this right. The fifth one grew from a cutting and now stands three feet tall in my living room. It survives every winter because I followed the steps I shared here.
The heat mat is the most important tool. Without it, the cold soil stops everything. The rooting hormone gives the cutting a head start. The small pot with drainage holes prevents rot. These three things together made propagation possible in my cold climate.
Start with a healthy parent plant. Take cuttings when the plant is actively growing. Be patient and do not overwater. The roots will come if you give the cutting warmth and time.
I wish someone had told me these things when I started. I would have saved months of frustration. Now I propagate Money Trees every year and give them as gifts. Even friends in colder zones have success with my method.
If you follow this guide, you will avoid the mistakes I made. You will see roots in two weeks instead of two months. Your Money Tree will thrive even in a cold climate.





