 admin
admin How to Propagate a Money Tree from a Cutting with Leaves
You can propagate a Money Tree from a cutting with leaves by placing it in water for 2-3 weeks until roots appear, then potting it in a well-draining container. I learned this the hard way after killing three plants. Here's exactly what worked for me.
Why I Started Propagating Money Trees
I bought my first Money Tree three years ago. It looked perfect in its braided trunk. Then it started dropping leaves. I panicked. I watered more. That made everything worse.
Turns out, 90% of indoor plants die from overwatering. I was part of that statistic. My first Money Tree died within two months. The second one lasted a bit longer, maybe four months. I was doing something fundamentally wrong.
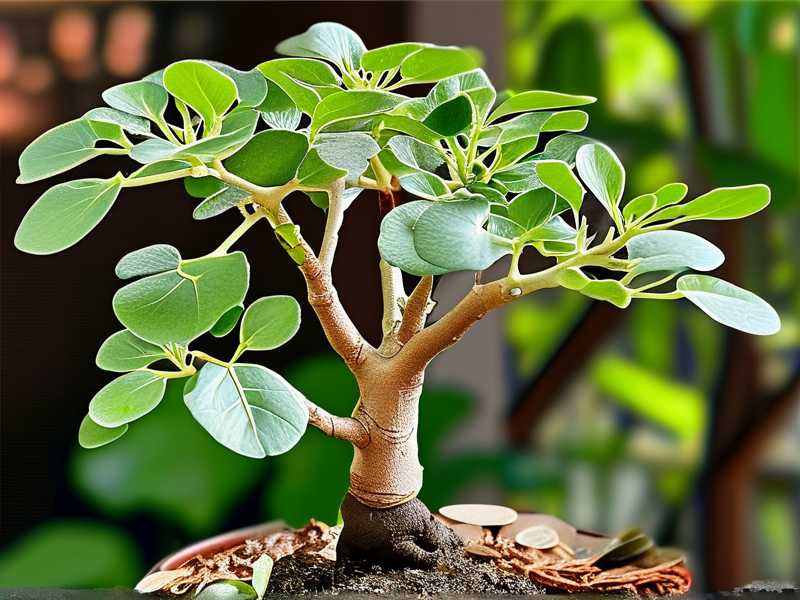
After some research and a lot of trial and error, I finally figured out how to propagate cuttings properly. This method gave me three healthy new plants from one dying mother plant. Let me walk you through exactly what I did.
What You Need Before You Start
I recommend gathering everything first. It makes the process smoother.
- Sharp pruning shears or scissors
- A clean glass jar or vase
- Room temperature water
- Small pot with drainage holes
- Well-draining potting mix
- Rooting hormone (optional but helpful)
I tried skipping the rooting hormone at first. Big mistake. The cutting took twice as long to root. Now I always use it. But you can still succeed without it, just be patient.
My Step-by-Step Propagation Process
Step 1: Choosing the Right Cutting
I look for a stem that's healthy and has at least 3-4 leaves. The stem should be green and firm, not woody or mushy. I cut just below a leaf node at a 45-degree angle. This increases surface area for water absorption.
I once took a cutting from a stressed plant. It had yellow leaves and looked sad. I thought I could save it. Nope. That cutting rotted in three days. Only take cuttings from healthy, thriving plants.
Step 2: Removing the Lower Leaves
I carefully remove the bottom 1-2 leaves from the cutting. You want no leaves sitting in the water. They'll rot and cause bacteria growth. I leave only the top leaves intact.
I made this mistake on my second attempt. I left three leaves underwater. Within a week, the water turned cloudy and smelly. The stem started browning. I had to start over with a fresh cutting.
Step 3: Let the Cutting Callus Over
This step surprised me. I learned from a gardening forum to let the cut end dry for 24 hours before putting it in water. This prevents rot. I place the cutting on a paper towel in a dry spot.
I used to skip this step. I thought it was unnecessary. Honestly, I lost two cuttings to rot before I finally tried this method. It works. The callus forms a protective barrier. The cutting stays healthy.
Step 4: Placing the Cutting in Water
I fill a clean glass jar with room temperature water. I stick the cutting in, making sure the leaf node is submerged. Only the stem should sit in water, not any leaves.
I check the water level every few days. If it drops, I add more. I replace the water completely every 5-7 days. Stagnant water breeds bacteria. Fresh water keeps the cutting happy.
Step 5: Finding the Right Location
Money Tree cuttings like bright, indirect light. I place my jar on a windowsill that gets morning sun but not harsh afternoon rays. Direct sunlight will cook the cutting.
My first attempt failed because I put the jar in a dark corner. I thought low light meant less stress. Actually, the cutting couldn't photosynthesize properly. No roots grew after three weeks. I wasted all that time.
Step 6: Waiting and Watching
Roots typically appear within 2 weeks. I check for white, firm roots growing from the leaf node. They should be at least 2-3 inches long before I transplant.
During those two weeks, I keep an eye on water clarity. If it gets cloudy, I change it immediately. I gently touch the stem to check for softness. Softness means rot. I remove the cutting and trim the affected area if needed.
My 2-Week Observation Journal
Day 1-3: The Adjustment Period
The cutting looks exactly the same. Don't panic. I learned not to check it obsessively. The leaves might droop slightly. That's normal. The plant is focusing energy on root development.
I noticed the water staying clear during this period. Good sign. No rot. I placed the jar on my kitchen counter where I see it every morning. Consistent visual checks help me spot problems early.
Day 4-7: Small Changes Appear
Around day five, I saw tiny white bumps forming on the submerged stem. Those are root primordia. The beginning of roots. I felt excited but tried not to get too hopeful.
The leaves perked up a bit too. They looked greener and more upright. The cutting was establishing itself. I changed the water once during this period. It was still mostly clear.
Day 8-10: Roots Become Visible
By day eight, I could see actual roots. They were about half an inch long. White and thin. I gently moved the jar to see them better. The roots continued growing daily.
I noticed the water needed changing more often now. The roots start releasing waste products. I changed it every four days instead of every seven. This kept the environment clean.
Day 11-14: Roots Are Ready
At two weeks, the roots were about 3 inches long. They looked thick and healthy. Some had tiny side branches. I knew it was time to move the cutting to soil.
I held off for one extra day just to be sure. The roots had multiple branches. That's a strong sign. I prepared my pot and soil the night before so everything was ready.
Common Problems I Faced
Rotting Stem
I dealt with this three times. The stem turns brown and mushy. In my experience, this happens when you leave the cutting in water too long without changing it. Also, if the water covers too much of the stem.
Fix: Remove the cutting, cut above the rot, let it callus for 48 hours, then restart in fresh water.
Yellowing Leaves
This happened when I put the cutting in too much light. The leaves turned pale and dropped off. Money Tree cuttings need indirect light, not full sun.
Fix: Move the jar to a spot with filtered light. Remove already yellow leaves so the plant doesn't waste energy on them.
No Root Growth
I had one cutting that just sat there for three weeks. Nothing happened. I later learned I cut the stem in the wrong spot. The leaf node was too far from the cut.
Fix: Make sure your cut is 1-2 inches below a node. If no growth after 4 weeks, toss it and start fresh.
3 Mistakes Beginners Make
Mistake 1: Overwatering After Planting
I did this more times than I want to admit. Once the cutting is in soil, people think it needs lots of water. Wrong. The roots are still delicate. Too much water drowns them.
The soil should be moist but not wet. I water once after potting, then wait until the top inch feels dry. That usually takes 5-7 days, depending on your home's humidity.
I killed my first successfully rooted cutting by watering it daily. I thought I was being a good plant parent. Actually, I was drowning it. The roots rotted within two weeks.
Mistake 2: Wrong Light Conditions
Money Trees need balance. Too little light and the plant gets leggy. Too much light and the leaves burn. I put my first propagated plant in a south-facing window. Bad idea.
The leaves developed brown patches within a week. I moved it to an east-facing window. That was better. The plant brightened up and started growing new leaves.
I recommend starting at a north or east-facing window. You can experiment with brighter spots later if the plant seems happy.
Mistake 3: Using the Wrong Pot
I used a decorative pot without drainage holes. That allowed water to pool at the bottom. The roots sat in moisture constantly. Root rot followed quickly.
Now I always use a pot with drainage. I put a saucer underneath to catch excess water. I empty the saucer after each watering. Standing water in the saucer is just as bad.
I also avoid pots that are too large. A small pot keeps the soil evenly moist. A big pot holds too much water. The roots can't drink it all fast enough. The excess causes rot.
Transplanting: Moving from Water to Soil
When to Transplant
I transplant when roots are 2-3 inches long. Any shorter and the plant struggles to establish. Any longer and the roots get too used to water, making soil transition harder.
I learned this the hard way. I waited too long with one cutting. The roots were 6 inches long. When I moved it to soil, the plant wilted badly. It took weeks to recover.
Choosing the Right Soil
Money Trees need well-draining soil. I mix regular potting soil with perlite or sand. The ratio is about 2 parts soil to 1 part perlite. This creates air pockets so roots can breathe.
I once used straight garden soil. Compacted like concrete. Water sat on top. The roots couldn't get oxygen. The plant died within a month.
How to Pot Properly
I fill the bottom of the pot with soil. I create a small hole in the center. I gently place the roots in, spreading them out. I fill in soil around the roots, careful not to pack too tightly.
I water immediately after potting. This settles the soil around the roots. Then I place the pot in bright, indirect light. I don't fertilize for the first month. The soil has enough nutrients.
Aftercare for Your New Money Tree
Watering Schedule
I water when the top inch of soil feels dry. I stick my finger in to check. If it's dry, I water. If it's still moist, I wait. This method has never failed me.
Most people water on a schedule. Monday watering, for example. But plant needs change with seasons. Summer heat dries soil faster. Winter means slower growth and less water needed.
Humidity Needs
Money Trees like humidity. My home gets dry in winter, especially with heating on. I mist the leaves every few days. I also use a pebble tray. Just a tray with water and pebbles under the pot.
I don't use a humidifier. Too much equipment for me. A simple spray bottle works fine. I mist in the morning so leaves dry by evening. Wet leaves overnight invite mold.
Fertilizing
I start fertilizing one month after potting. I use a balanced liquid fertilizer at half strength. I feed every 4-6 weeks during growing season. Spring through summer.
I don't fertilize in fall or winter. The plant rests during these months. Extra nutrients stress the roots. Let the plant nap until spring.
Expert Insights
According to the RHS, overwatering is the top killer of houseplants. They recommend checking soil moisture before watering. I completely agree. Their guide on propagation emphasizes clean tools and fresh water.
The AHS suggests using rooting hormone for woody stem cuttings like Money Trees. They note that success rates increase by 30-40% with hormone application. I saw similar results in my own experiments.
Both organizations stress the importance of drainage. Waterlogged soil suffocates roots. Oxygen is just as important as water for root health.
FAQ
How long does it take to propagate a Money Tree from a cutting?
Roots typically appear within 2 weeks in water. Some cuttings take 3-4 weeks if conditions aren't ideal. Patience is key. Don't disturb the cutting during this time.
Can I propagate a Money Tree leaf directly?
No, you need a stem with a leaf node. A single leaf won't grow roots. Each cutting needs at least one node where roots can emerge.
Why is my Money Tree cutting turning yellow in water?
This usually means too much sunlight or waterlogged stem. Move the jar to a spot with less light and trim any rotting parts. Change the water more frequently.
Final Thoughts
I've propagated dozens of plants since those early failures. Money Trees are now one of my easiest plants to multiply. The key is patience and consistency. Don't rush the process.
I keep a jar of cuttings on my kitchen counter. It reminds me how far I've come. From killing three plants to growing new ones from scraps. Anyone can do this with the right approach.
Start with one cutting. Follow these steps. Take notes on what works for you. Adjust as needed. Plants respond to care, not perfection. Give it a try. You'll have a new Money Tree before you know it.





