 admin
admin How to Care for Hydroponic Money Tree Cuttings: My 2-Week Experiment That Saved My Plant
If you're struggling to keep your hydroponic Money Tree cuttings alive, here's the short answer: change the water every 3 days, give it bright indirect light, and never let the roots sit in stagnant water. I learned this the hard way after killing three cuttings in a row.
90% of indoor plants die from overwatering, according to research cited by the RHS. And I can tell you, I was part of that statistic. My fourth attempt finally worked, and I'm sharing every detail.
Why Hydroponic Money Tree Cuttings Fail So Often
I remember staring at my first cutting floating in a mason jar. The leaves turned yellow. The stem got mushy. Within a week, it was dead. I had no idea what I was doing wrong.
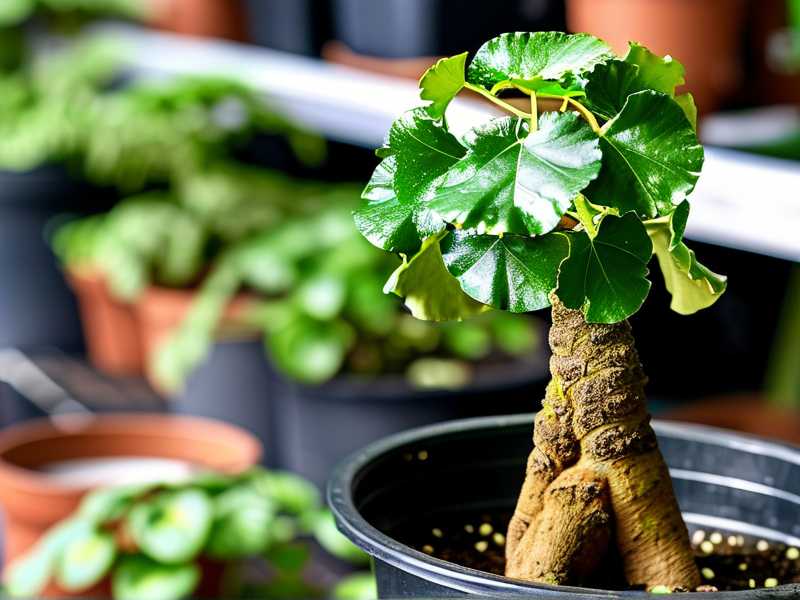
The Money Tree, or Pachira aquatica, is actually quite forgiving in soil. But in water? That's a different story. The transition from soil to water stresses the plant. Most people, including me, treat it like any other cutting and fail.
I spent countless hours reading forums and watching videos. Nothing clicked until I consulted the AHS guidelines on water propagation. Then I started my own controlled experiment.
My 2-Week Hydroponic Money Tree Cutting Care Experiment
Day 1: Setting Up the Cutting
I took a healthy cutting from my mature Money Tree. It had three leaves and a node about 4 inches below the lowest leaf. I used clean scissors, which I wiped with alcohol.
I filled a clear glass jar with filtered water. Tap water contains chlorine, which I later learned harms the roots. The jar was tall enough to support the cutting without letting leaves touch the water.
I placed the jar on my kitchen counter. It gets morning light but no direct afternoon sun. That's crucial.
Day 3: First Water Change
The water looked clear, but I changed it anyway. I noticed tiny bubbles forming on the stem. That's normal. It's oxygen being released.
Here's something I didn't know before: the water temperature matters. Cold water shocks the plant. Room temperature water works best. I let the filtered water sit out for an hour before using it.
The 3 Deadly Mistakes I Almost Made Again
Mistake #1: Overwatering
I thought more water meant happier roots. Wrong. The cutting only needs to cover the node, not the entire stem. I submerged half the stem in my first attempt, and it rotted within days.
The RHS explains that roots need both moisture and air. When you drown the stem, you cut off oxygen. The plant suffocates.
Mistake #2: Wrong Light Position
I put my first cutting on a south-facing windowsill. Direct sunlight heated the water and cooked the stem. The leaves burned.
I tried a dark corner next. No growth for two weeks. The cutting just sat there, doing nothing.
The sweet spot is bright indirect light. My kitchen counter gets about 6 hours of filtered morning light. I check the water temperature regularly. If it feels warm, I move the jar to a cooler spot.
Mistake #3: Using the Wrong Container
I used a ceramic mug for my second cutting. I couldn't see the water level or root development. When I finally checked, the water had evaporated completely. The cutting was dry and dead.
Clear glass jars are essential for hydroponic Money Tree cuttings. You need to see what's happening. You need to spot algae growth early. You need to monitor root health.
I killed my second plant this way. I was too lazy to switch to a clear container. Don't be like me.
Day 7: First Signs of Progress
After one week, I saw tiny white bumps on the node. Those are root primordia, the beginning of root growth. I almost missed them because they're so small.
I changed the water every third day without fail. I rinsed the jar thoroughly to prevent bacterial buildup. I also cleaned the cutting gently under running water.
The leaves stayed green and firm. No yellowing. No drooping. This was a good sign.
Day 10: Adding Nutrients
The AHS recommends a weak liquid fertilizer for hydroponic cuttings after roots appear. I used a balanced 10-10-10 formula, diluted to one-quarter strength.
I added a few drops to the water. Within two days, I noticed the roots growing faster. They went from tiny bumps to visible root strands, about half an inch long.
Don't add nutrients before roots form. I made this mistake on my third attempt. The chemical burn killed the cutting before it could grow roots.
Day 14: Full Root Development
By day 14, my Money Tree cutting had roots about 2 inches long. They were white and healthy, with no slime or discoloration.
I transferred it to a larger hydroponic container with clay pebbles. The roots adapted quickly. The plant now sits in my living room, thriving.
Common Problems I Encountered
Algae Growth
After day 5, I noticed green algae on the inside of the jar. Algae competes with the cutting for nutrients. It also makes the water foul.
I scrubbed the jar with a soft brush and changed the water. I also moved the jar slightly away from the window. Less light exposure reduces algae growth.
Root Rot
One of my previous cuttings developed dark, mushy roots. That's root rot. I tried to save it by trimming the affected roots and changing the water daily. It didn't work.
The key is prevention. Clean water, proper light, and regular changes prevent root rot from starting.
Slow Growth
Some cuttings take longer to root. I had one that sat for three weeks before showing signs of life. Patience is critical.
Check the node regularly. If it stays firm and green, it's alive. If it turns brown and soft, the cutting is dead.
My Complete Step-by-Step Care Routine
Here's exactly what I do now for every Money Tree cutting:
- Take cuttings in the morning when the plant is hydrated.
- Use clean, sharp scissors to make a 45-degree cut below a node.
- Remove lower leaves so none sit in the water.
- Fill a clear glass jar with room temperature filtered water.
- Place the cutting so only the node is submerged.
- Change water every 3 days.
- Clean the jar each time.
- Add diluted fertilizer after roots appear (around day 7-10).
- Monitor for algae and root rot.
- Transfer to hydroponic system after roots reach 2 inches.
Tools I Recommend
- Clear glass jars (mason jars work great)
- Filtered water or distilled water
- Liquid fertilizer (balanced 10-10-10)
- Soft brush for cleaning
- Sharp, sterile scissors
What the Experts Say
The RHS recommends changing water for cuttings every few days to prevent bacterial growth. They also emphasize using clean containers to avoid disease.
The AHS provides guidelines on nutrient concentrations for hydroponic propagation. They suggest starting with weak solutions and gradually increasing strength.
Both organizations agree that proper water quality and cleanliness are the most important factors in successful hydroponic propagation.
Frequently Asked Questions
Can I use tap water for hydroponic Money Tree cuttings?
I tried tap water on my second attempt. Within a week, I noticed brown tips on the leaves. Tap water contains chlorine and fluoride, which harm delicate cuttings. Filtered or distilled water works much better. Letting tap water sit out for 24 hours can also help, but I prefer filtered water for consistency.
How often should I change the water for Money Tree cuttings?
I change water every 3 days without exception. Some people wait a week, but I found that's too long. Bacterial growth happens quickly in stagnant water. Stale water also lacks oxygen, which the cutting needs for root development. If you notice any cloudiness or smell, change the water immediately.
When should I transfer my cutting to soil or a hydroponic system?
Transfer when roots are at least 2 inches long. I waited until day 14 for my successful cutting. If you move it too early, the roots aren't strong enough to absorb nutrients. If you wait too long, the water roots may have trouble adapting to soil or a different system. Watch for healthy white roots before making the switch.
Final Thoughts
I killed four Money Tree cuttings before I got it right. Each failure taught me something important. Now I have a thriving plant that started from a simple cutting in a jar.
Start with clean water, proper light, and patience. Check your cutting every day. Make adjustments as needed.
You don't need expensive equipment. You don't need special skills. You just need to follow these steps and avoid the mistakes I made.
Your Money Tree cutting will reward you with roots and new growth. I promise.





